Translator

Friday 31 January 2014

Do You Believe in Fairies .....


                                              Click on Image to enlarge 

Hello to all my fellow bloggers and new friends that have joined. My inspiration was running on empty all this week, so when I picked up my stamp to start this project I had no idea what it was going to end up looking like, never mind where I was going to start.  Isn’t it so annoying when this happens !


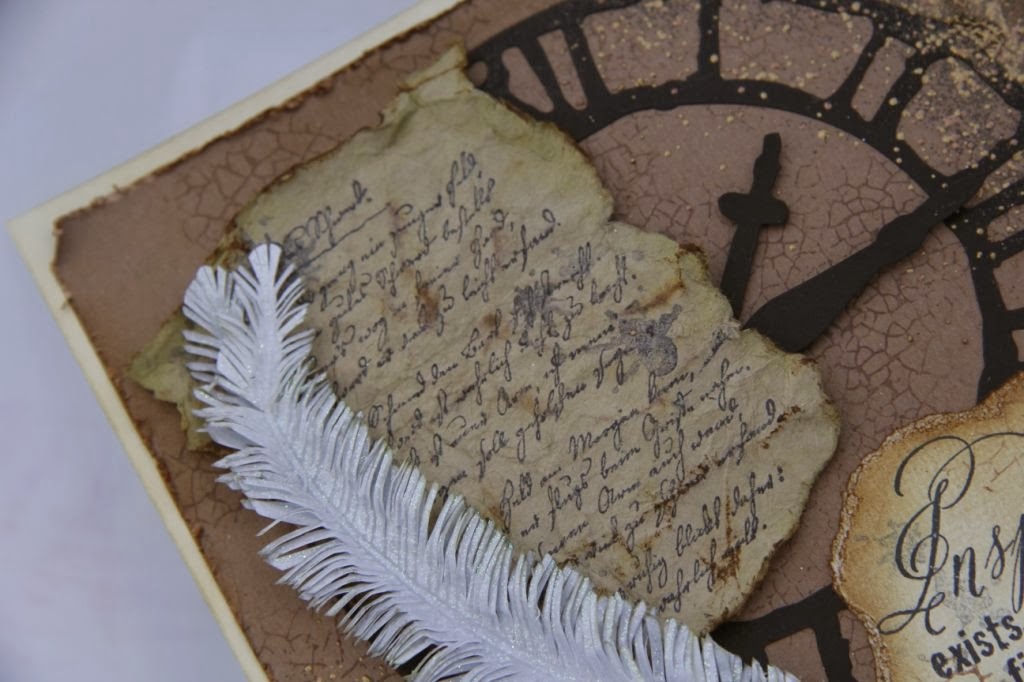
I made my topper by stamping my little boy with archival ink and coloured him in with distress inks. I highlighted the leaves and flowers with my versamark pen and embossed, to give more texture. I then part die cut out the oval and ran my versamark pen around the edges and embossed with gold powder. I sprinkled frantage, distressed and used a crackle stamp to create more texture. This then sat on my work surface waiting on the vital craft tool....  Inspiration.

Finally,  today I started to feel inspired. My little boy had now fallen asleep in the garden amongst the flowers after hunting around looking for Fairies. While he slept the inquisitive little Fairies made an appearance. Can you spot them ?


Picture in my head where my project was finally going now, I stamped some rose leaves and crackles onto my background paper, distressed and rubbed gilding wax on the edges and glued onto a wooden tag which was reduced in the bargain stores to 50p. Don’t you just love a bargain !! 


My flowers I die cut and placed onto my flourish die to look as if they were cradling the little boy as he slept. I widened the edges with my lace doily edger and rolled round to give the effect of being cradled again. Layered and pieced everything together, finally adding my little fairies. 


The Craft Fairies are also busy just now, delivering my parcel of Cheery Lynn goodies from my Challenge wins, along with a few more I couldn’t resist getting. I have a lot of inspiration stashed away for them and can’t wait to start. If I have forgotten something or you would like to ask me something please email me.

Hope you all have a lovely creative weekend.Bye for now, 

Julie x

 I wish to enter this in the following challenges :


http://cheerylynndesigns.blogspot.co.uk/search/label/challenge -Tickled Pink Challenge

http://www.theribbongirlchallengeblog.blogspot.in/2014/01/anything-goes-challenge.html -
Anything Goes Challenge

http://itsallaboutthevintagechallenge.blogspot.fi/2014/01/61-tee-oma-koru-make-your-own-jewel.html - Make Your Own Jewel Challenge ( My Roses I Made )

http://frillyandfunkie.blogspot.co.uk/2014/01/valentines-day-with-twist.html -Valentines Day with A Twist Challenge - ( I used Pinks and Whites )

http://fussyandfancychallenge.blogspot.co.uk/2014/01/challenge-106-vintage.html -Vintage Challenge

http://theartisticstampercreativeteam.blogspot.co.uk/2014/02/february-2014-challenge-use-distress.html - Use Distress Challenge

Products Used :  Cheery Lynn Dies, Dancing Doily DL134, Victorian Romance Flourish DL151, Large, Medium and Miniature Roses B155, B154 and B152, Cuties 3 B151, Iris Leaves B179, Nautical Wheeler Doily DL180. 

Other products used : La Blanche boy stamp, Cardio Majestix Fairy stamp, Pion summer papers,  Distress Inks and pens. Gilding Wax, Embossing powders, Archival Ink Potting Soil and Watering Can. Craft stash, Versamark Pen.


Wednesday 22 January 2014

Sweetheart Frame


                                             Click on image to enlarge 

First of all, I would like to say Hello to the new members who have joined my blog and thanks to everyone for leaving comments on my blog. Each and everyone of them is appreciated.


Inspiration for this project came from watching the Antiques Roadshow programme a while ago. I listened intently to the history behind a Sweetheart Frame. This was given between 2 loved ones as the man would part for battle or war. The one I remember seeing on the show was of a metal frame encased in a leather folder and they explained that when a man left for battle or war these were often exchanged between two sweethearts as a reminder of each other.They would often contain a lock of hair hidden behind the frame and a love poem. The story has remained poignant in my memory and when I saw at Cheery Lynn the challenge Sweethearts it immediately sprung to mind and my crafty head switched on to replicate this


I wanted the outside of my folder to resemble the look of old worn leather. I got a piece of cardboard and using grunge paste stenciled areas and added texture to other parts. I also cut out CL corner dies and glued in shape.


I covered the outside with a layer of black gesso and then started to blend my paints onto it. Once dry I picked up my textures with gilding wax.The keyhole was made from a mixture of gel medium and paint  poured over my stamp. This was then left for 24 hours to dry.I then peeled it off the stamp and highlighted with gilding wax.


To resemble the metal frame and picture inside, I had a family photograph of this young man in uniform, which I thought was perfect for my project. Unfortunately, we are unsure who he is but my mum reckons he is possibly  my Great Great Grandfather. I cut out my CL die and applied Versamark onto it and then embossing powder. If you heat from the back and repeat this process it gives a smoother finish. I carefully cut my photograph out and mounted it onto black card and then onto the frame.


I wanted this side to look like a small collection of memories the sweethearts had collected in their relationship, before they parted. I made my red rose from my CL die and added my Cuties 3 strip around the edges and distressed with ink and my distress tool.


As I was looking at the photo for inspiration I noticed the buttons on his uniform. My dad was a Captain in the Merchant Navy before retiring and he had given me the buttons from his uniform jacket. I decided to make a mould of one of them and then poured utee into it. Once popped out I highlighted with gilding wax. I think the result was fab.... I then placed all my pieces together. If you look closely at the postcard you may notice I had stamped with Old Paper Distress Ink  a small dots stamp. This represented parts of the mildew age marks that were on the frame of the photo I had cut up for my project.


Hope you enjoyed reading my blog and I always look forward to reading your comments.

Julie x 

I wish to enter this into :

http://cheerylynndesigns.blogspot.co.uk/2014/01/cheery-lynn-designs-116-sweethearts.html

http://www.theartisticstampercreativeteam.blogspot.co.uk/2014/01/january-2014-challenge-love-is-in-air.html

http://wlvc.blogspot.co.uk/2014/01/challenge-nr-18-en-random-winnaar.html 
Man Card /Creation.

http://ourcreativecorner6.blogspot.co.at/2014/01/no-more-shopping-sins.html 
I bought the Paper Lace Ribbon on the spine of my project years ago and never used it until now ! 


Product Used : Cheery Lynn dies Sweetheart Frame FRM127, Cuties 3 B151, Miniature Rose B152 and Lace Corner Deco E B165.

Other products used : PaperArtsy paint brown shed, chocolate pudding and little black dress. Black and white gesso, treasure gold, grunge paste,harlequin stencil, 2 part molding putty,maja design vintage summer,woodware envelope punch, heart punch ,black soot and old paper distress ink, Paperartsy minis MN72, crackle stamp, bobunny keyhole stamp, platinum utee, stampendous pearl embossing powder, versamark, archival watering can and various craft stash.


Thursday 16 January 2014

Visit to the Snow Queen


                                             Click on Image to enlarge  


The challenge at Cheery Lynn this week is Snowflakes.
 When gathering stash together for this card I realised I only had a punch and stamps with snowflakes. So. I studied my stamp of the children going through the snow, trying to get inspired. Then I remembered the story of the Snow Queen and the children Kai and Gerda that she tried to get under her spell. This is where my inspiration started. Isn’t it strange how things can pop into our head which we haven’t thought of in years and suddenly we are inspired.


I started off by wanting to make a big flower that looked like the Snow Queen had turned it into ice. I used my Cheery Lynn corner die. This comes in a pack with another 2 and I find them extremely useful for lots of shapes. I cut out 6 of them and placed  in to a shape that now looked like a snowflake / flower. Attached together with a brad and added some glamour dust for an extra icy effect.


I then stamped my image of the children with Archival ink and shaded a few parts with a distress pen and added some frantage to give a blizzard effect, mounted onto mirri card and coordinating paper.


 I cut out white card and punched the edges and used gilding flakes with 2 snowflake stamps and some more frantage. along with some extra snowflakes from my punch, to give more texture to the background. Around the edges I pieced back on the snowflakes and placed some gems into them.


Hope you have enjoyed looking at my card,

Julie x


I wish to enter this in Snowflakes Challenge


http://cheerylynndesigns.blogspot.co.uk/2014/01/cheery-lynn-designs-challenge-115.html

Products used – Cheery Lynn Lace Corner Deco E, B165.

Also – Crafty Individuals christmas stamp, silver gilding flakes,  glamour dust, frantage jewel kit, Milled lavender distress ink, pen and paper. Mirri card, MS punch aroundthepage snowflake, archival ink watering can and gems.


Sunday 12 January 2014

The Parfumerie


                                            Click on Image to Enlarge
Hello Everyone,
Hope you are all managing to grab a few hours to craft over this cold weekend. I have had an idea in my head now for a very long time to make a Victorian Style ladies department store, be it in a different way than this. But, when I read the challenge at LLC headed Perfume, this idea sprung to mind along with Jean Paul Gaultier perfume bottles. So I started to think of how to make a spin off variation on it and when I read the challenge at OCC- Shopping Sins, I thought of my grand dies that had never been used. My crafty head now went into overdrive day and night, for almost a full week as I made this. How fab. I was able to combine it all with WLVC Anything Goes and Maya Designs mood board challenges too. I wanted the finished project to have a twist on a ladies dressing table top with Perfume, Jewellery and Victoriana all on it. 


My Perfume bottles are all made from different beads . Another shopping sin. I don’t make jewellery, but my daughter does. So we go to these stands together at Craft Shows and I can never resist how pretty they are and end up buying some. My hand mirror was a wooden button I painted and gilded. The cameo is an old earring with the back cut off.

Thinking best to make an Easel card. Only one problem, I had never used my Grand Dies. This was a ‘Shopping Sin’ of mine,  I had watched it being demo’d on how to make various shaped cards, but had never used since purchasing . Question now was could I remember what to do ? Several attempts later I started to cut out my Maja Design papers and made an easel card.


The perfume sign was stamped onto white card and re-stamped with a crackle stamp. I then shaded it all with distress. And added the Cutie Fringe as shown. On the base I applied the same technique as on my perfume sign as I thought this useful to support my card as well as give a nice edging.


My Parasol was made from a bead finding that I put frantage on. I also placed a cocktail stick through the bottom of it, placed in a few paper flowers and finally a hat pin. The handbag was cut from a spellbinders die. I pierced holes around to give a faux stitching effect, added pearls and a flower. The handle is a bit metal wire threaded with some seed pearls. The mannequin was painted first edged with gilding wax and butterfly die and other bits mounted onto it.


My Large Mannequin I cut out in mountboard. Stamped with distress and then went over certain areas with a Versamark pen and embossed to highlight areas. Shaded with more distress and gilding wax. The ribbon I stamped with archival Ink. Finishing touches added.


The Corset was stamped and embossed onto Parchment paper. I cut this out twice and added pearls and a miniature ric rac to it to give dimension.


Apologies for my post being rather on the large side. But I wanted you all to see every little detail as best as possible and I think Chris has captured it well with his photography. And believe it or not I do still have ideas sitting in my ‘Craft Bank’ for this project, unused !!!

Thanks for looking and your crafty comments are always appreciated.

Julie x

I wish to enter this in :
 http://ourcreativecorner6.blogspot.co.uk/2014/01/no-more-shopping-sins.html

 http://wlvc.blogspot.co.uk/2014/01/challenge-nr-17-en-random-winnaar.html

 http://liveandlovecrafts.blogspot.co.uk/2014/01/challenge-19-perfume.html

 Maja Design – Mood Board

Products used; Grand Nestabilities 1 (My shopping sin). Also Cheery Lynn Dies B117, B178, B152, DL180. MC Butterfly, Crafty Individuals stamps CI 148, CI 341. Magnolia script, Whimsy ticket, Crackle stamp and corset Indigo Blu, Maja design papers Vintage summer Basics,Archival Ink Potting Soil, DI’s Tattered rose, Victorian velvet, Frayed Burlap, Paperartsy paints Snowflake and Rose. Treasure gold. Platinum Stickles. Frantage Aged Ivory and Aged Bronze. Various craft stash and LLC stash. 

Tuesday 7 January 2014

The Hummingbird


Cheery Lynn’s Challenge this week is Winter White. I had purchased their Hummingbird die last month and thought this would blend beautifully with the challenge. As rather than be reminded of  Scotland’s cold wet winters, I thought it would be much nicer to imagine warm winter climates, when keeping to this theme.

I was very much aware whilst making my card, I wanted the camera to pick up on the detail and having never made a card before that is purely white, I was unsure how it would photograph. So firstly, I decided to cut out various dies in white cardstock and literally, played with moving them about on another layer of white card, to see how they would ‘pop’ forward on the paper. I would recommend everyone doing this, although, I did realise I had sat for probably 2 hours just doing this. It wasn’t wasted time as I have now noticed lots of different shapes and patterns in my dies, rather than just the obvious ones. I also noticed that even though I was working with the same white card throughout my project depending on how I placed it, different shading would happen. So a good learning curve all round.


My corner die, I noticed linked together when you cut out several and blended beautifully to this shape I created. I  glued the links together on the reverse side so no glue marks would show. 


You may be asking yourself what die I have used around the edges. This is what I would call the ‘sequin waste’ from the Cuties 1 strip die and  I pierced along the edges using my piercing ruler. I then put a curve into the paper to give it a 3D effect rather than it lying flat on my card.  


My roses I shaded with Antique Linen distress so they would pop forward on my card. I also cut the Humming Bird out twice and layered up and added some Glamour Dust. I layered on some pearls as still wanted it to have a Vintage feel to it.


A little fact for you all... The Hummingbird is the only bird that is able to fly forward and backwards.

I hope everyone has enjoyed looking at my post. Your comments are always appreciated.

Julie x.

I wish to enter this in to : http://cheerylynndesigns.blogspot.co.uk/2014/01/cheery-lynn-designs-challenge-114.html   Winter Whites Challenge.

Products Used: B178 Flourish Leaf Strip, B149 Cuties 1, B193 Hummingbird, B154 Medium Rose, B152 Miniature Rose, B165 Lace Corner Deco E. Also used Antique Linen, Glamour Dust , Pearls and stamens.

Monday 6 January 2014

Wonderful Surprise


Today my crafty friend popped in to see me, and brought with her this stunning Napkin holder she had made for me, along with a selection of some nice napkins in it. She told me it started off life as a cardboard box.


I just love it and had to share with everyone. It will be treasured. Thanks so much Lilian.

Lilian doesn’t have a blog, but I’m sure would love if you left her a comment on mine.

 Julie x 

Sunday 5 January 2014

Yippee My First Challenge Win


Well here it is, my first win in a Blog Challenge.

I received the wonderful news from Cheery Lynn Designs this morning that I had been picked as a winner in the Thank You Challenge and have been going around all day with a big smile on my face. 

I cannot wait to get started on my next challenge project. The post on my win you can find here,http://cheerylynndesigns.blogspot.co.uk/2014/01/thank-you-challenge-winners.html

Thank you to everyone who left their lovely comments. 

Julie x


Thursday 2 January 2014

Time for Inspiration


Over at at The Shabby tea room, the challenge this week is to make something with black, cream,white and Kraft card from an Inspirational photo they show you.
At Country View Challenge the theme is Monochromatic so I thought I could combine this card to work in both Challenges.

I got out my various colours of card to work with. I die cut my sizzix clock out in black . I then layered it onto a piece of Kraft card, that I had distressed with my  distress tool and partly tore around the edges and stamped with a crackle stamp over the kraft card and worked some distress ink in. Layered both up and sprinkled some Frantage into areas.


My Inspiration stamp,  was stamped with archival Ink on to white card. I then tore around the edges added my crackle and splodge stamp for texture and distressed over and gilded edges. The script stamp was done in the same way but I crumpled the piece of paper too, to give another dimension and sprayed a little water on to lift some ink back off.


My feather was stamped with Versamark and embossed with holographic powder, this was repeated again so I had 2 images to layer up after carefully cutting into the stamped image to give a feather effect. I distressed edges and ruffled up the paper, layered on top of each other and added the pen nib with a little piece of twine.

 Hope you have enjoyed looking at my card,


 Julie x


 I wish to enter this in - Colour Challenge at 
http://theshabbytearoom.blogspot.co.uk/2013/12/week-199-color-challenge.html


And enter it in to Monochromatic challenge at - http://countryviewchallenges.blogspot.co.uk/  


Wednesday 1 January 2014

Thank You Everyone


Cheery Lynn’s Challenge theme is Thank you. So I have decided to dedicate this card to Chris for his ‘almost patience’ LOL, taking photos and setting up my blog and to everyone who has taken the time to leave a comment on my blog. I can’t believe its nearly a month since my first post.

My topper on my card, I went over with a crackle stamp using distress.Firstly I used my distress tool around the edges then pressed the edges into my ink pad and embossed, layered onto another piece of paper and added some distress glitter.

I cut out strips of my Cuties 1 Strip Die and adhered to the back of my paper and then curled with a quilling tool and touched with a little distress and gilding wax. I also tore my paper and curled round and layered another piece of paper behind. Edged inside with distress stickles. I also made the flower on the corner of my card with the same die.


I die cut my corners in white cardstock and then pressed them into my ink pad and embossed, repeating again to get a smooth metallic finish. I wanted them to look more like a frame and another focal point on my card rather than just using them as corners, so layered up with the stamped -Thank You Ticket. Layered on to my card weaving the flourish die around it to add more texture.


My flowers and leaves had edges brushed with distress and some gilding wax onto them. I curled them with my quilling tool.


Happy New Year to All.

I look forward to reading your comments on my latest project.
 
Julie x
 
 
I would like to enter this in the http://cheerylynndesigns.blogspot.co.uk Challenge – Thank you
 
Products Used : Cheery Lynn Dies - Fanciful Flourish, Medium Rose, Miniature Rose, Cuties 1, Flourish Leaf Strip,Lace Corner Deco E.
 
Also: Pion papers and topper, Penny Copper embossing powder, rose quartz Treasure Gold, Potting Soil Archival Ink, Versamark, Distress ink Victorian Velvet and Faded Jeans, Distress Glitter Antique Linen and Victorian Velvet, Copper Stickles, Whimsy Thank you ticket stamp and craft stash. – Thank you Card
 

LinkWithin

Related Posts Plugin for WordPress, Blogger...
01 09 10