Translator

Friday, 30 March 2018

Believe in Fairies


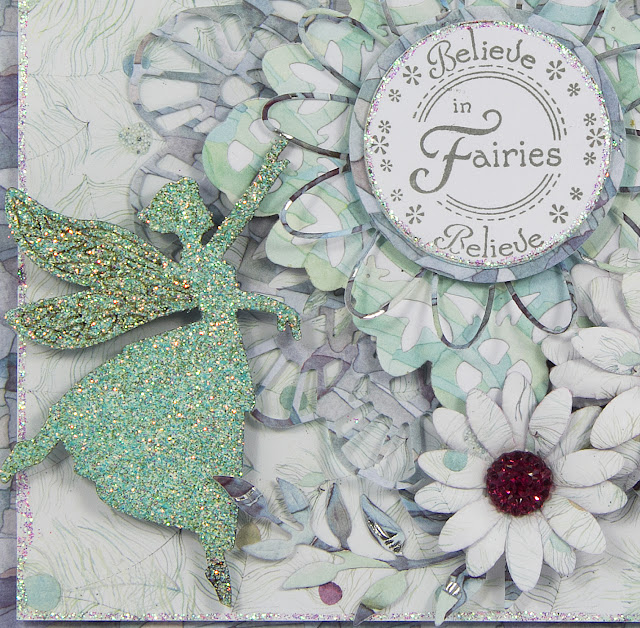
Hi everyone, today for my DT post with Craft Consortium I am sharing some inspiration on my 6x6 inch card using the beautiful Bloom Beautiful Paper Pad which I adore.


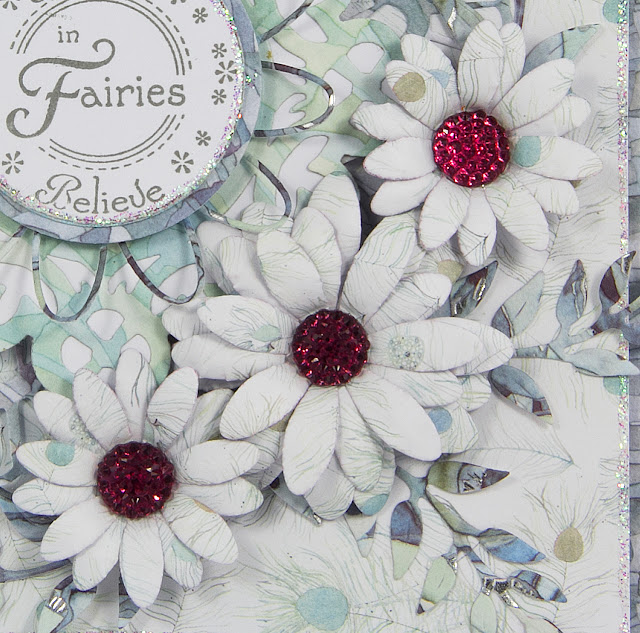
My card uses a few of the papers in the pad for my mats and layers and die cut Doilies and flowers.


I added a stamped sentiment and a chipboard fairy which was heat embossed with a few colours, finishing with accents of Stickles for extra sparkle.


My flowers were also cut out using the paper pad, adding some gems to the centres.

Thanks so much for stopping by today and do check out Craft Consortium and follow them on Facebook and Instagram for regular inspiration and giveaways.

Crafty Hugs, 
Julie x

Tuesday, 27 March 2018

Best Wishes Pop Up Card


Hi Everyone, today for my DT card at Cheery Lynn Designs I am sharing some Vintage inspiration with their Dies and a new Pop Up one today.


My card measures approximately 6x6 inches and uses pretty Maja Design papers. You will see my paper layers have been tattered at the edges adding a pretty Stacker frame between my layers. I also added a Doily between my torn layers and foam strips to my torn layers to give more dimension to my card.


My flowers were inked at the edges and shaped on my Embossing mat with a gem added to the centres and flourishes paper pieced around my card.


I also cut down a flower to fit on the corner adding a little Silicone Glue between the 2 layers, I love how pretty this effect looks.


My Best Wishes sentiment was layered onto my card adding another layer of patterned paper inked at the edges and flower petals in the corners all to compliment the outside of my card.


Cheery Lynn Dies Used:


Thanks for stopping by and wishing you a creative week.
Julie x

Friday, 23 March 2018

Time


Hi everyone, today for my DT post at Cherish The Memory I am sharing a collage style card.


I started by tattering the edges of my base layer of paper and adding tattered blue strips onto it for extra detail. Using my Ephemera Sheet I fussy cut out my clocks and diecut my centre image and added some stickles around the edges layering all around my diecut butterflies.


My sentiment was stamped onto patterned paper and layered onto my card with foam strips and accents of stickles at the edges.


Finishing with flowers, butterflies and an Ephemera button badge.

Thanks for stopping by today and do check out Cherish The Memory Etsy Shop to view their pretty range of craft products and follow them on the following links :

https://uk.pinterest.com/cherishthmemory/pins/

Crafty Hugs,
 Julie x

Monday, 19 March 2018

Mixed Media Canvas


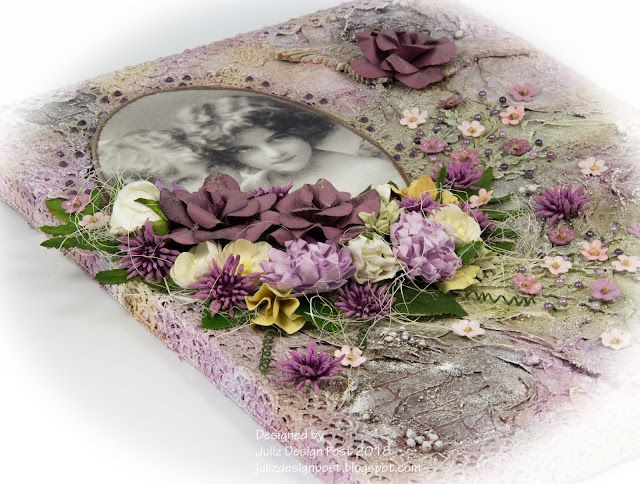
Hi creative friends, it’s been a while since I have got messy creating a mixed media project. So I decided it would be fun to make a piece of home decor for my craft room.
This canvas measures approximately 12 x 9 inches.


I started by giving my MDF oval shape a coat of Gesso and once dry I added a layer of Multi Medium. Next I separated the layers of my beautiful vintage napkin and placed the top layer onto the MDF. Once dry I added another couple of layers of Multi Medium to seal it. I heat embossed around the edges with a gold coloured Embossing Powder. Who would have ever thought this started out as a napkin.


The next stage was to create my background onto my canvas. I started by adding Embossing paste through my brick stencil. Once dry I added a layer of Tissue paper with Multi Medium adding creases and puckers and exposing my bricks.


I then added some lace round the outside of my canvas to help frame it. Also adding some dry wall tape, Art stones and more lace around the area my picture would sit and some chipboard shapes for extra detail. Once I was happy I gave my canvas a layer of Gesso to seal everything. Then onto the fun part of using a mix of sprays from 13Arts and Lindys.


Once I had dried with my heat gun I started to highlight all my texture by dry brushing on some Gesso. I also heat embossed some sparkly Embossing Powder for another detail, which unfortunately hasn't been captured in the photos.


My butterfly was made with Resin wings which had been coloured and shaded with Gilding Wax. 


The antennas are wire from my flowers curled into shape and heat embossed with gold, finishing with a rose in the centre.


Onto the fun part of layering on my floral bouquet, accents of pearls onto my chipboard shapes and bling around my lace frame.

Thanks so much for stopping by today, your visits are always appreciated.

Crafty Hugs 

Friday, 16 March 2018

Easter Egg Hunt


Hi Everyone, today for my DT card at Cheery Lynn Designs I am sharing some more Easter inspiration with the super selection of Dies they have available.


I started by cutting out my chicks in lemon and white cardstock. I shaded the eggs with Tattered Rose Distress Ink and mounted them onto the yellow die cut chicks adding a drop of Black Liquid Pearls into their eyes. 


My rabbit was shaded with Iced Spruce Distress ink and a fluffy Pom Pom tail added.


My eggs were cut out of Craft Consortium’s Wild Rose Paper Pad and mounted onto background paper and fussy cut around the edges, finishing with lots of pink gems being added onto them for sparkle.

Cheery Lynn Dies Used -


Thanks for stopping by and I hope you have a lovely creative weekend.


Crafty Hugs, 
Julie x

Sunday, 11 March 2018

Happy Mothers Day to my Mum


Hi everyone, today I am finally able to share with you all my card for my wonderful Mum on Mother's Day.

On this card I have used Spellbinders new range of Dies from Becca Feeken, please check out her amazing blog HERE.


These flowers are so easy to make and very effective. I used Lemoncraft papers to make my flowers, inking at the edges to add some definition to them and some Stamens into the centres.


I heat embossed the edges of my vintage picture with gold embossing powder and added a layer of gold glitter card from Craft Consortium into my layers and gold foliage stems to also compliment the card.


My butterflies were fussy cut from my Lemoncraft Ephemera Sheet, available from Cherish The Memory and I added some bling into their centres.


Finishing with a stamped fussy cut banner wishing my Mum a Happy Mother's Day.


Thanks so much for stopping by today, your visits are always appreciated.

Crafty Hugs
Julie x

Thursday, 8 March 2018

Happy Mother’s Day - Cherish The Memory


Hi everyone, today I am sharing some more DT inspiration with the beautiful Lemoncraft papers available at Cherish The Memory with a 3D vignette Card.

 This new Die from Spellbinders is such a fab design as it folds flat for posting.


 After cutting all my layers and assembling my card, I die cut my topper and fussy cut my Butterflies and flowers from the Ephemera sheets. 


I inked them at the edges and positioned them on my card along with a ribbon and my sentiment which was stamped onto paper from the coordinating paper pad.


Please do check out all the amazing Lemoncraft products available at Cherish The Memory HERE.

Here is also the link to Becca's beautiful Blog where you will see all her wonderful dies.

Thanks for stopping by.

Happy Crafting,
Julie x

Wednesday, 7 March 2018

Repost - Tutorial Post for That Craft Place


Hi everyone, I am just re-posting my tutorial post onto my blog as it was previously posted at That Craft Place a couple of years ago when I was on their Design Team with only a link from my blog to take you to this tutorial. I wish to now keep as a reference on my blog rather than it being lost in cyberspace with their blog being closed down rather than it sitting continuously in my drafts box. So please don't feel obliged to comment, but enjoy the post.
                                                      
                                                            Blog Post Copy

Hi Everyone, it's Julie here today from Juliz Design Post and I am sadly sharing my last DT tutorial with you at present here at That Craft Place, as our challenge blog and Natter and chatter group are taking a long extended holiday.

Lisa sells the most beautiful MDF Shrines in different shapes along with great embellishments to add to them in Greyboard and MDF, so please check out her shop links at the end of my post as these will still be remaining open.

So let me take you through the process of my shrine.


These are all the sections that come in the kit to start the project, ( my finished shrine measures approx 2.5" x 4.5" ).


You will see I painted all my inside sections apart from the front of my house.


In this photo you will see I added on some heat embossed detail.


Next I made templates in greyboard so I could add a roof onto my house by simply drawing around my shapes. I also roughly worked out placement of embellishments although I changed a bit later on.


I covered my greyboard in Metal foil and ran through my embossing folder. 


I  added my paint and let it slightly dry before buffing back with a dry baby wipe.


I glued my greyboard onto the MDF and added on some rust effects to the edges.


I glued lace onto the front and painted it with Black Gesso.


I then blended in some Mica Powders for highlights with a little water over my lace.


I felt at this point the background was a little dark in my house so I gave it a wash with Titan Buff.


I mixed Bronze Micro Beads with some Matt Gel Medium and applied through my stencil onto my roof. Once this was dry I dripped Alcohol Inks over it.  


I love the look it gives almost like an Abalone Shell.


Side on and rear views were highlighted with Inka Golds at the embossed detail. My feet are sewing machine bobbins with some alcohol inks on them. 


I added alcohol ink onto my pearls for a more Industrial look and then glued them around the window opening.


I Rusted my cogs using Andy Skinner's Techniques.


A close up view of the inside showing the cogs in place. My hearts had a layer of Crackle paint and were sprayed with Tarnished Brass Spray Stain, I wiped them back and added a little Black Paint to the edges.


My key was heat embossed with various Embossing and Distress Powders, wrapping around with a little wire. 


I brought out more highlights in my lace using Viva Decor Inka Golds in coordinating shades.


A couple of finished photos. All products used in this post are available at the links below to the shop.

If you have enjoyed my posts at That Craft Place I'd love for you to pop over HERE to my blog to continue to follow me. My followers buttons are down my sidebar and I look forward to following your blog too.


Crafty Hugs,

Julie x
Links you need to know.

LinkWithin

Related Posts Plugin for WordPress, Blogger...
01 09 10