Translator

Showing posts with label Maja Design. Show all posts

Monday, 1 April 2019

To Mum on Mother’s Day


Hi everyone, today I am sharing a box I made for my mum on Mother’s Day using Tonic Studios and Cheery Lynn Dies and of course the beautiful Maja Design Papers.


The photo is of my mum, which she thinks was taken in her early twenties with her first Toy Poodle called Nikki. Doesn’t she look glamorous.


My flowers have all been handmade using my Dies and inks adding stamens into the centres.


Some photos for you to enjoy.


Products used from

Thankyou so much for stopping by.

Crafty Hugs, 
Julie x

Wednesday, 4 April 2018

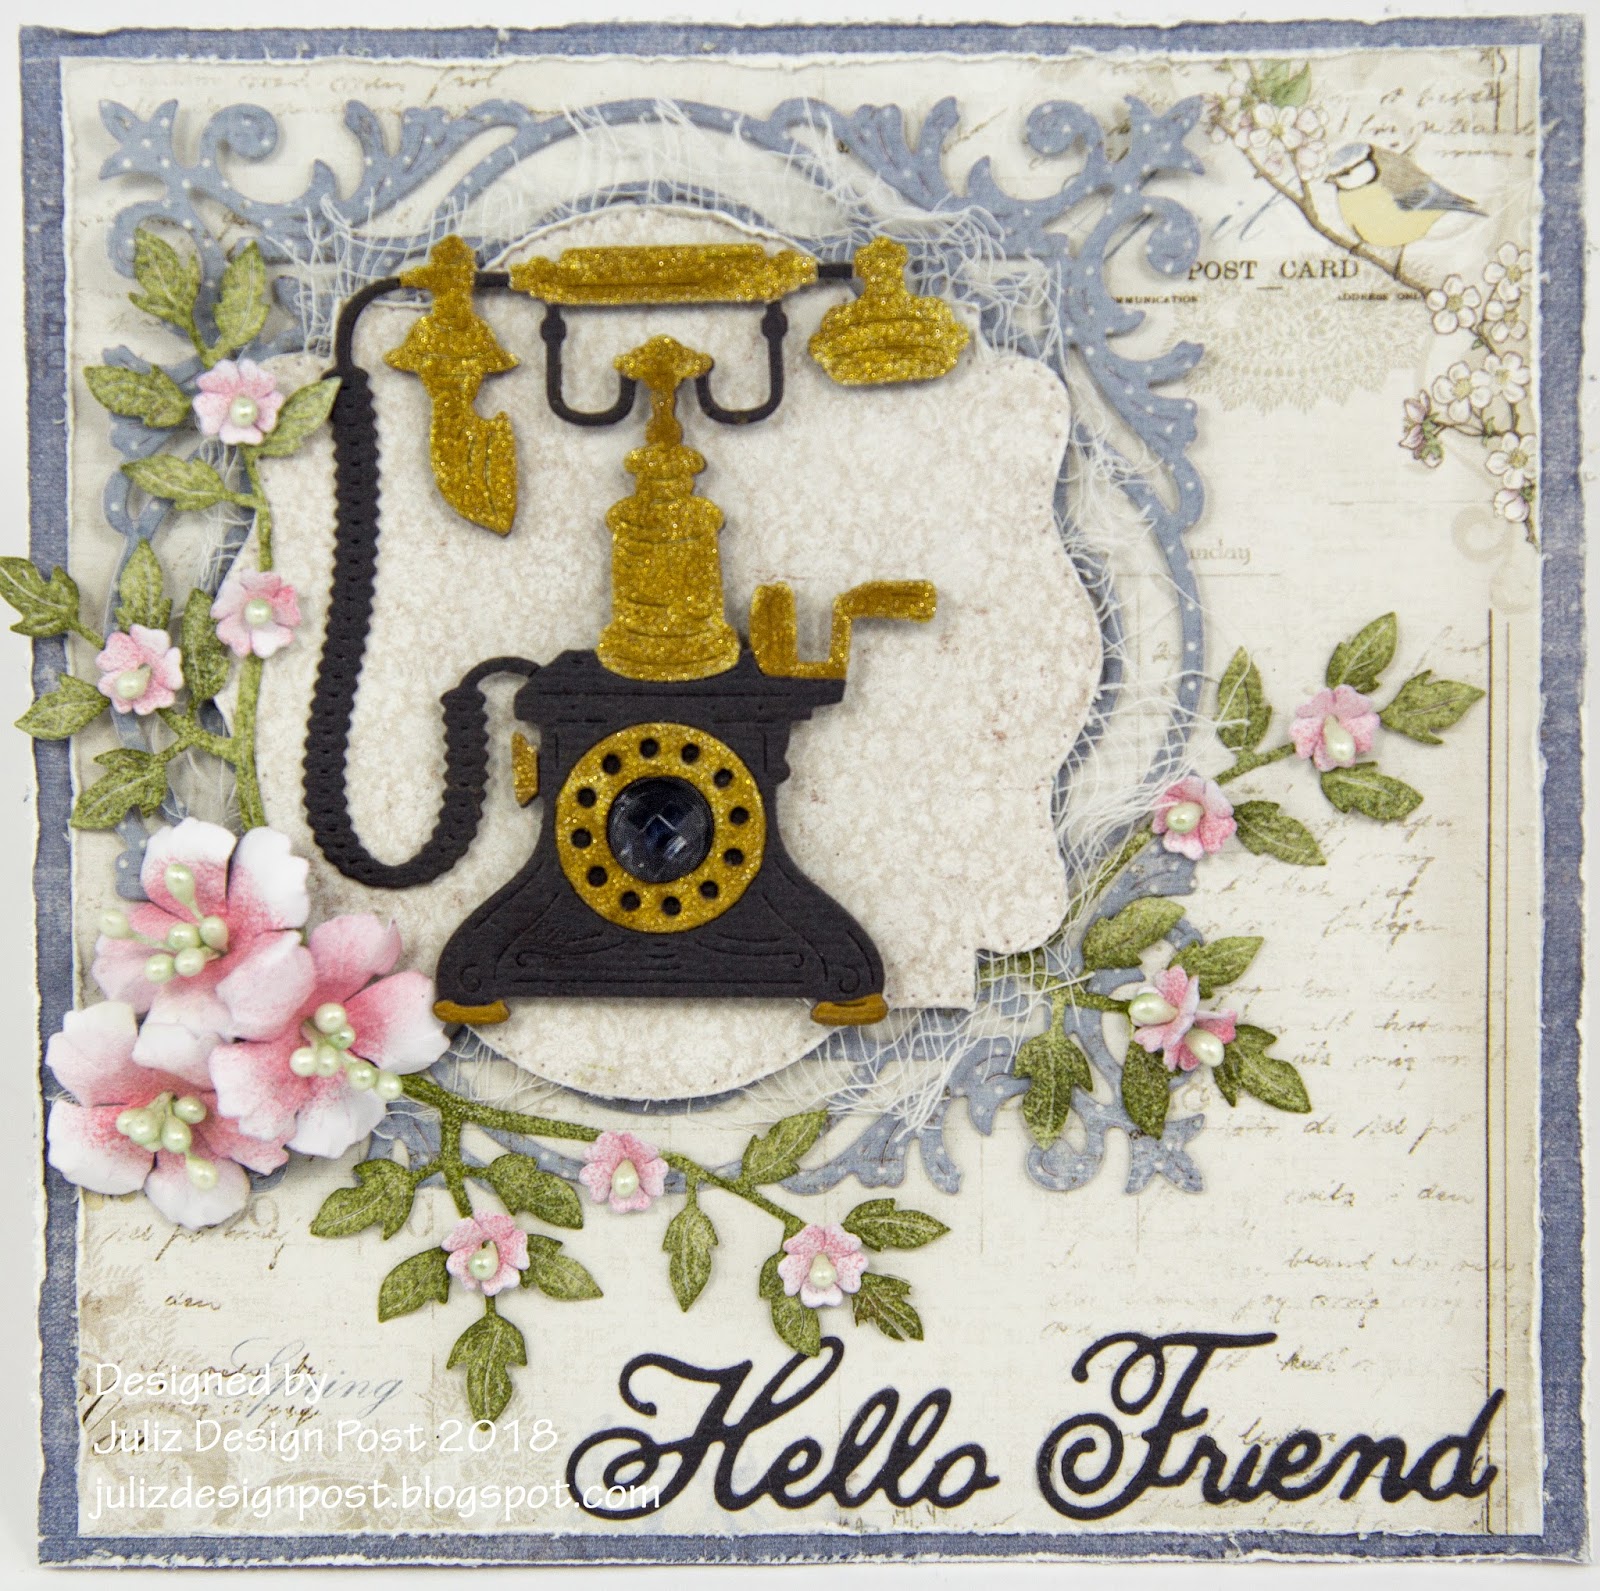
Hello Friend


Hi everyone, today for my DT card at Cheery Lynn Designs I am sharing some inspiration on my friendship card using their super vintage Rotary Phone Die. 


Using Maja Design papers I started by tattering my base layers and adding on Hello Friend.


My Rotary Phone was cut out in Black cardstock and Gold Glitter card, paper piecing my sections together and adding a large gem into the centre of the dial. I glued in place with some Silicone Glue onto my tattered layer and Doily.


My flowers were all inked in the centres with Archival ink adding Stamens into the centres, placing the arrangement onto my card.

Cheery Lynn Dies Used -


Thanks so much for stopping by today, your visit is always appreciated.

Crafty Hugs,
Julie x

Tuesday, 27 March 2018

Best Wishes Pop Up Card


Hi Everyone, today for my DT card at Cheery Lynn Designs I am sharing some Vintage inspiration with their Dies and a new Pop Up one today.


My card measures approximately 6x6 inches and uses pretty Maja Design papers. You will see my paper layers have been tattered at the edges adding a pretty Stacker frame between my layers. I also added a Doily between my torn layers and foam strips to my torn layers to give more dimension to my card.


My flowers were inked at the edges and shaped on my Embossing mat with a gem added to the centres and flourishes paper pieced around my card.


I also cut down a flower to fit on the corner adding a little Silicone Glue between the 2 layers, I love how pretty this effect looks.


My Best Wishes sentiment was layered onto my card adding another layer of patterned paper inked at the edges and flower petals in the corners all to compliment the outside of my card.


Cheery Lynn Dies Used:


Thanks for stopping by and wishing you a creative week.
Julie x

Thursday, 14 December 2017

Christmas Time


Hi everyone, thanks so much for stopping by today. If you missed my last post below you will see I am taking a break at present from blog following and Facebook.

Today for my DT post at Cheery Lynn Designs I am sharing some more Festive Inspiration using some of their beautiful Dies and pretty Maja Design Papers.


I started by fussy cutting my figure and inking at the edges, matting and layering onto my tattered inked layers.


I layered a mixture of foilage inking my leaves at the edges, adding Glossy Accents onto my berries and cutting out my Snowflakes from Glitter Card and adding some shape into them. Finishing with some flourishes and a Poinsettia along with a sparkly gem and Accents of Stickles for added sparkle.

Cheery Lynn Dies Used:


To enjoy extra savings at Cheery Lynn Designs all through December 2017, use the coupon code below.


Also you can join the Cheery Lynn Rewards Program by visiting Cheery Lynn Designs HERE.

GET REWARDED!

Crafty Hugs, 
Julie x

Tuesday, 14 November 2017

Joy to the World


Hi everyone and welcome to my DT post for Cheery Lynn Designs. Gosh I can't believe how fast we are now approaching the end of the year and it will soon be Thanksgiving Day for all our American friends. So today my card is inspired by this celebration.


I started by distressing my 2 layers of Maja Design papers at the edges and layered onto my card. I cut out my wreath in 3 shades of paper from the same pad, cutting 2 of my wreaths so they would stretch out a little larger than the base one. The cut was hidden by my drop shadowed reindeer.


My large sunflower was coloured with Copic Pens and Micro Beads added into the centre. The smaller sunflowers I added Flowersoft into the centres and also touches onto the wreath. My berries were coloured with Copic and 2 layers of Glossy accents added letting them dry between coats. Finishing with arranging my bouquet onto my card.

Cheery Lynn Dies Used:

Thanks so much for stopping by today.

Crafty Hugs, 

Julie x

Monday, 22 May 2017

Maja Guest Design

Hello everyone, I am super excited and honoured to have been asked to Guest Design for Maja Design today - a dream come true for me. 
I do hope you enjoy my 3 projects on this blog post today as much as I have enjoyed creating with their exquisite papers.


As a child I remember my parents had a Photo Cube in the house where family photos took pride of place and with all the beautiful images Maja Design have to offer I was inspired to making one in a shabby chic style. My cube measures approximately 3.75 inches square and was created by gluing beer mats together to form the cube, adding some coffee stirrer sticks at the joins internally to help strengthen my cube. Next I added tissue tape around all my seams and a little blue Distress paint.


My papers were all cut to size and tattered at the edges, I then rubbed some Versamark Ink around the edges and heat embossed my Embossing Powders. I added a pretty lace to the back of my paper and positioned them all in place with foam strips on each side. This helps to give my lace more dimension than lying flush next to the cube.


I tattered my images at the edges and added a little stamping to distress them before matting and layering in place on my cube.


I decorated with lots of small flowers with a Pearl centre and some dried ones.


I fussy cut out lots of butterflies using both the 12 x 12 paper and 6 x 6, gosh I adore these butterflies for a perfect finishing touch.


I added a diecut banner onto the top of my cube with my chipboard sentiment which had been heat embossed with the same colours as the edges of my paper.


My larger flowers were shaded with Distress Inks and Pearl Stamens added into their centres with some smaller butterflies added onto their petals.


I finished off my cube by adding small brass feet from my stash that I added highlights of Gilding Wax.


Finishing of with a few more images of my cube.


Maja Design Products Used :

Other products used:
Cheery Lynn Designs - 
Sue Wilson Small Flowers - Delicate Garden
Stampers Anonymous - Correspondence Set
6 Square Beer Mats or Chipboard measuring approximately 4 inches square 
Tissue Tape
Distress Ink - Victorian Velvet and Frayed Burlap 
Distress Paint - Faded Jeans 
Treasure Gold Gilding wax 
Versamark Ink Pad 
Gold and Penny Copper Embossing Powders 
Anna Marie Dried Flowers 
Flower Stamens, 
Cheesecloth and Lace - Ribbon Girl 
Scrapiniec Chipboard - Memories Captured 
Pinflair Glue, Hot Glue, Cosmic Shimmer Glue, Foam Strip Tape 
Tiny Pearls and Brass Feet - Hobby House


This card uses the exquisite papers from the Sofiero Collection. I love the pretty feminine tones and the elegance of the images that compliment any craft project so well. This card measures approximately 5" x 10" and I intend to put it into a frame to keep as my 'Precious Memory' as a Guest Designer here at Maja Design.


I started with tattering the base pink layer of my card with my scissors, this would help frame the soft tones on my design. I gathered lots of little scraps of paper from my Sofiero Collection and cut into approx 1" squares, tattered at the edges and placed onto my card with foam strips. I now added on my torn layer of paper with tattered edges, some stitching and lace for extra detail.


My dressing table mirror was diecut in white cardstock and I stippled on some Gesso for extra texture and once dry I added some Gilding Wax for highlights. You will also notice I replaced the mirror part of my diecut with a oval chipboard which had been painted and gilded in the same way. My beautiful image was glued onto an oval chipboard adding Pearls around the frame, finishing with a flower in her hair and a small Pearl added to her choker for extra detail.


My Ivy chipboard has been painted nestling some small flowers around them and adding a few diecut leaves.


My lilac flowers were created with Distress Inks and adding Pearl centres, my other flowers have all been creating using Maja Papers.


Products Used List.
Maja Design Products Used -
Other Products Used -

Scrapiniec - Ivy and Precious Memories
Dusty Attic - ATC Frame
Marianne Creatables Vintage Mirror
Spellbinders Hydrangea
Gilding Wax - Rose
Gesso
Sewing Machine, White Thread
Lace, Cheesecloth
Mini Pearls, Pearl Ribbon
Distress Oxide Peeled Paint
Distress Ink Milled Lavender, Shaded Lilac Foam Strips 
Pinflair Glue and Cosmic Shimmer Glue 


The inspiration for this card which measures 7.5 x 5.5 inches came from the love between a mother and daughter on my image and the beautiful Vintage Romance 12 x 12 paper called Engagement. I knew these would compliment each other so well and I could replicate the pretty flowers from the background paper onto my card.


I started by adding tattered layers, accents of cheesecloth, touches of lace and Frantage for a shabby feel.


My roses were die cut out in coordinating papers and inked with Victorian Velvet Distress Ink, I also added some small flowers with a mini Pearl into their centres.


My floral arrangement was positioned onto my card with leaves which were inked at the edges and a few flourishes for added detail.


I finished with a small double layered heart chain, some dried flowers and a little thread positioned through my bouquet.


Maja Design Papers Used :
Cheery Lynn Dies Used:

Other Products Used :
Lace, Cheesecloth
Image from Stash
Antique Linen and Victorian Velvet Distress Inks 
Stampendous Shabby Green Embossing Enamel 
Stampendous Aged Bronze embossing Enamel 
Craft Consortium Pearl

Thanks so much to Camilla for giving me this opportunity which shall be forever in my heart and for the super talented Design Team at Maja for their endless inspiration.
I would love if you had time to leave me a comment.

Crafty Hugs to all, 
Julie xx

Wednesday, 15 March 2017

Cheery Lynn Designs-March Blog Hop Featuring IOE Folders and Plates


Hello fellow bloggers, today at Cheery Lynn Designs we are having fun with a blog hop launching some beautiful new Embossing Folders and IOE Plates into the range. You may have watched the video clips and know how these clever folders work Embossing only the area of the folders you want, but if you haven't the link is HERE.


I used Maja Designs Paper from their Summertime range called Wind in my Hair and embossed my Frame It Embossing Folder for my outside edge and then changed to Vintage View Folder to get my embossed areas on my background. I rubbed over with Tattered Rose Distress Ink to highlight the embossed areas and added a touch of Gilding Wax.


I used the centre embossed area of my Vintage View Folder applying the same techniques to highlight the areas mounting on my Thank You Die Cut which I gave a shadow layer too.


Finishing with my Shasta Daisy, a pretty ribbon and lots of Pearls.

Thanks so much for stopping by today and I'd love if you left a comment before hopping to Lisa's beautiful BLOG.

Please carry on the hop until you end up back at Cheery Lynn Designs. You will see all our inspiration with these folders and be in with a chance to win a shopping spree of $20 at Cheery Lynn Designs.

Cheery Lynn Products Used:

Square IOE Plates

Crafty Hugs and have fun hopping, 
Julie x

Maja Design Paper - Wind in my Hair from the Summertime Range

I wish to enter this card into the following challenges -

LinkWithin

Related Posts Plugin for WordPress, Blogger...
01 09 10