Translator

Showing posts with label Pierced Stacker #3. Show all posts

Monday, 16 July 2018

New Baby


Hi everyone, today for my DT card at Cheery Lynn Designs I am sharing a baby card using a couple of their Dies in the Whimsical range along with a selection of others.


You will notice I started tattering my layers of patterned paper adding onto my card with my Celtic Stacker die in-between. 


Next I added my pretty Doily layers and stamped sentiment. My Whimsical Giraffe I glued onto a pale green paper and fussy cut around.


My Whimsical Flower I cut out in pale green paper and layered my patterned flower on top twice which had been shaped on my Embossing mat to add dimension. Finishing with several gems on my card.

Cheery Lynn Dies Used -
XL21 Pierced Stacker #3

Craft Consortium - Wild Rose Paper Pad

Thanks so much for stopping by today.

Crafty Hugs,
Julie x

Monday, 4 June 2018

Happy Anniversary


Hi everyone, today for my DT card at Cheery Lynn Designs I am sharing some inspiration using one of our Cardmaker Dies. I love the elegance and impact these give to a card especially if you need to make a card quickly.


I started by die cutting my Cardmaker die in Gold Mirri Card and in White Cardstock. I then offset my layers making sure I had an even aperture around the edges. I then layered onto my card with foam strips for added dimension.


Happy Anniversay was stamped and heat embossed with Gold Embossing Powder. I added extra touches of detail layering my Tags#2 flourish dies around the edges of my middle layers and adding on some gems.

Cheery Lynn Dies Used:


Thanks so much for stopping by today.

Crafty Hugs, 
Julie x

Wednesday, 4 April 2018

Hello Friend


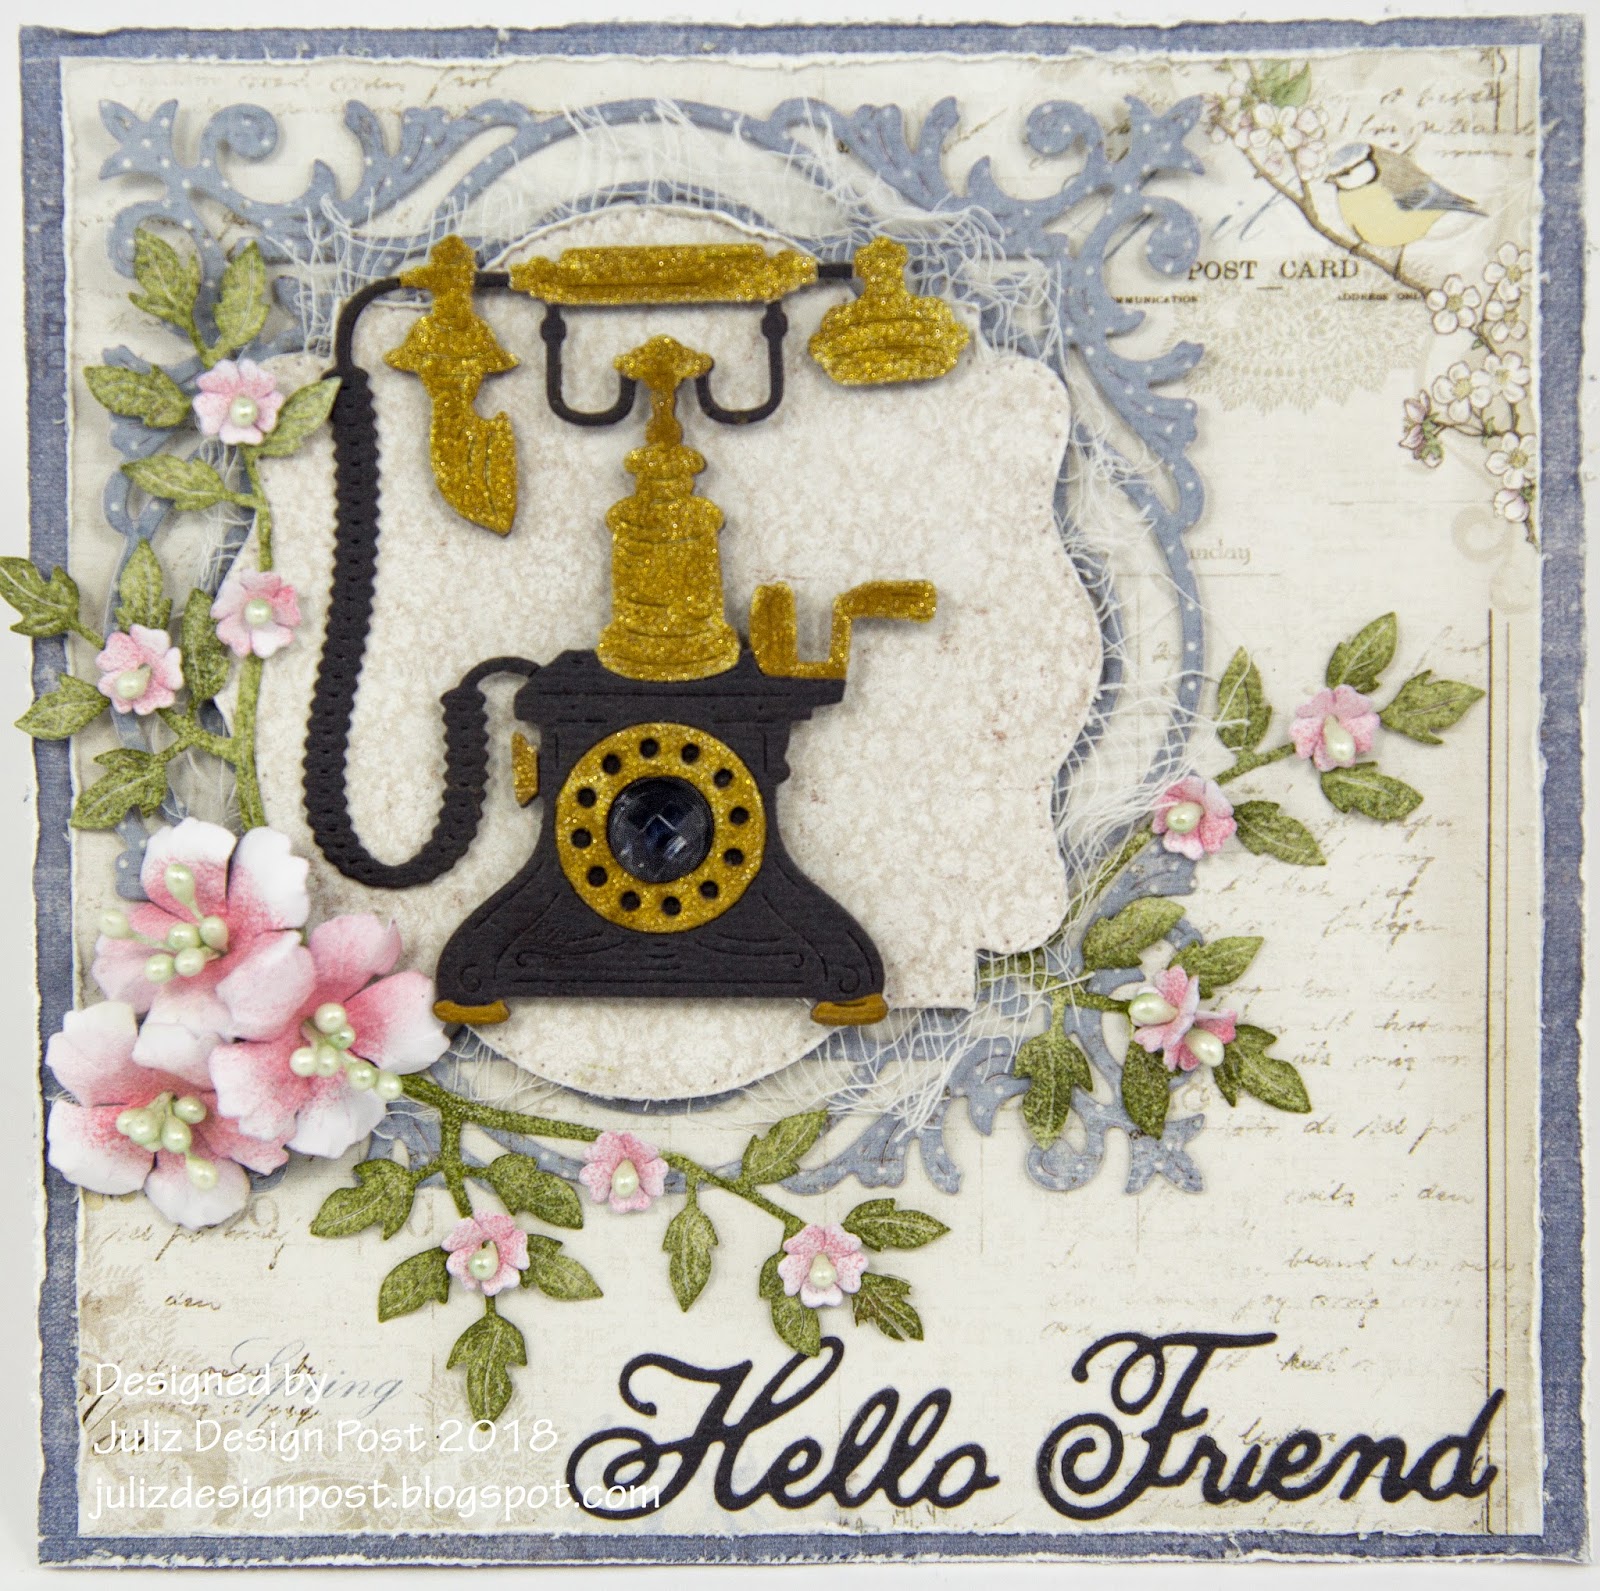
Hi everyone, today for my DT card at Cheery Lynn Designs I am sharing some inspiration on my friendship card using their super vintage Rotary Phone Die. 


Using Maja Design papers I started by tattering my base layers and adding on Hello Friend.


My Rotary Phone was cut out in Black cardstock and Gold Glitter card, paper piecing my sections together and adding a large gem into the centre of the dial. I glued in place with some Silicone Glue onto my tattered layer and Doily.


My flowers were all inked in the centres with Archival ink adding Stamens into the centres, placing the arrangement onto my card.

Cheery Lynn Dies Used -


Thanks so much for stopping by today, your visit is always appreciated.

Crafty Hugs,
Julie x

Friday, 26 January 2018

Springtime Birthday


Hi Everyone, this last week in Scotland has been very cold and we have had a lot of snow and frost. Thinking of warmer days I decided to create a Birthday card for my DT post at Cheery Lynn Designs using one of their latest Pop-Up Dies - Celebrate, along with spring coloured cardstock.


I shadowed layered my word Celebrate 3 times to make it pop and incorporate the colours on my card design and flowers.


My flowers were all cut out in white cardstock and shaded in the centres with some ink. Next I shaped the petals on my Embossing mat and added Flowersoft into the centres. The smaller flowers I bunched a few together in places and added single ones too for extra detail and interest.


Cheery Lynn Dies Used:


Thanks so much for stopping by today and for the lovely comments left on my blog on our Blog Hop, it was lovely to read them all.

Wishing you a lovely creative weekend, 

Crafty Hugs 
Julie x

Friday, 5 May 2017

Missing You


Hi everyone, today for my DT card at Cheery Lynn Designs I am sharing with you a few tips on how to get dimension into your Dies cuts.


My card today uses Maja Design papers,  I started by cutting out my Stacker layers and tattering at the edges with my scissors and tearing out small sections of the paper and inserted my lace style die cut for detail.


My butterflies were all cut out twice and I moulded the wings to give shape with my fingers. I pressed them into my Versamark Ink pad and heat embossed with a Pearl Embossing powder. Whilst still warm I held my wings so they stayed curled as they cooled and would then constantly remain in this shape. This is a great way so your wings don't flatten especially if posting a card.


My flowers I sprayed my die cuts with a little water and moulded each petal in a concertina effect. I next dried with my heat gun and then teased my petals back out to show the crinkles and shaped the layers on my Embossing mat then added a Pearl and Stamens into their centres.


I accented my Doily top and bottom of my card adding half a flower onto them and used the matching mini Doily behind my centre butterfly.

Shop at Cheery Lynn for -
Thanks so much for stopping by today and I hope you feel inspired to try these techniques in your next crafty project.

Crafty Hugs,
Julie x

Tuesday, 4 April 2017

Easter Egg Hunt


Hi everyone, today for my DT card at Cheery Lynn Designs I thought I would share some inspiration for an Easter card in a vintage design.


Cheery Lynn have many cute Easter Dies that embellish our crafty designs so well. My sweet little chicks were diecut from a yellow patterned cardstock and I coloured their beaks and feet with Copic Pens and added a touch of Black Liquid Pearls for their eyes.


My rabbit was also cut in patterned paper adding a fluffy cotton tail and some Liquid Pearls also to his eye.


My Stackers were all layered up in different shades of paper adding a little cheesecloth behind my image.

Shop at Cheery Lynn for -

Thanks so much for stopping by today to see my card and I hope you have a lovely creative week.

Crafty Hugs,
Julie x

Tuesday, 4 October 2016

Happy Catoween


Hi everyone, gosh I can't believe we are into October already and Halloween shall be here very soon. So today for my DT card at Cheery Lynn Designs I am sharing some Halloween inspiration. I so love making these fun cards with all these fab dies.

I started off with an 8" X 5" card and matted and layered cardstock which I tattered at the edges. For my background I used inks and a web stencil to get a spooky effect, layering up my spiders web with foam strips.


My main cat I added the witches hat to, layering on the belt and buckle twice for added texture. I used the reverse side of my smaller cat on the left hand side of my card to give a mirror image. You don't tend to notice as much you have used the reverse side in black cardstock when you want your die cut facing the other way.


Frankenstein was cut out in several colours layering him up and highlighting his face and clothes with a Fine Liner pen.


My Skeleton I shadowed with black cardstock to help him pop.

I do hope you have enjoyed my post and feel inspired to make a Halloween Card. Thanks so much for stopping by today and good luck to everyone entering the Bi-Weekly Challenge at Cheery Lynn Designs for a chance to win a $20 shopping spree. 

Crafty Hugs,

Tuesday, 5 July 2016

Celebrate


Hi fellow crafters, today for my DT card at Cheery Lynn Designs I have made a shabby chic card to share with you all that would be suitable for many occasions including a Wedding, Prom and Birthday.


I scattered some Frantage over my background layer and tattered the edges for a shabby feel, adding my die cut layers. My dress I glued onto another layer of card and fussy cut around it. I then added lace to the hem and a scattering of pearls and a net shawl draped around the coat hanger for extra detail.


My Tea Roses were inked at the edges and Flower Soft added to the centres. I love these pretty flowers and how delicate they look.

Thanks so much for stopping by today and for all your continued comments, I love reading them.

The Current Challenge over at Cheery Lynn Designs is Pretty in Purple, I do hope you manage to join in the fun with a chance of winning a $20 shopping spree.


Crafty Hugs,

Julie x

Shop at Cheery Lynn For :
I would like to enter this in to the following Challenges:


Saturday, 28 May 2016

Vintage Kisses


Hi everyone, the challenge over at Cheery Lynn Designs at present is Lots of Layers and I thought it would be fun to join in with some inspiration for my DT card this week using the new Lords and Commons A2 die Facer set.
I decided to use my die set for an Easel styled card, using negative parts of the die and some of the corner shapes as well as the Facer.


You will see I tattered all my layers as I started to layer adding some stitching to the top layer, along with some Frantage and the little hearts that fall out of the negative space of the die, topping with a Pearl.


My flowers were inked in the centre along with some Flowersoft. My leaves I scattered some Frantage onto them.


I used the corner accent that comes in the Facer set and my Tiny Doily to add some more detail and layered behind my stacker frames at the image.


My flower to hold the Easel in place was mounted onto my Lords and Commons tiny Doily. 

Thanks so much for stopping by my blog today and I hope you have a lovely creative weekend. Look forward to seeing you in the Cheery Lynn Designs  Bi - Weekly Challenge.

Crafty Hugs,
 Julie x
Shop at Cheery Lynn For:

Saturday, 16 January 2016

Cheery Lynn Designs Jan 2016 Blog Hop


Welcome to the Cheery Lynn Designs January New Release Blog Hop. We are all so excited to showcase the fabulous new dies that were just released. I am the first blog on the hop so at the end of my post just click on Lisa's name to get to your next stop on the hop.

Cheery Lynn make the most amazing Bird Dies with incredible detail and for my DT post today I am using the newly released Stork and Baby die. The Stork comes separate from the baby so you have different variations of using this die.


I started off by using my Hearts embossing sheet with white cardstock and rubbed over lightly with some Distress ink to highlight the hearts. My Doily was cut out and backed onto my Angel Wing. I then cut in half and placed at each end of my card.


My Stork and Baby were shaded with Copics, I added a little gem and some black Liquid Pearls to its eye and highlighted the swirl detail with a glitter pen. Mounting onto another heart embossed mat and layering onto my Its a Boy banner.

Thanks so much for your visit today and I would love if you leave me a comment to let me know you have stopped by on the BLOG HOP. Be sure to head over to your next stop which is LISAFollow through to the end of the hop and leave a comment on the Cheery Lynn Designs Blog too for a chance to win a $20 gift certificate.

Julie x

Cheery Lynn Dies Used:


Saturday, 12 September 2015

Merry Christmas my Reindeer


Hi Everyone, today I am sharing with you my Cheery Lynn Designs DT card which is a Festive card made with some of their New Release dies.


My large Snowflake die was cut out in White Cardstock. I sprayed with glue and added some extra fine glitter on it. You will also notice that on my Pierced Stacker die cut the little pierced holes act as a super guide line for adding Stickles evenly - Unfortunately the camera hasn't picked up the sparkle too well. 


My cute Reindeer was cut out in Kraft Cardstock adding a layer of White Cardstock to the back I shaded the areas with Red and Gold pens, adding a little ribbon to the neck and Stickles to the nose.


My Poinsettias were cut out in Patterned Cardstock, distressing lightly with ink and adding a few stamens.

Thanks for stopping by today and have a lovely weekend. 

Julie x

Shop at Cheery Lynn for:


Saturday, 29 August 2015

With Kisses


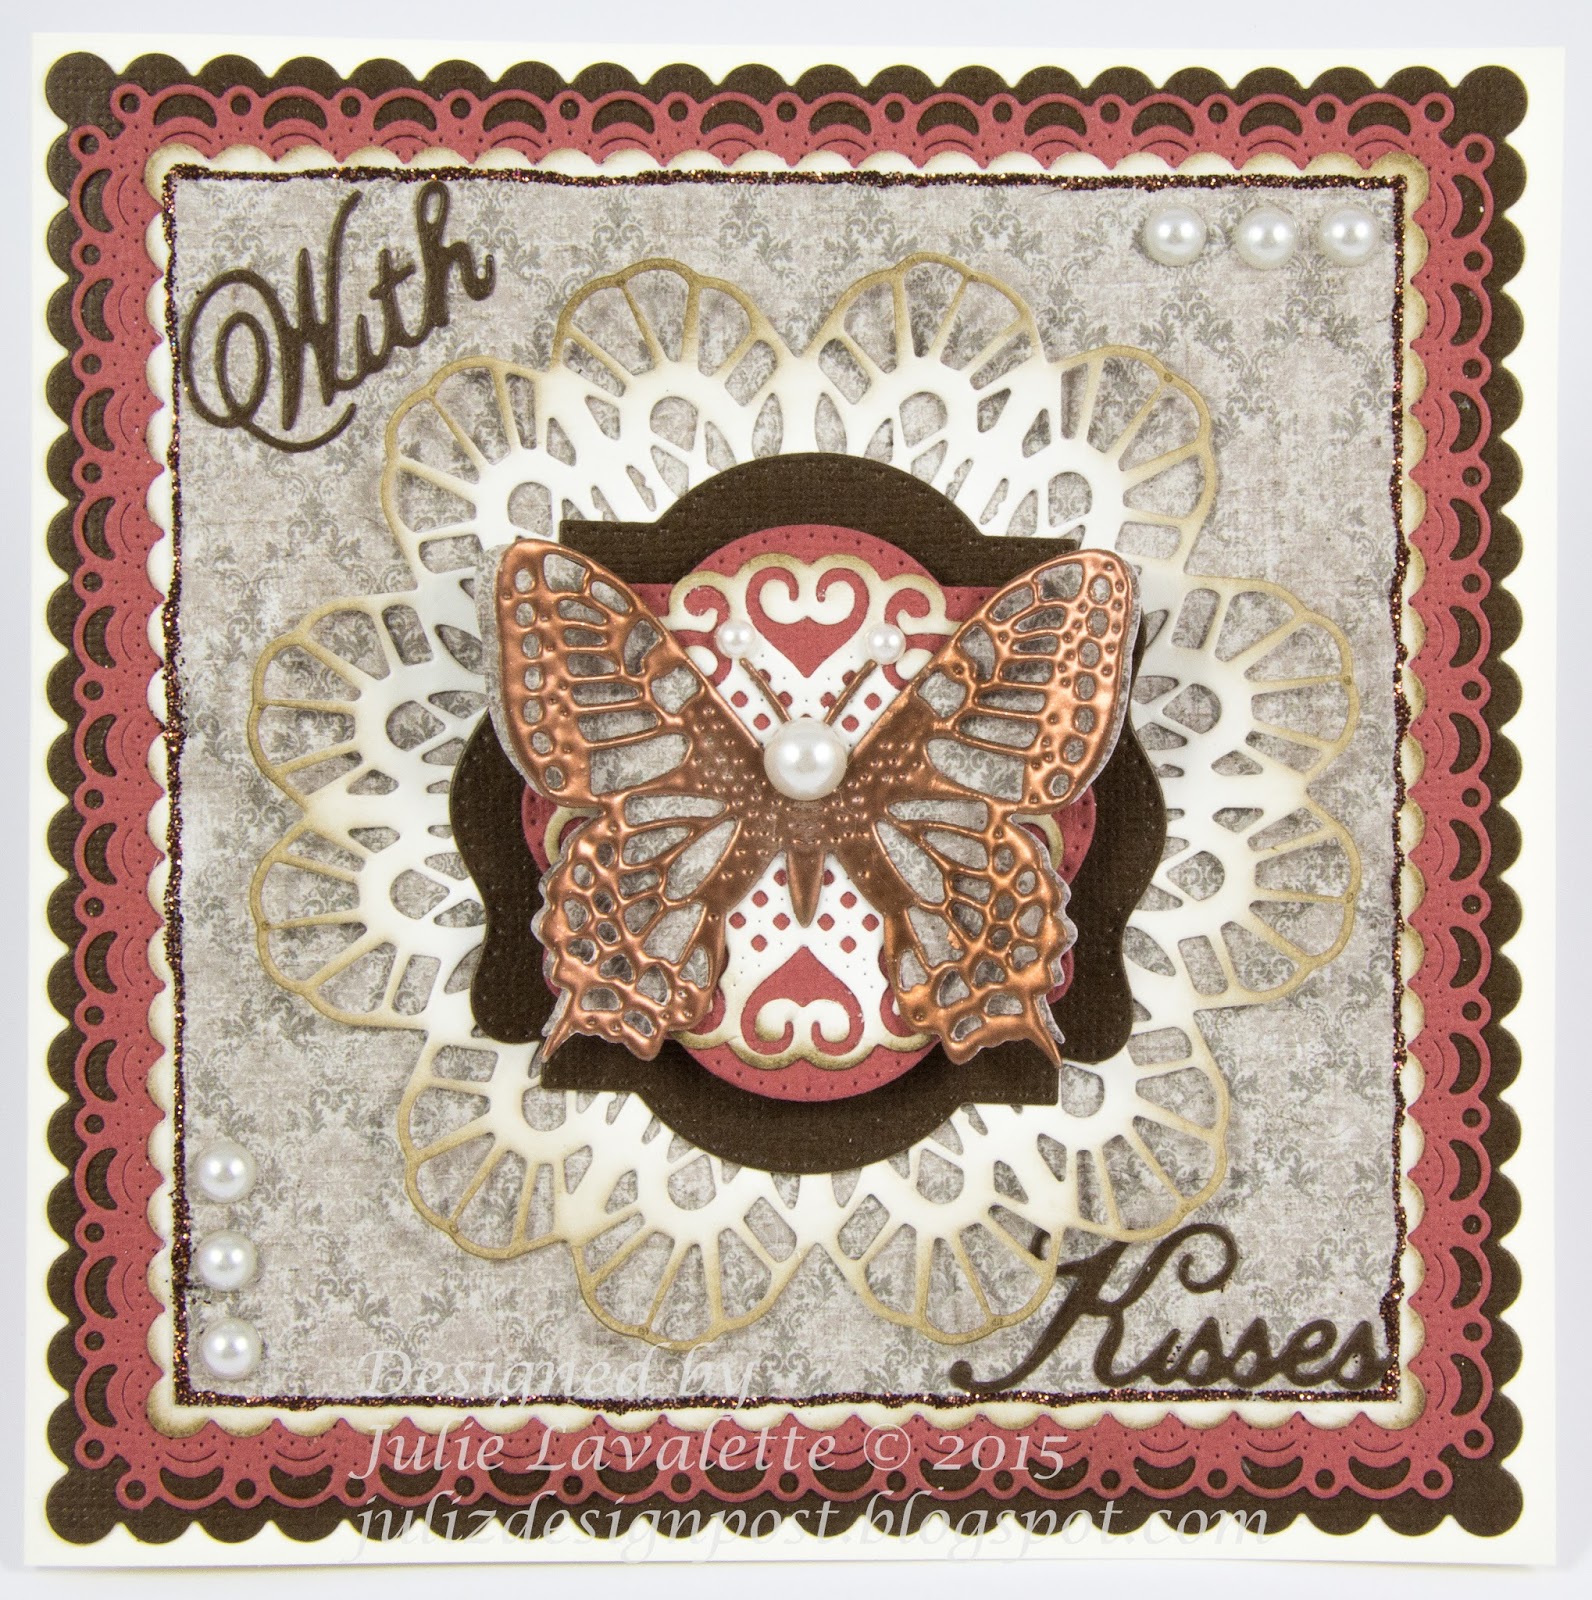
Hi Everyone,  Cheery Lynn Designs do the most wonderful Butterfly dies in many different styles and sizes with Angel wings for perfect layering. So for my DT card this week I thought it would be nice to show you all how they can hold centre stage on a card for a wow factor.


I started by matting and layering my stacker dies to give a detailed border with contrasting colours and adding some Copper Stickles around the edge of my centre mat.


My Doily was cut out in Cream Cardstock and shaded with Distress ink, matting onto my Pierced stackers along with my Lords and Commons Super Doily. My Butterfly was heat embossed with Copper Embossing Powder and layered onto my Angel Wing Die, finishing off with a few pearls and a Sentiment.

Thanks for stopping by today.

Julie x

Shop at Cheery Lynn for: 

Saturday, 18 July 2015

Haunted House


Hi everyone, today I am sharing with you another DT card using some Halloween dies from the Cheery Lynn Designs - Latest Release.


I started off by making my own background paper with stamps and inks, matting and layering on to my stacker dies. Next I cut out my Spiders Web in purple card stock then placed them on to the corners and added purple Stickles around the edges.

My orange mat I added a little Distress ink and went around the pierced holes with a white pen, layering on to my card with a little Silicone Glue.


My Home Sweet Home die I layered up twice and added some yellow card stock behind the windows to make them pop and I pulled the windows to an ajar position. 


With layering my house twice it gave my tree some extra added dimension and popped the house forward on my card rather than lying flush to the card stock.


My Bat was cut in black cardstock and offset with some white. I stamped my sentiment in clear Embossing ink and embossed with extra fine white Embossing Powder.


My cute figures were trimmed out of the Trick or Treat Border and offset with yellow card again to make them pop on my card.

Thanks for stopping by today. 

Julie xx

Cheery Lynn New Release Dies Used:

Other Cheery Lynn Dies Used:


LinkWithin

Related Posts Plugin for WordPress, Blogger...
01 09 10