Translator

Showing posts with label Horizon Square Boutique Stacker Frames. Show all posts

Tuesday, 4 April 2017

Easter Egg Hunt


Hi everyone, today for my DT card at Cheery Lynn Designs I thought I would share some inspiration for an Easter card in a vintage design.


Cheery Lynn have many cute Easter Dies that embellish our crafty designs so well. My sweet little chicks were diecut from a yellow patterned cardstock and I coloured their beaks and feet with Copic Pens and added a touch of Black Liquid Pearls for their eyes.


My rabbit was also cut in patterned paper adding a fluffy cotton tail and some Liquid Pearls also to his eye.


My Stackers were all layered up in different shades of paper adding a little cheesecloth behind my image.

Shop at Cheery Lynn for -

Thanks so much for stopping by today to see my card and I hope you have a lovely creative week.

Crafty Hugs,
Julie x

Tuesday, 3 January 2017

2017 Happy New Year


Hi to all my crafty friends and a Happy New Year to you, I hope it's a wonderful year for us all.
Today for my DT card at Cheery Lynn Designs I am sharing my inspiration with the fun 2017 Shaker Die and have added the sentiment that comes with it. This die would also look amazing recording any special memory for this year, a special birthday, the birth of a baby and a graduation to name a few.


I added the Happy New Year confetti into my shaker along with a mix of micro beads and added a shadow layer to 2017 to make it pop.


Thanks so much for stopping by today and I hope you feel inspired to making a shaker card, Cheery Lynn have a brilliant selection of these dies you can check out HERE.

Until next time,

Crafty Hugs, 
Julie x  

Saturday, 14 November 2015

Love You


Hi Everyone, today for my DT card at Cheery Lynn Designs I'm sharing with you a card using one of their fabulous new word dies - Love You. I gave my card a Masculine touch, hopefully to inspire you, as I know we all struggle when it comes to thinking what design to make for a Male, but changing the colours and adding a flower would equally give this design a feminine look.


I used several of my Stacker dies to build my layers and with it coming close to the Festive season I just had to add some Platinum Stickles for an accent of bling.


My Ink bottle was coloured with a Copic Pen and I wrote the work Ink on it. My Feather I inked the edges and ruffled the sides for a realistic look.


I fussy cut a heart shape to place behind my heart doily and gave my word Hugs a shadow effect.

Thanks for stopping by today and I hope to catch up with your blogs shortly.

Julie x

Shop at Cheery Lynn For :


Saturday, 29 August 2015

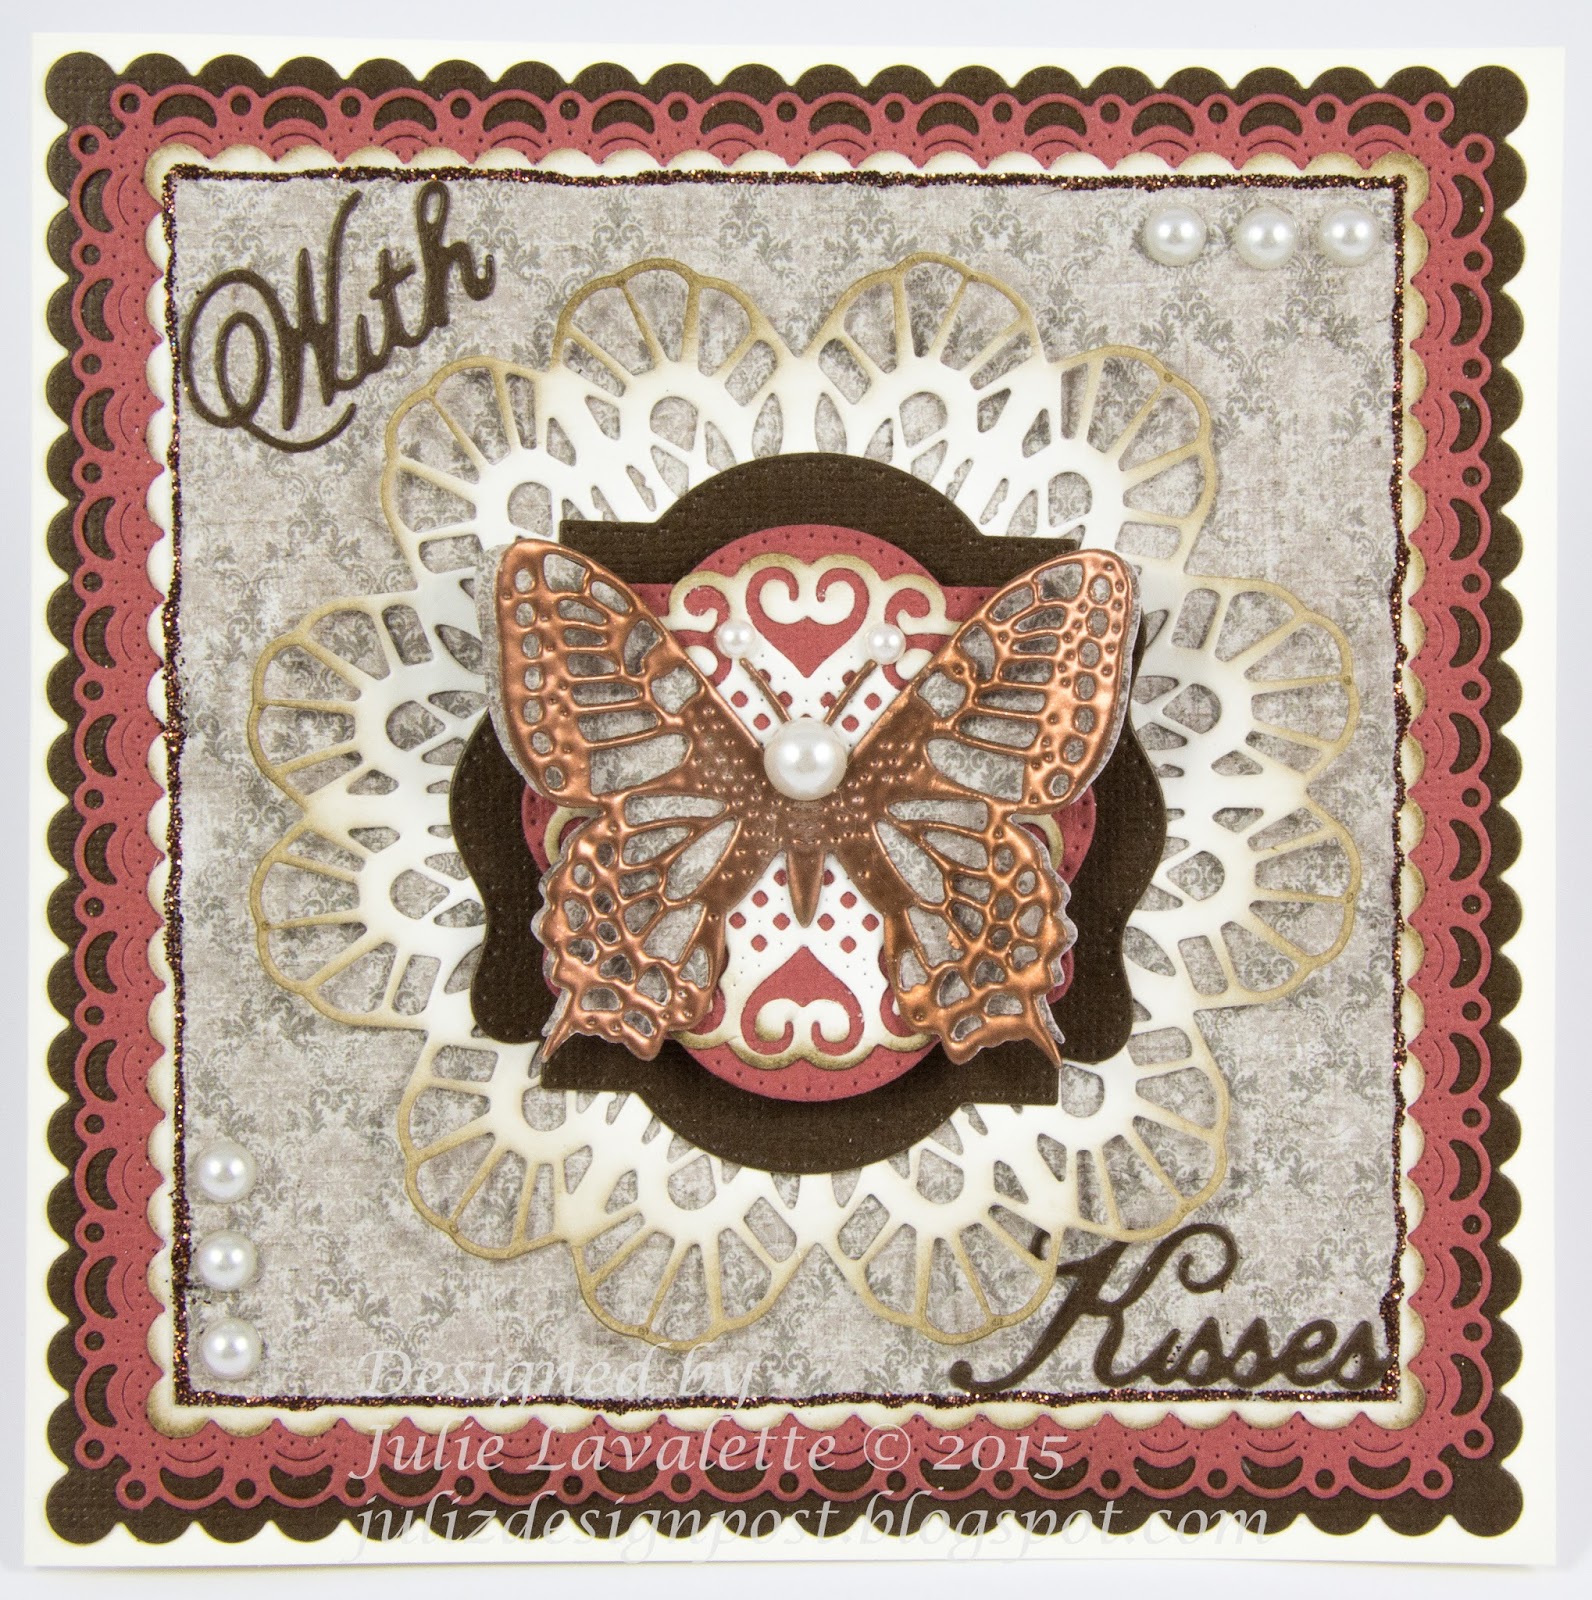
With Kisses


Hi Everyone,  Cheery Lynn Designs do the most wonderful Butterfly dies in many different styles and sizes with Angel wings for perfect layering. So for my DT card this week I thought it would be nice to show you all how they can hold centre stage on a card for a wow factor.


I started by matting and layering my stacker dies to give a detailed border with contrasting colours and adding some Copper Stickles around the edge of my centre mat.


My Doily was cut out in Cream Cardstock and shaded with Distress ink, matting onto my Pierced stackers along with my Lords and Commons Super Doily. My Butterfly was heat embossed with Copper Embossing Powder and layered onto my Angel Wing Die, finishing off with a few pearls and a Sentiment.

Thanks for stopping by today.

Julie x

Shop at Cheery Lynn for: 

Saturday, 4 July 2015

Someone Special at Christmas


Hi Everyone, sorry I am still behind catching up with your blogs after my holiday but I am rather poorly with two different infections at the moment, but hope to catch up very soon if I haven't already.This week the challenge at Cheery Lynn Designs is Christmas and I couldn't resist playing along, so this is my DT card for this week, as I love making Festive cards and getting the Glitter out.


I started by cutting out my paper with the image of Santa on it, mounting onto green card and I then dropped a little Stickles into the centre of all the tiny holes around the frame of my Horizon Stacker die.


My sentiment was stamped adding some Stickles and Distress ink for a Vintage look, layering onto my die cuts with a little Silicone Glue.


My foliage was cut and curled slightly with my embossing tool and mat. I then added some red gems to look like berries for added detail.


My Poinsettias were made be shading white card stock with Distress Stains and a gold Mica spray. Once the card stock was dry I die-cut out my flowers, shaped on my embossing mat and added some glittered stamens to the centre.

Thanks for stopping by today, as always your comments are greatly appreciated.

Julie x 

 Shop at Cheery Lynn For :


Saturday, 16 May 2015

Live, Laugh and Love card and Exciting News to Share


Hi Everyone, today for my DT post at Cheery Lynn Designs I am sharing with you a card which was initially all cut out in White Card Stock. I then selected some feminine vintage shades in Distress Ink to define my layers.


This photo shows the start of my layers and you can see I have layered the Circle Classic die on top before layering on my next Doily. 


Notice the lace design now pops forward in the centre.


Close Up of my Sunflower.

And now for the exciting news I have been patiently waiting to share with you all. I recently applied to be on the talented Design Team at That Craft Place and was lucky enough to be chosen to be on their Mixed Media team and will post a project monthly for them. Hope you can join me next Sunday when I share my first post with them.

For those of you that don't know That Craft Place they are a bricks and mortar shop in East Sussex, England that carry a variety of my favourite products including Cheery Lynn Designs. They also do a Bespoke service of Laser cutting MDF and Stencils so please check them out HERE. They also have an online Facebook shop and a friendly natter and chatter group on Facebook. All the details can be found from their challenge blog HERE.

Hope you have a great weekend,

Julie x

Shop at Cheery Lynn for:


Saturday, 14 February 2015

Forever Yours


Happy Valentines Day to everyone and a warm welcome to my followers old and new. For my Cheery Lynn Designs DT card this week I have made a very Ornate Vintage Style Valentines card using lots of layers, dies and a coordinating pack of papers.


In this photograph you will see how my layers started on my card. I tattered some edges and added Distress Ink for an aged look along with a little Muslin tucked around my layers, also adding a few pearls around my clock.


My main flower, stamens were added into the centre along with a little Gesso to the edges of the petals. My Chrysanthemums were folded in half, offset, glued in place and the petals ruffled. Leaves were rubbed at the edges with a little Distress and a wooden heart added.


My heart I paper pieced back in the centre with a different shade of paper and Pearls added. The word Forever was layered twice for depth.


I colour tinted my image and added it on to the Alpine Flourish frame.


Finishing off my card by adding Pearl swirls and a delicate butterfly.

Hope you have a fabulous weekend and see you all next week.

 Julie x

Shop at Cheery Lynn For :


Friday, 9 January 2015

Cheery Lynn New Release

Hi Everyone, We are all very excited at Cheery Lynn Designs as this is the first New Release of 2015 and is being launched at the CHA show. I feel so honoured and proud to know my cards will be on display at the Cheery Lynn Designs Stand.

I am showcasing 3 of the new dies today, so please also pop over to the Cheery Lynn blog HERE to see what my talented team mates are showcasing from the New Release. This is a fantastic Release giving you even more versatility with your die cuts, as you can make a variety of patterns with the new border dies and I had amazing fun working with them.


This first card shows one of the new sets of words. Once Upon A Time, I love this little saying as it is so Apt for many cards or scrapbook pages. I decided to use this on a baby card.


You will see in this first photograph I tattered the edges of my layers and then cut out strips from the Horizon frame and paper pieced layering on some ric rac.


Here I started to layer on a row of my corner dies in blue around my frame.


Here you will see another row being placed on.


I placed my ruler across my card to get my wording straight, double layering it.

Cheery Lynn New Release dies used

Other Cheery Lynn Dies Used

My next card 


For my Easter card I have used 2 other new dies,


Happy Easter which was layered up twice and I added some flowers from my Tiny Flower kit.


Now if you look down the sides of this card again you will see this lace pattern. This is one of our new clever border/edger dies which come in sets of 3 and can interlink together or you can use one at a time. You decide where you want to place it on your card to cut. They also compliment Doilies that were out in our previous release for even more versatility and choice to match up on your craft projects.


Cheery Lynn New Release Dies Used

Other Cheery Lynn Dies Used

Click HERE to see all the New Release Dies at Cheery Lynn Designs

Thanks for stopping by and I will be back tomorrow to show you another card using more of the New Release dies.


Julie x

Saturday, 13 December 2014

A Festive Card

Click to Enlarge

Hi Everyone, I can't believe we are now less than 2 weeks away from Christmas and still so much to do LOL.
Thank you so much to everyone for their kind comments with my Mixed Media Tutorial last week, I really appreciated it. For my DT Post at Cheery Lynn Designs this week, I have made a Christmas card to share with you all. Let me take you through the steps of making this card.


I first of all stamped my Crafty Individuals image in black onto Kraft card and heat embossed with clear ink. Shading my image with Copics and adding Stickles to the berries.


I next paper pieced my large Snowflakes and Pine Branches to the reverse of my card layers to form frames.


You will have noticed on the green foliage I also cut out the top of the branch and layered on to form a corner point.


The Poinsettia's were made by colouring strips of white paper with Distress Spray Stains. I used Aged Mahogany, Festive Berries and Brushed Pewter and dried with my heat gun before adding a touch of gold mica spray. I then die cut out my Poinsettia Strip. 


You get beautiful different shades on your flowers which gives a realistic look. I added some stamens and built them up.


I paper pieced my Holly and my Pine Branches onto my card, checking my Poinsettia would hide the joins before I finally glued on top. finally adding Stickles around the Perimeter.


Thanks for stopping by.

Julie x


Shop at Cheery Lynn for :


Saturday, 18 October 2014

Wish You Were Here


Hi Everyone, Can you believe it's the weekend once again and only another week until the clocks change here in the UK and the dark winter nights are upon us.

For my Cheery Lynn Designs DT card I have used some more of the new release dies. I stamped my postcard stamp, shaded it with Distress added some crackles and mounted onto the Alpine Flourish Doily die. I totally love all the detail on this die and shaded it also with distress. It gives a stunning Vintage look. The clever thing with this die is you have the option of having a solid centre to stamp on, add a sentiment to or place your centre coordinating die piece into it for a lace look.


My binoculars I die cut out in Grey and Black cardstock slightly off setting for a shadow effect. I then put some Glossy Accents onto the lens area and rubbed a little distress over to highlight.


A pretty Vintage style flower and some black gems were added to finish my Parisian themed card.

Hope you all have a Crafty Weekend.


Julie x


Cheery Lynn New Release Dies Used:

Other Cheery Lynn Dies used:


Wednesday, 15 October 2014

New Release at Cheery Lynn Designs


Hi Everyone. Today is a very exciting day over at CheeryLynn Designs as their latest release of dies are showcased. They have many new wonderful Themed Dies and an amazing new collection of Doily Dies in squares, circles and rectangles called their Diamond Doily collection. These dies are going to become a staple in many of our collections of dies. There versatility to mix and match with stacker dies, we will now all have a lot more possibilities of different designs and patterns.


For my card I used 3 of the New Release dies on this card. The centre of the doilies comes out and is able to be placed anywhere on a piece of paper or in to a decorative stacker frame. You will notice in the background that I cut using the centre part of my doily on all four corners and layered dark card behind to make it pop. I thought I had taken a photo of this stage but I think with the excitement on using these new dies I forgot, but will take one the next time I do this technique, so it becomes clearer.


I did the same technique on my fishtail banner with the Alpine Flourish Doilies centre. I also mixed and match my doily layers for different designs.


Bling, Butterflies and a Flower were all placed on my card to finish. Please pop over to the blog here to see all the other cards made from our Talented Team at Cheery Lynn Designs.


Cheery Lynn New Release dies used:

Other Cheery Lynn Dies used:


Enjoy your week,


Julie x

LinkWithin

Related Posts Plugin for WordPress, Blogger...
01 09 10