Translator

Showing posts with label Square Classic. Show all posts

Saturday, 14 November 2015

Love You


Hi Everyone, today for my DT card at Cheery Lynn Designs I'm sharing with you a card using one of their fabulous new word dies - Love You. I gave my card a Masculine touch, hopefully to inspire you, as I know we all struggle when it comes to thinking what design to make for a Male, but changing the colours and adding a flower would equally give this design a feminine look.


I used several of my Stacker dies to build my layers and with it coming close to the Festive season I just had to add some Platinum Stickles for an accent of bling.


My Ink bottle was coloured with a Copic Pen and I wrote the work Ink on it. My Feather I inked the edges and ruffled the sides for a realistic look.


I fussy cut a heart shape to place behind my heart doily and gave my word Hugs a shadow effect.

Thanks for stopping by today and I hope to catch up with your blogs shortly.

Julie x

Shop at Cheery Lynn For :


Saturday, 7 November 2015

Mixed Media Christmas Card


Hi Everyone, today I am sharing some Festive Inspiration using the new Royal Scandinavian Doily from Cheery Lynn Designs for my DT card.


I die cut out my Doily and Corners and heat embossed with a Gold Tinsel Embossing Powder, layering on to my patterned cardstock.


Next I started to cut out my Candlelight die 3 times, so I had plenty parts to build up my layers for texture. My foliage was shaded with Copics, shaped on my embossing mat and layered up a few times. My Poinsettia was also shaded with Copics, layering in my shaped petals and adding a little Gold Flower Soft to the centre.


My candles were layered twice. On the top section I brushed on some Beeswax which I had melted in my Meltpot. I then added some drips of wax and once set highlighted with Gilding Wax. My flames were shaded with Copics and some Glossy Accents added onto them.

I do hope you have enjoyed my techniques and feel inspired to try them out on your die cuts.

Thanks for stopping by today. 

Julie x 

Shop at Cheery Lynn for:

 Other Cheery Lynn Dies Used:


Saturday, 29 August 2015

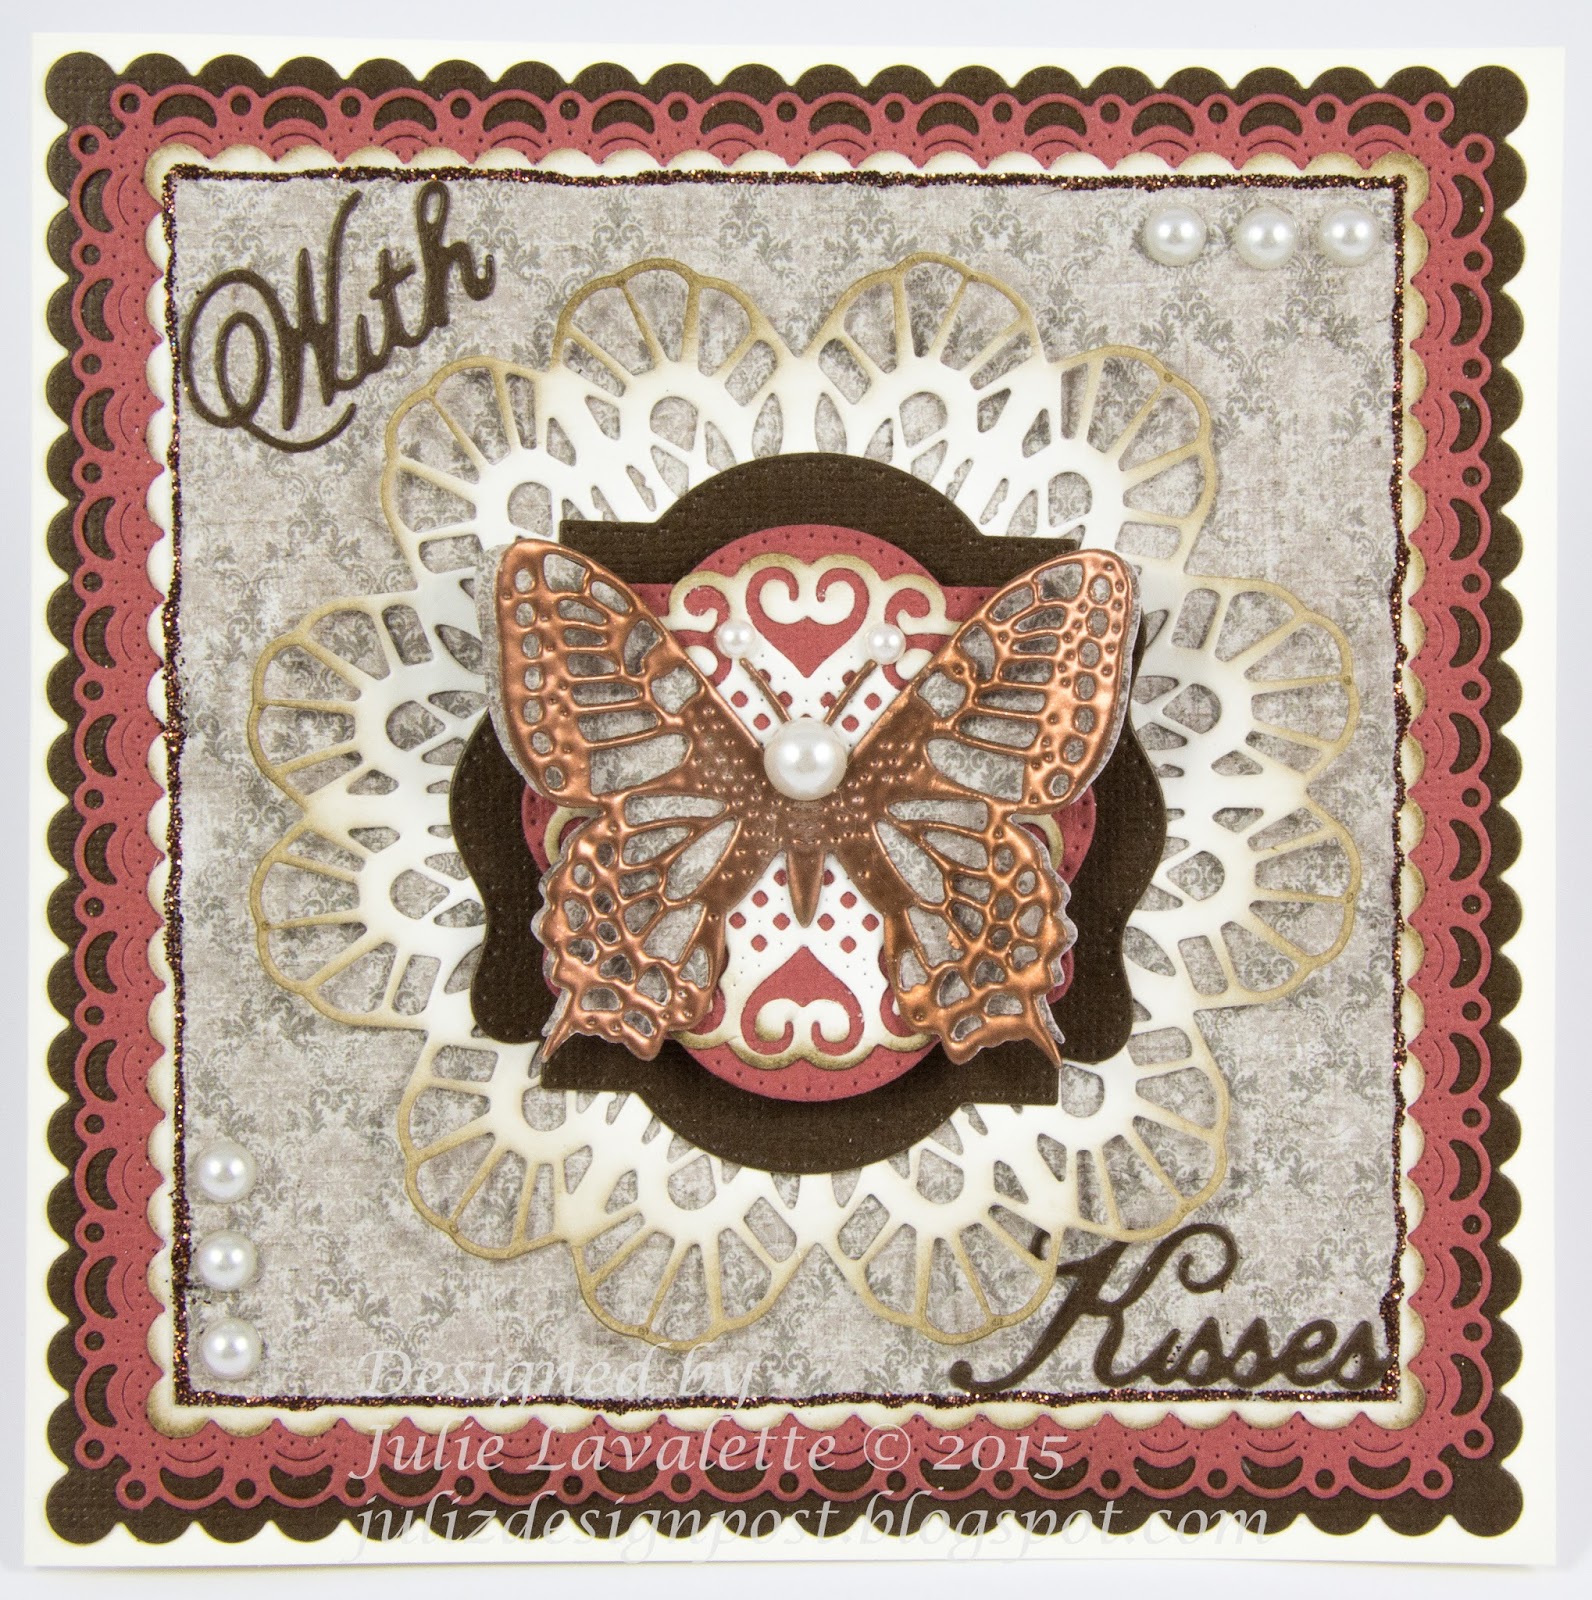
With Kisses


Hi Everyone,  Cheery Lynn Designs do the most wonderful Butterfly dies in many different styles and sizes with Angel wings for perfect layering. So for my DT card this week I thought it would be nice to show you all how they can hold centre stage on a card for a wow factor.


I started by matting and layering my stacker dies to give a detailed border with contrasting colours and adding some Copper Stickles around the edge of my centre mat.


My Doily was cut out in Cream Cardstock and shaded with Distress ink, matting onto my Pierced stackers along with my Lords and Commons Super Doily. My Butterfly was heat embossed with Copper Embossing Powder and layered onto my Angel Wing Die, finishing off with a few pearls and a Sentiment.

Thanks for stopping by today.

Julie x

Shop at Cheery Lynn for: 

Saturday, 20 June 2015

Summer Garden


Hi Everyone, Isn't it lovely the summer flowers are starting to bloom and I thought this week I would bring part of my garden onto my DT card at Cheery Lynn Designs. Today my post is scheduled as we are off for a summer break, hence why I may be a little quieter in Blogland over the next ten days or so depending on internet connection.


I started by layering my Flourish onto my card as a background accent and added my Pocket Watch with silicone glue.


My leaves were cut out in green card stock and shaded with distress ink, rolling my edges and layering on with Silicone to give a natural look to my leaves. My Flowers were coloured with Copics and a little Flower Soft added to the centres.


We have a Baby Blue Tit which frequents our garden regularly and I just had to include him on my card. I shaded him with Distress inks and used a Fineliner to hi light the black.


Adding Stickles, bling and a stamped sentiment which was fussy cut to finish.

Thanks for stopping by to see my post today. 

Julie x

Shop at Cheery Lynn For:


Saturday, 13 June 2015

Fathers Day Card


Hi Everyone, a week on Sunday marks the Celebration of Fathers Day in both the UK and USA, so I thought it would be nice to share my DT card for Cheery Lynn Designs this week. My Dad loves being out in his garden and his cat is not usually far away from him, so I decided to create this little scene on my card.


I started off by using the Brick Embossing Plate and some Beige card stock. Once embossed I dry brushed Gesso onto my bricks to highlight them.


Next mounting onto Green Cardstock and stitching around the edges for detail.


My garden fence was shaded with a little Distress ink to shabby it up and a couple of layers of grass added.


My watering can I added a little gilding wax to highlight it. My flowers,leaves and dragonfly were shaded with Copics.


My sunflower was shaded also with Copics and I made the word Dad from my words Day and And as I have still to get the Cheery Lynn die - Dad.


Thanks for stopping by today and for the lovely comments you leave, I love to read them all. See you all soon.

Julie x

Shop at Cheery Lynn for:


Saturday, 28 February 2015

Wedding/Celebration Stationery


Hi Everyone, today I am sharing with you my DT project for Cheery Lynn Designs. With the Wedding Season fast approaching I thought it would be nice to share some Invitations with you today that could easily be adapted for any other celebration/occasion.


Here is a close up photograph of my Wedding Invitation. In the aligning up of the dies my DT mate Sandy shows how to do this in a Tutorial HERE, so I won't go into details.


My words were stamped using Archival Ink and a little Stickles was added for sparkle, along with some gems. I attached my ribbon using extra strong tape tucking in the edges before matting onto my card.


My Evening Invitation compliments the Wedding one. I stamped directly onto my card with Archival Ink adding on my mats and layers, Stickles and a few gems. I kept this card simple, so several could be made should you have a lot of invitations to make.


My Place Settings were made be cutting out the scalloped rectangle, scoring down the middle and adding my die cut layer. Bride and Groom were handwritten on. You could also computer generate your names and cut out before layering on.
  
Hope you have enjoyed my post and have a great weekend.
See you all next week.

Julie x

Shop at Cheery Lynn  for :

For the Wedding Invitation


For the Evening Invitation


For Place Cards


Saturday, 17 January 2015

Mayan Butterfly Card


Hi Everyone, from a wild, wintry Scotland. Today for my DT post at Cheery Lynn Designs I am showcasing the stunning Mayan Butterfly. There are 4 newly released Large Butterflies available individually in this collection and all have Angel Wings, please check them out HERE.


In this photo you will see how I cut my layers to give an aperture on my card. I used Coordinations Cardstock and sanded it back to reveal a bit of the core, followed by using my Brick Embossing plate to add more texture.


My Mayan Butterfly was die cut 4 times using 300gsm Cardstock.


I then shaded a few colours of Distress Ink to the edges and added a spritz of Mica Spray, drying off with my heat gun.


You will see the difference from one layer on my card to the finished result of the 4 layers. I glued the centre and edges of my Butterfly only bevelling it up slightly so my wings wouldn't lie flat and would add depth and rigidity to them.


My Flourish Band I wanted to be at the edge of my card, so I simply cut it in half as I new I was mounting my flowers across it and this would hide the space in the middle. The Shasta Daisies were layered up with a little Distress ink and Flower Soft added into the centres.

Hope you enjoyed my post today, I really appreciate you stopping by and leaving a comment. Have a lovely weekend.

Julie x

Shop at Cheery Lynn for:


Friday, 9 January 2015

Cheery Lynn New Release

Hi Everyone, We are all very excited at Cheery Lynn Designs as this is the first New Release of 2015 and is being launched at the CHA show. I feel so honoured and proud to know my cards will be on display at the Cheery Lynn Designs Stand.

I am showcasing 3 of the new dies today, so please also pop over to the Cheery Lynn blog HERE to see what my talented team mates are showcasing from the New Release. This is a fantastic Release giving you even more versatility with your die cuts, as you can make a variety of patterns with the new border dies and I had amazing fun working with them.


This first card shows one of the new sets of words. Once Upon A Time, I love this little saying as it is so Apt for many cards or scrapbook pages. I decided to use this on a baby card.


You will see in this first photograph I tattered the edges of my layers and then cut out strips from the Horizon frame and paper pieced layering on some ric rac.


Here I started to layer on a row of my corner dies in blue around my frame.


Here you will see another row being placed on.


I placed my ruler across my card to get my wording straight, double layering it.

Cheery Lynn New Release dies used

Other Cheery Lynn Dies Used

My next card 


For my Easter card I have used 2 other new dies,


Happy Easter which was layered up twice and I added some flowers from my Tiny Flower kit.


Now if you look down the sides of this card again you will see this lace pattern. This is one of our new clever border/edger dies which come in sets of 3 and can interlink together or you can use one at a time. You decide where you want to place it on your card to cut. They also compliment Doilies that were out in our previous release for even more versatility and choice to match up on your craft projects.


Cheery Lynn New Release Dies Used

Other Cheery Lynn Dies Used

Click HERE to see all the New Release Dies at Cheery Lynn Designs

Thanks for stopping by and I will be back tomorrow to show you another card using more of the New Release dies.


Julie x

Saturday, 20 December 2014

Merry Christmas Everyone

Click to Enlarge

Hi Everyone, here in Scotland we have had our first covering of snow on the hills and it has turned very cold, but I don't think we will get a White Christmas. 
My DT card this week for Cheery Lynn Designs has been arranged by building up layers of die cuts in complimentary colours of card.


You will notice I have added Stickles to help define my layers and to add the all important sparkle to a festive card. 


My Poinsettia's were made by colouring White card with Distress Spray Stains and adding a little Gilding wax to the edges and a few stamens in the centres. I arranged my Holly Leaves and Pine Branches to form a Festive arrangement. 


I stamped my centre image adding more Stickles and Silicone glue to raise it up slightly. Finishing off my card with a few Red Gems. 

I would like to wish you all a Merry Christmas and thanks so much for all your lovely comments throughout this year. I have loved reading them. 

Julie


Shop at Cheery Lynn for : 


Saturday, 13 December 2014

A Festive Card

Click to Enlarge

Hi Everyone, I can't believe we are now less than 2 weeks away from Christmas and still so much to do LOL.
Thank you so much to everyone for their kind comments with my Mixed Media Tutorial last week, I really appreciated it. For my DT Post at Cheery Lynn Designs this week, I have made a Christmas card to share with you all. Let me take you through the steps of making this card.


I first of all stamped my Crafty Individuals image in black onto Kraft card and heat embossed with clear ink. Shading my image with Copics and adding Stickles to the berries.


I next paper pieced my large Snowflakes and Pine Branches to the reverse of my card layers to form frames.


You will have noticed on the green foliage I also cut out the top of the branch and layered on to form a corner point.


The Poinsettia's were made by colouring strips of white paper with Distress Spray Stains. I used Aged Mahogany, Festive Berries and Brushed Pewter and dried with my heat gun before adding a touch of gold mica spray. I then die cut out my Poinsettia Strip. 


You get beautiful different shades on your flowers which gives a realistic look. I added some stamens and built them up.


I paper pieced my Holly and my Pine Branches onto my card, checking my Poinsettia would hide the joins before I finally glued on top. finally adding Stickles around the Perimeter.


Thanks for stopping by.

Julie x


Shop at Cheery Lynn for :


LinkWithin

Related Posts Plugin for WordPress, Blogger...
01 09 10