Translator

Showing posts with label Rose Leaf Strip. Show all posts

Friday, 3 February 2017

Be My Valentine


Hi everyone, today for my DT card at Cheery Lynn Designs I thought I would share some inspiration for Valentines Day using the beautiful intricate Doily called Sophie's Heart as my pretty backdrop to my card.


My flowers are made using the Sweet Williams die strip cutting them out in white cardstock and inking at the edges with Distress Ink. Next I sprayed the petals with a little water and added folds to each petal drying with my heat gun. I added several layers to my flowers finishing with a few pearl stamens.


My flowers were mounted onto my card with a mix of leaves and flourishes for added detail and interest.

Thanks so much for stopping by today and I hope my card inspires you to make some pretty flowers or a Valentine card for a loved one.

Crafty Hugs,

Julie x
Cheery Lynn Dies Used:

Friday, 15 April 2016

North American Release - Cheery Lynn Designs Blog Hop


Hi Everyone, thanks for stopping by today and welcome to our latest blog hop at Cheery Lynn Designs. We are all excited to be sharing with you the latest North American Release of dies. There is 63 dies in this latest collection, where you can find every state and region of the U.S and Canada.

I am first on the blog hop roll, so please just click on Lisa's name at the end of my post to continue hopping.


I decided to make a home decor item as inspiration with my dies of choice Texas, Maine and California. So let me show you how I made this.


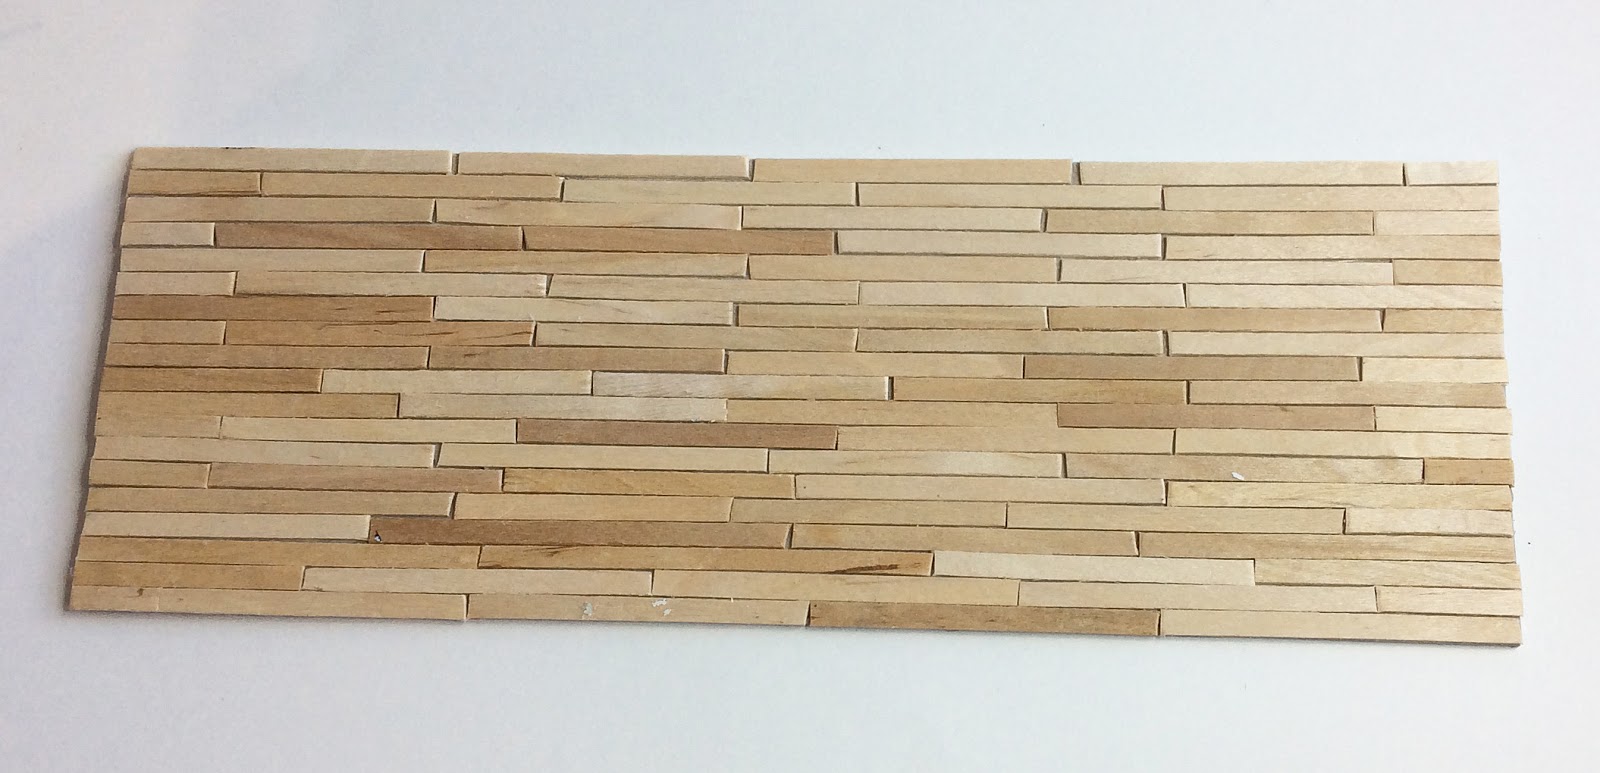
I started off by cutting a piece of Greyboard to approx 12 x 4. Next I cut coffee stirrer sticks in half and trimmed the angled end off them. I glued in place across my greyboard and weighed it down until dry. I gave this board a whitewash of paint and a layer of DecoArt varnish to seal.


You will see on this photo I glued two papers together onto white cardstock to resemble the American flag and placed my dies on to cut out.


My lady was cut out from the Maine die using Tim Holtz Family pack. All my State Letters, Stars and Explore were heat embossed with Red Tinsel embossing powder for an added sparkle.


My Red Roses are to represent the national flower of the United States, adding some leaves and Baby's Breath for added detail.


I added some metal screw brads to the corners.


These dies are fantastic for scrapbooking, memorabilia projects, cards, home decor and lots more. You will see lots of inspiration from my fellow Teamies as you visit their blogs.


Another look at my finished project.

I'd love if you leave a comment to let me know you stopped by on our BLOG HOP and be sure to head over to LISA'S blog next.

Once you have finished hopping be sure to leave a comment at Cheery Lynn Designs to be in with a chance to win a $20 prize for one random commenter.

Have fun and Happy Crafting,

Julie x

Cheery Lynn Products Used:


Monday, 29 February 2016

Hop on over to - A Vintage Journey


Hi Everyone, It's my turn to be hosting the Destination Inspiration post over at A Vintage Journey today. 
It would be lovely if you popped over HERE to see my full tutorial on my card.
Happy Crafting,

Julie x

Cheery Lynn Dies Used:


Monday, 21 September 2015

Hello Friend


Hi there fellow bloggers, I hope you all had a lovely weekend. Today I am sharing with you a card made with the most amazing 12x12 paper pad called Bloom Beautiful from Craft Consortium. When I first saw this pad I just ooh'd and ahh'd at every sheet and I am continuing to drool over this paper pad every time I open it. Please check it out HERE.


I started off by die cutting my Birdcage in Chipboard and adding some DecoArt Crackle paint. Whilst still wet I sprinkled a little Distress powder in Milled Lavender and dried it with my heat gun so the paint would bubble a bit more for texture. Finishing off with a little gilding wax and fussy cut birds from the paper pad.


I sprayed my paper with a little water on the reverse side and gathered in to look like a curtain, drying in place with my heatgun. I added 2 rows of stitching, a handmade Rose along with a stamped sentiment and a ribbon to finish.

Thanks for stopping by today.

Julie x

Paper Used:

Cheery Lynn Dies used :

Saturday, 7 March 2015

Vintage Easel Card


Hi Everyone, for my DT Card at Cheery Lynn Designs today, I am sharing with you how to cut an easel card using your dies. Let me talk you through my photographs.


My card was folded in half. Notice how I have placed my die slightly off the edge of my card so it doesn't cut my fold when I run through my die cutting machine. I next placed the die to the opposite end and cut. I now had my shaped card.


My topper was cut to form the top of my easel card in white and patterned paper for the top and bottom part. You will also see in the second photo how my folded card looks opened up. My layers were glued to form my easel.


My doily was double heat embossed for a smooth finish and some bling added into the centre of the flowers.


Love these little butterflies for an accent. I double layered them and added a touch of bling to the centre.


My Rose was cut out of white cardstock and a little Frayed Burlap Distress ink added. This was then mounted onto my bow with a few leaves, my corner die and little butterflies.

the 

Thank you for stopping by and I appreciate all comments left, see you again soon.

Julie xx

Shop at Cheery Lynn for : 

Saturday, 3 January 2015

Butterflies and Flowers Card

Click to enlarge

Happy New Year to Everyone, I hope you have all had a wonderful time during the festivities. For my DT card at Cheery Lynn Designs this week I decided to use the fabulous Chrysanthemum Strip to make an abundance of flowers for my card.


I started off by die cutting my background in a Dusky Pink Shade.


My doily was edged with Spun Sugar ink at the edges and in the centre, this softened the starkness of the White Cardstock against my vintage image and I also added some Pearlised Glitter glue.


My flowers were made by adding a little Spun Sugar ink into the centres of each layer. I used my embossing tool to shape the petals, layering up and adding Flower Soft to the centres.


My leaves were cut out in different shades of Green and my Butterflies were double layered with 2 shades of Pink Cardstock.


Finally arranging my floral bouquet onto my card.

See you all next week.

 Julie x

Shop at Cheery Lynn For :


Saturday, 22 November 2014

Especially for You - Tag

Click to Enlarge

Hi Everyone, I decided to join in the fun of the challenge at Cheery Lynn Designs this week and make a tag for my DT post. I had full intentions of it being Festive in style, but it was such a horrible day outside I decided to think of summer days.


I cut a piece of Cardstock into a tag shape measuring 3.5 by 8 inches. I mounted my pink striped paper onto it which was distressed at the edges with my distress tool, to give a shabby feel.  I cut out my Deco Border in pink and white paper and offset one in front of the other to give added dimension.


I cut sections of my Snowflake Doily and placed on my tag for interest and texture. Next layering my fanciful flourishes on top.


My flowers were cut out in white card. I dabbed a little distress into the middle area of the flowers for shading and added flower soft for texture into the centres to finish them.


My speech bubble is from the Latest Release. The die is called Say What and has many shaped bubbles which are so much fun to use. I stamped a sentiment onto it and added distress ink around the edges.


My doll stamp was coloured with Copics and her dress was stamped on patterned paper and layered up. Finally adding a ribbon and some bling for finishing touches.

Hope you have a lovely creative weekend,


Julie x

Shop at Cheery Lynn For :


Monday, 10 November 2014

Thank You Gift Card


Hi Everyone, thanks for your continued support with comments especially with me running behind with all your lovely blogs. Today, I am delighted to be sharing my post as a Guest Designer at Craft Hoarders Anonymous after my win with my Cherub Keepsake Box here.
The challenge is 'For all that you do,Thank you'. It describes to make a Thank you gift for this challenge, a hostess gift or a simple thank you card.


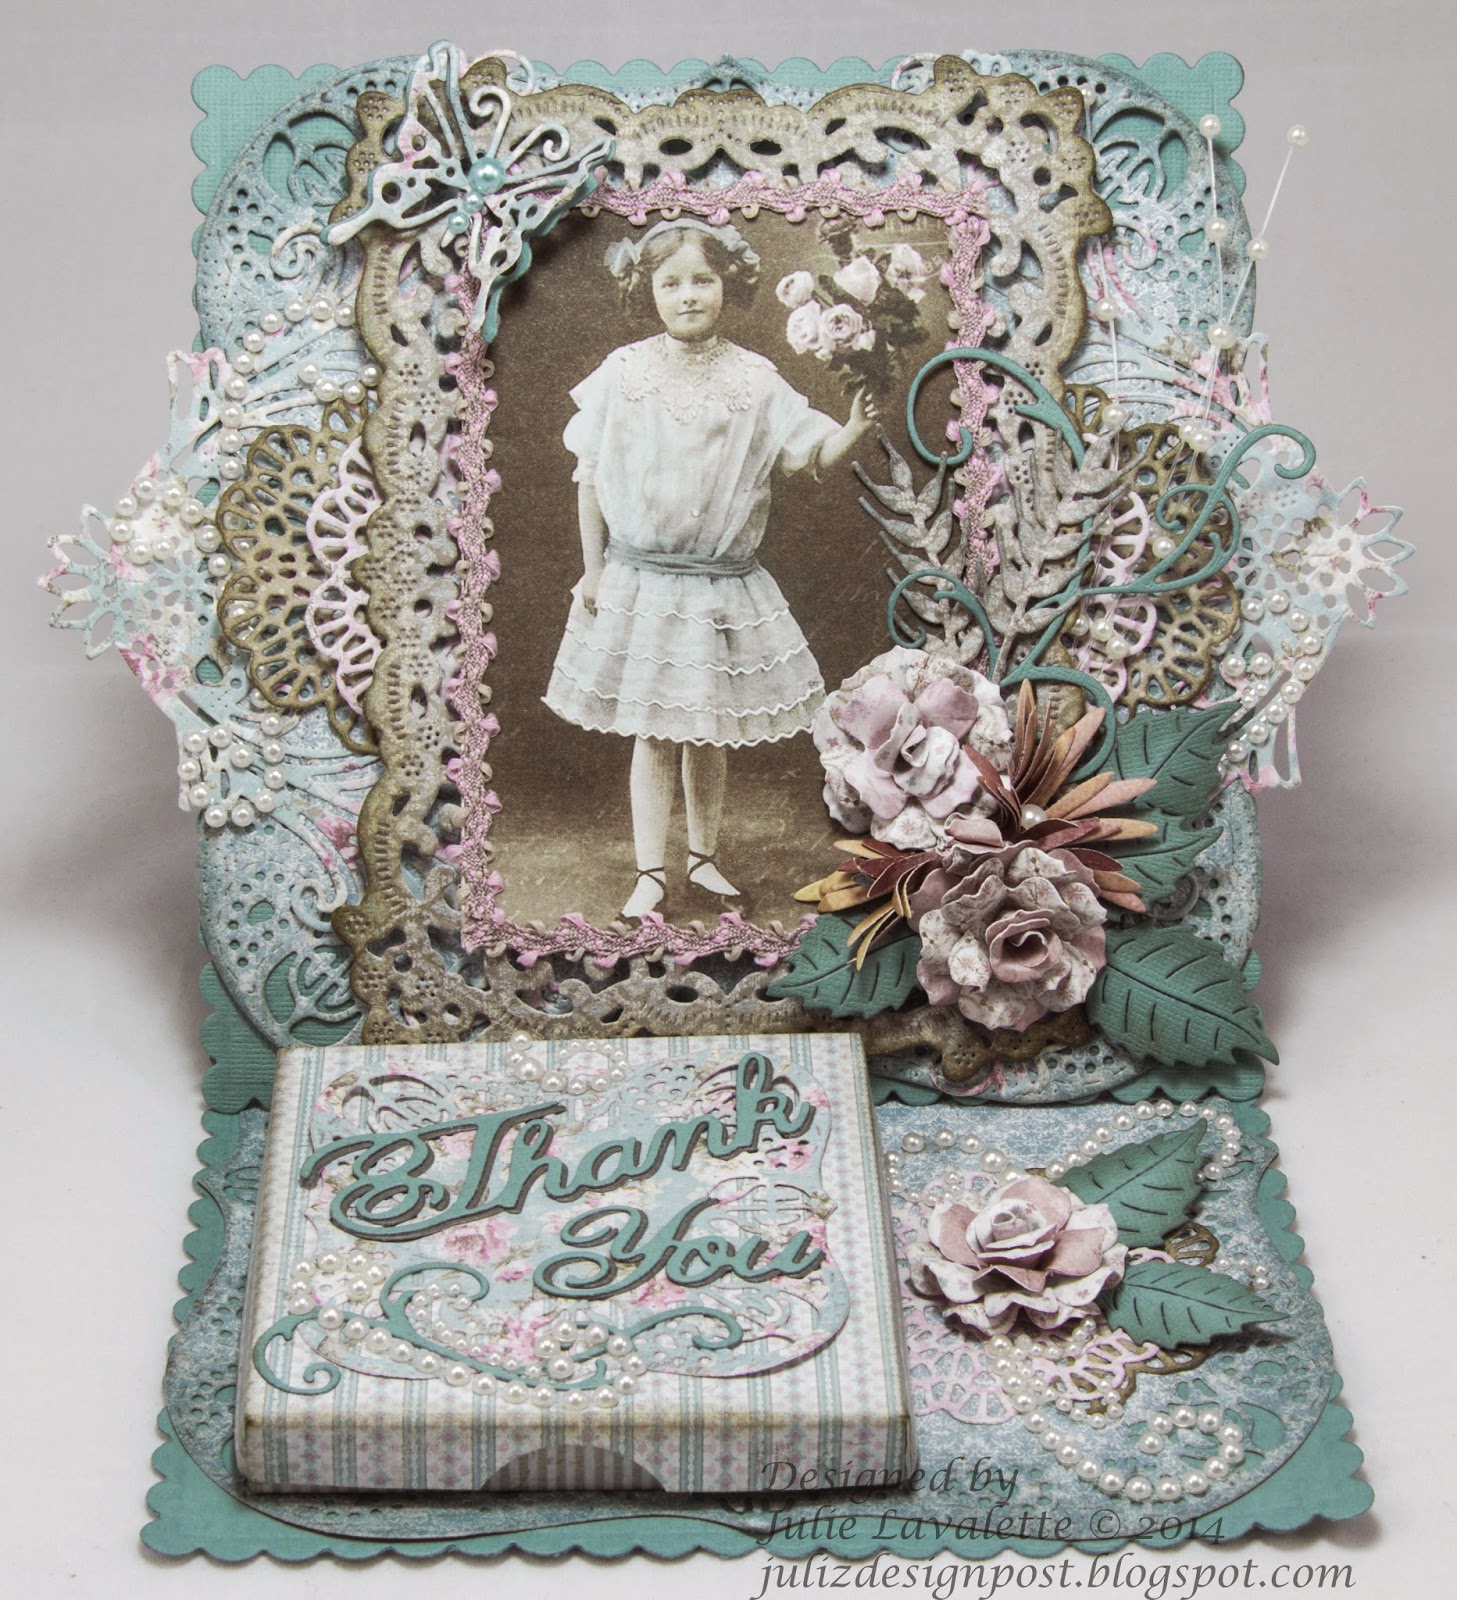
My mum asked me around the same time to make a Thank you card for her friend she had stayed with recently in Finland. She explained to me she adored the vintage style, lace, pearls and a very ornate look. I decided to make an easel card and inside the little gift box I placed some Post - it notes. This way she could have it on display and always know where to get a bit paper if needed.


My image is from Pion and my papers are all Maja.


My box I made using my Scorpal board. Sorry I can't show you inside, I realised I didn't have this photo and it is now in Finland.


My die cuts are all Cheery Lynn and the lace is from my craft stash.

Please pop over to Craft Hoarders Anonymous to see the talented Design Team's post of inspiration for this challenge which started last week and you will also see a variety of Guest Designers posting at the same time as myself. Good luck to everyone entering their challenge.


Julie x

Cheery Lynn dies used:


Saturday, 25 October 2014

Ornate Vintage Card


Click to Enlarge

Hi Everyone, hope you are all having a lovely weekend.

For my Cheery Lynn DT card this week I decided to showcase the versatility of one of my latest favourite dies from the newly released Cheery Lynn Designs Doily Collection called Alpine Flourish Doily. 

This die comes as a set of 2. You have the option to have a solid centre or use the ornate centre in the middle of your doily. For my card this time, I opted to have the solid centre as I wanted to stamp and mount a verse to place on it using the card maker die, this also fits perfectly as a mount to the back of my Alpine Flourish.


You will notice the ornate sides on my card are die cut using the centrepiece from my doily. I then mounted onto my plain card stock to make my design pop forward.


My flower and leaves were shaded with distress inks and mounted onto the Italian Flourish Mini Doily. I die cut out 2 doilies and made a cut into the centre on both of them. Next folding back and forward in a concertina style, I glued them together at the edges to form the full circle again.

I added a little stickles and distress around the edge and pearls to finish.

Cheery Lynn New Release:


Other Cheery Lynn Dies Used :


Thanks for stopping by to see my card today. 

Julie x


Saturday, 18 October 2014

Wish You Were Here


Hi Everyone, Can you believe it's the weekend once again and only another week until the clocks change here in the UK and the dark winter nights are upon us.

For my Cheery Lynn Designs DT card I have used some more of the new release dies. I stamped my postcard stamp, shaded it with Distress added some crackles and mounted onto the Alpine Flourish Doily die. I totally love all the detail on this die and shaded it also with distress. It gives a stunning Vintage look. The clever thing with this die is you have the option of having a solid centre to stamp on, add a sentiment to or place your centre coordinating die piece into it for a lace look.


My binoculars I die cut out in Grey and Black cardstock slightly off setting for a shadow effect. I then put some Glossy Accents onto the lens area and rubbed a little distress over to highlight.


A pretty Vintage style flower and some black gems were added to finish my Parisian themed card.

Hope you all have a Crafty Weekend.


Julie x


Cheery Lynn New Release Dies Used:

Other Cheery Lynn Dies used:


LinkWithin

Related Posts Plugin for WordPress, Blogger...
01 09 10