Translator

Showing posts with label French Flair Doily. Show all posts

Monday, 14 August 2017

Songbirds


Hi everyone thanks for stopping by, today for my DT card at Cheery Lynn Designs I am sharing some more inspiration using their fabulous new Vintage Dies.


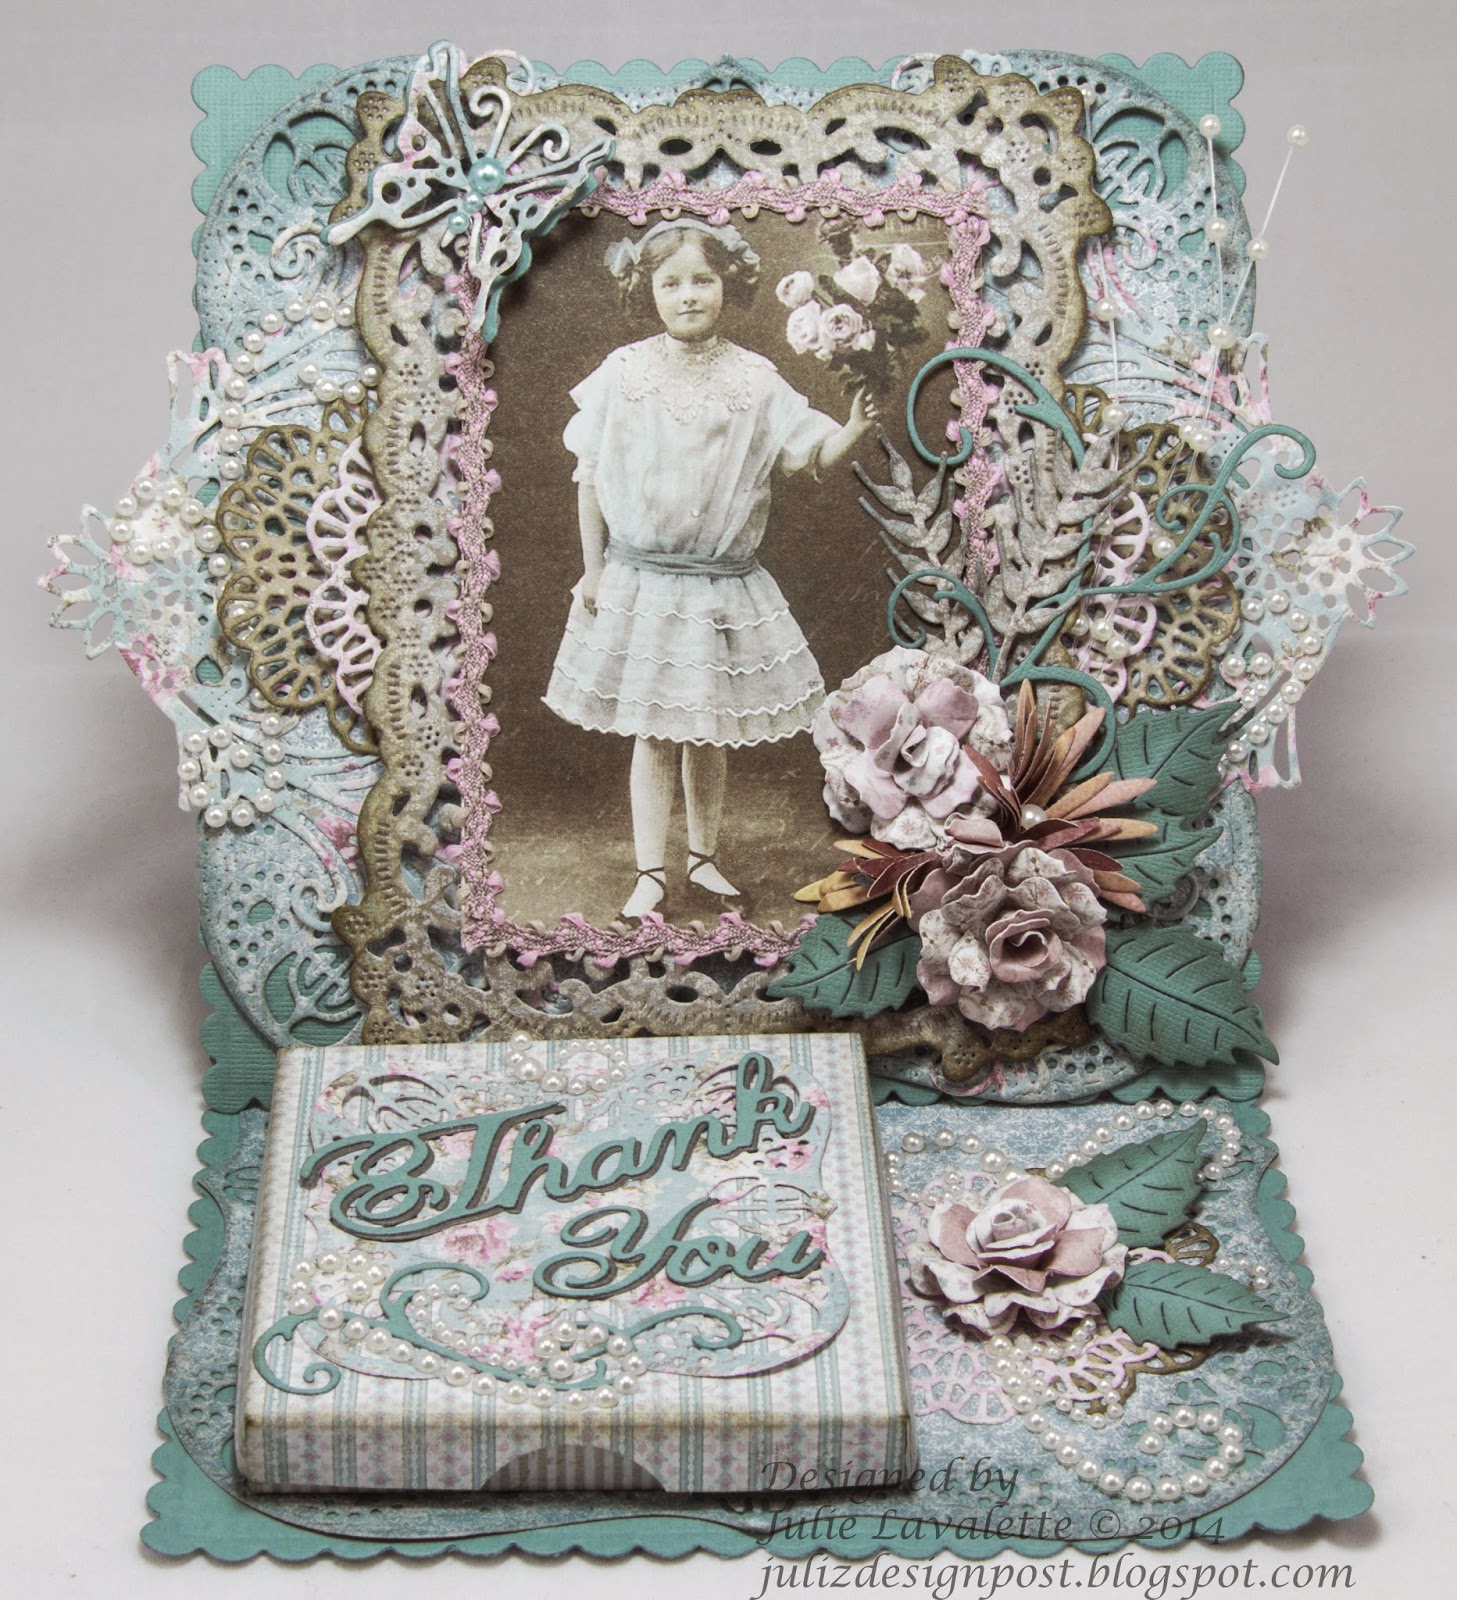
My card has lots of layers using coordinating papers from Pion Design. I started by Die cutting my layers and adding Gilding Wax around the edges. This was to compliment my Gilded Birdcage and to give an opulent feel to my card.


You will also notice my diecut corners have had Gilding Wax rubbed all over them.


The corner of my paper was placed into my Die and cut to give a curved edge and I fussy cut around the bird and foliage, mounting in place with some Silicone Glue and a touch of Cheesecloth.


My centre layers I layered in place with foam tape for added dimension, adding some sweet birds onto my Birdcage for extra detail.


Finishing with a pretty Floral bouquet, some die cut feathers and bling.

Wishing you a lovely week.

Happy Crafting, 

Julie x

Cheery Lynn Dies Used :
LPC12 French Flair Pierce and Cut Tool

Saturday, 12 December 2015

Joy to the world


Hi Everyone, today for my DT card at Cheery Lynn Designs I am sharing with you my latest Festive card making a Christmas Wreath for my sweet little Robin to sit on.


I started by matting and layering my first few chosen layers adding Stickles and Distress ink around the edges. You will also notice on my top layer I highlighted all the pierced holes with a red Fine Liner Pen and scattered some Frantage embossing Powder for a snowy effect.


My Wreath was cut out 3 times and my base layer was cut in half and slightly offset to give the illusion of more foliage gluing another layer on top. My final layer I added heat set Mistletoe coloured embossing powder onto the foliage this gave it added sparkle and detail.


My Robin was shaded with Distress Inks and some Black Liquid Pearls added to his eye. My Candy Canes are from the Build a Tree set, I die cut them in White cardstock and added some red with a Fine Liner Pen.


My wording was heat embossed with Red Tinsel and offset onto Green Card Stock for a shadow effect.


Finishing off with my Pretty Bow.

Thanks for stopping by today and for your continued visits and comments, I really appreciate them. 

Crafty Hugs,

Julie x

Shop at Cheery Lynn for:
I wish to enter this in to the following Challenges:

Saturday, 23 May 2015

Documented Card


Hi Everyone, sorry I have been rather quiet in Blogland this week. One of my darling Siamese Cats - Simba took seriously ill over a week ago and has required 24 hour nursing, so all my energy has had to focus on him. I was back at the Vet yesterday and he now feels confident he will make a full recovery, I do hope so as he is a beloved member of our family. Today I am showcasing some more of the April 2015 New Release for my DT card at Cheery Lynn Designs as this week's challenge is - Make it Manly.


The French Flair Stackers have little piercing holes in them which compliments the new Pierced Banners and Pierced Stackers so well when layering up.


My ink pot I cut in patterned paper and added a little crackle glaze to it adding my feather which was cut out in patterned paper.


I added a little bling to my Fleur de Lis for interest.


I stamped my word Documented with Archival Ink. Notice also how the Lords and Commons Super Doily fits perfectly onto my Pierced Stackers.

Thanks for stopping by today I appreciate your visit and hope to pop by your Blog soon.

Julie x 

Shop at Cheery Lynn for:

Other Cheery Lynn Dies Used:


Saturday, 3 January 2015

Butterflies and Flowers Card

Click to enlarge

Happy New Year to Everyone, I hope you have all had a wonderful time during the festivities. For my DT card at Cheery Lynn Designs this week I decided to use the fabulous Chrysanthemum Strip to make an abundance of flowers for my card.


I started off by die cutting my background in a Dusky Pink Shade.


My doily was edged with Spun Sugar ink at the edges and in the centre, this softened the starkness of the White Cardstock against my vintage image and I also added some Pearlised Glitter glue.


My flowers were made by adding a little Spun Sugar ink into the centres of each layer. I used my embossing tool to shape the petals, layering up and adding Flower Soft to the centres.


My leaves were cut out in different shades of Green and my Butterflies were double layered with 2 shades of Pink Cardstock.


Finally arranging my floral bouquet onto my card.

See you all next week.

 Julie x

Shop at Cheery Lynn For :


Monday, 10 November 2014

Thank You Gift Card


Hi Everyone, thanks for your continued support with comments especially with me running behind with all your lovely blogs. Today, I am delighted to be sharing my post as a Guest Designer at Craft Hoarders Anonymous after my win with my Cherub Keepsake Box here.
The challenge is 'For all that you do,Thank you'. It describes to make a Thank you gift for this challenge, a hostess gift or a simple thank you card.


My mum asked me around the same time to make a Thank you card for her friend she had stayed with recently in Finland. She explained to me she adored the vintage style, lace, pearls and a very ornate look. I decided to make an easel card and inside the little gift box I placed some Post - it notes. This way she could have it on display and always know where to get a bit paper if needed.


My image is from Pion and my papers are all Maja.


My box I made using my Scorpal board. Sorry I can't show you inside, I realised I didn't have this photo and it is now in Finland.


My die cuts are all Cheery Lynn and the lace is from my craft stash.

Please pop over to Craft Hoarders Anonymous to see the talented Design Team's post of inspiration for this challenge which started last week and you will also see a variety of Guest Designers posting at the same time as myself. Good luck to everyone entering their challenge.


Julie x

Cheery Lynn dies used:


Saturday, 4 October 2014

Nice Little Things

Click to Enlarge

Hi Everyone,  with winter now just around the corner here in Scotland, I have started to feed our Garden Birds once again. This week my Cheery Lynn DT card is inspired by them and the Summer flowers that are now all disappearing.

Let me show you previous layers again on this card to make it easier to understand how I made it.


You will see I layered my French Flair Doily stackers rotating the following layer to a diamond shape and I paper pieced in my Snowflake Doily at the back.


I shaded my leaves,birds and birdbath with distress inks and my flowers were coloured with Copics.


I stamped my verse, added a little distress and accent stamping to soften the sharpness of the white card.

Happy Crafting,

Julie x


Shop at Cheery Lynn for :


Saturday, 6 September 2014

Happy New Year card


Hello Everyone, thanks for stopping by today. 
This week I have gone a bit Christmassy again with my Cheery Lynn DT card but this time incorporating the New Year onto it.

My wine glasses, bottle and New Year are from their latest release. I mounted my glasses and bottle onto different coloured card, fussy cut around and added some bling. I sanded the paper slightly on my wine glasses and bottle for a shabby feel.


My Happy New Year was layered twice with different colours of card to add dimension.


My Poinsettias I layered up and sprayed with a little gold mica spray for added sparkle. The flourishes I kept some complete and others I cut in half and added into areas of my card to accent.

Thanks again for all your comments, I hope to be back on Monday with my CCC3 Challenge project as just about finished it.

Julie x

Cheery Lynn dies used:


New release dies used:


LinkWithin

Related Posts Plugin for WordPress, Blogger...
01 09 10