Translator

Showing posts with label Add a Flourish. Show all posts

Monday, 10 November 2014

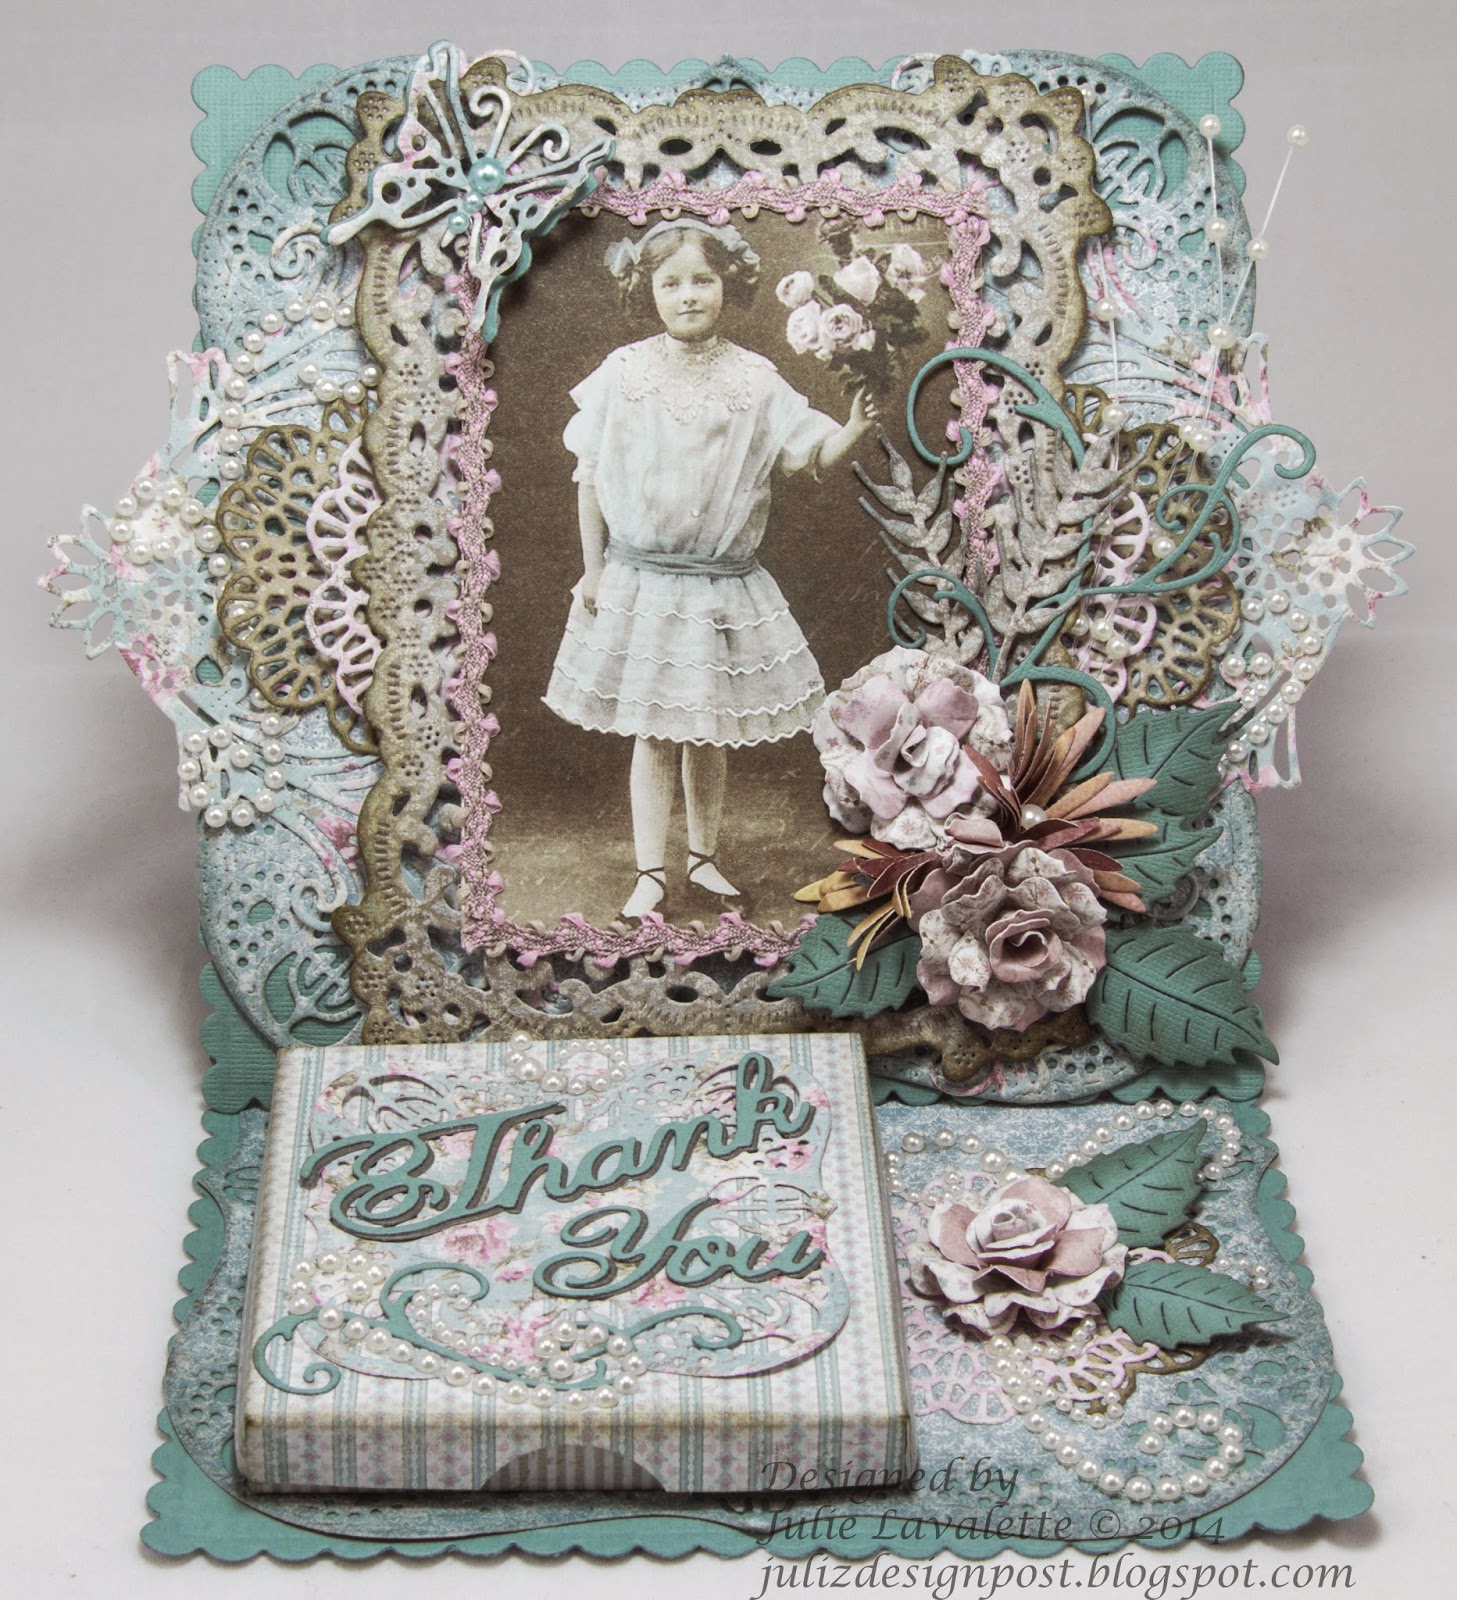
Thank You Gift Card


Hi Everyone, thanks for your continued support with comments especially with me running behind with all your lovely blogs. Today, I am delighted to be sharing my post as a Guest Designer at Craft Hoarders Anonymous after my win with my Cherub Keepsake Box here.
The challenge is 'For all that you do,Thank you'. It describes to make a Thank you gift for this challenge, a hostess gift or a simple thank you card.


My mum asked me around the same time to make a Thank you card for her friend she had stayed with recently in Finland. She explained to me she adored the vintage style, lace, pearls and a very ornate look. I decided to make an easel card and inside the little gift box I placed some Post - it notes. This way she could have it on display and always know where to get a bit paper if needed.


My image is from Pion and my papers are all Maja.


My box I made using my Scorpal board. Sorry I can't show you inside, I realised I didn't have this photo and it is now in Finland.


My die cuts are all Cheery Lynn and the lace is from my craft stash.

Please pop over to Craft Hoarders Anonymous to see the talented Design Team's post of inspiration for this challenge which started last week and you will also see a variety of Guest Designers posting at the same time as myself. Good luck to everyone entering their challenge.


Julie x

Cheery Lynn dies used:


Saturday, 1 November 2014

Snow Globe Card

Click to Enlarge

Hi Everyone, here in Scotland we are now into the dark winter nights with our clock change last weekend.  I love seeing a crisp winter morning with snow, but unfortunately here we have more chance of it being wet and wild. So my inspiration for this card was made thinking of snow and how elegant it looks when there are no footsteps or tyre tracks in it.

For my Cheery Lynn Designs DT card this week I am using the newly released Deutschland doily, I decided to cut out the solid centre using my inverted scalloped circles and mounted gold card behind it and a piece of acetate. Top tip : If you dust the acetate lightly with your chalk powder bags used in stamping this helps to take the static off it and stops the glitter clinging too much.


Next stage, I stamped my image, cutting it out with the inverted circle die and mounting it onto some red card. I glued this onto my partly layered card and added some clear foam tape right around the edge of my stamped image. I then carefully added a mix of glitter and mica flakes into the centre and placed the top doily part on with silicone glue at the edges.


My Poinsettia has a little gilding wax added to the edges, a spritz of mica spray and stamens in the centre for added dimension. I cut out 2 flourishes placing one on complete and the other one I cut in half before placing on both pieces.

I finished by adding bling around the centre of my doily, scattering some snowflakes and stamping my sentiment onto my card.

Cheery Lynn Designs  Newly Released Doilies are all very versatile and could be easily adapted to this style of card. Please take a look at them here.

Thanks for stopping by today to see my card and I hope it has inspired you to start your Christmas cards. 

Have a lovely weekend.

Julie x

Cheery Lynn New Release :

Other Cheery Lynn Dies used :

Saturday, 11 October 2014

Doll Tag


Hi Everyone. I thought this week it would be nice to make a fun tag for my DT Post at Cheery Lynn Designs this week for a change.

My tag this week is pretty self explanatory but let me point out some of the layers to you. I started off cutting a layer of paper to cover my tag and used the Border Carnivale at one side, with the Anastasia Border at the other side. I also layered my Lattice Valance Border on each side to add a contrast of colour for more interest. My Horizon Fishtail Banners were paper pieced at either side to extend it slightly.


My heart was cut out and I added back in the inside part that I had die cut out. I layered Daughter twice for a shadow effect.


My butterflies were cut out in patterned paper and angel wing added to the back.


I used my tiny flowers to decorate my doll stamps dress, headband and shoes to give a little more texture. Finishing off with some gems, ribbon and stickles.

Hope you have enjoyed my post today and see you all next Saturday,

Julie x

Shop at Cheery Lynn for :


LinkWithin

Related Posts Plugin for WordPress, Blogger...
01 09 10