Translator

Showing posts with label Chrysanthemum Strip. Show all posts

Tuesday, 5 December 2017

Cheery Lynn Designs - Flower Power Blog Hop


Hi everyone and a warm welcome to my blog. Today at Cheery Lynn Designs we are having a Blog Hop sharing inspiration with lots of the beautiful flower Dies available at Cheery Lynn. Please be sure to leave a comment as you arrive back at Cheery Lynn Designs to be in with a chance of winning a $20 shopping Spree which is amazing especially with their end of year sale on, or why not join our new rewards program.


My card today has lots of Shabby layers on it using Craft Consortiums beautiful Wild Rose paper pad. I love this pad for making my flowers as they look so pretty with all the shades.


I used strips of my Japanese Lace Garden Frame to add a lace border on my layers. My butterflies have tiny flowers added into the centres of them.


My Chrysanthemum's have been off set at different angles and some added in bud form for a natural look. My Sweet Christine I have used 4 layers to build them up adding Gems into their centres, also adding a mix of different leaves.


My sentiment was stamped with Archival ink and layered onto my tattered Die Cut layers with foam strips for extra dimension, adding another couple of tiny flowers for more detail.


Cheery Lynn Dies Used:

Thanks so much for stopping by and I'd love if you left me a comment before hopping over HERE to Lisa's lovely blog.

Click HERE

Crafty Hugs, 

Julie x

Monday, 13 March 2017

Happy Mothers Day


Hello everyone, here in the UK we celebrate Mother's Day this month so for my DT card at Cheery Lynn Designs I thought it would be nice to share some inspiration that could easily be adapted into many other occasions by changing the centre sentiment.


Using Craft Consortium's paper pad "Wild Rose" for my card I cut out my Heart Stacker Die and layered on my Stitched Squares which I distressed at the edges to give a material patchwork effect. 


Next I layered my Doily onto the centre.


My flowers were cut in White Cardstock and shaded with Distress Inks adding Flower Soft into the centres of one of my favourite smaller flower Dies - Sweet Christine and my Chrysanthemums I added gems to their centres.


My heart I backed onto White Cardstock and kept all the negative cut hearts adding onto my card for extra detail.

Thanks for stopping by and I do hope you have a lovely week with some time to create.

Happy Crafting, 

Julie x   
Cheery Lynn Dies Used :

Friday, 15 July 2016

Cheery Lynn Designs - Blog Hop July 2016


Hi everyone, Thanks for stopping by today, we are all so excited at Cheery Lynn Designs to be launching a new IOE Birthday Oval Embossing Folder. If you didn't see our previous blog hop on the amazing IOE plates you can see a video HERE.


I decided to make a card in the shabby vintage style I love. Let me take you through the different stages making my card. 


As you can see from this photo I wanted to use the outside edge of my Birthday Oval Folder and the filigree corners from our previously released folder,


so I used my IOE plates to emboss these areas and highlighted with some Gilding Wax.


Next I placed my IOE plates onto my Happy Bithday and embossed my patterned paper. I fussy cut around the edge and mounted my image on with a little Cheesecloth accent and Gilding Wax to highlight the wording.


I now started to add all my layers together.


My floral bouquet I added Flower Soft and a Sparkly Gem to the centres of my flowers.


I heat embossed the word friend with a copper powder and highlighted my embossed areas with some more gilding wax.


Thanks for all your continued comments on our Blog Hop days, and I would love for you to leave a comment today so I know you have stopped by on our hop and to be in with a chance of winning a $20 shopping spree at Cheery Lynn Designs.

Your next stop on the Blog Hop is my talented Teamie Lisa.


Crafty Hugs to you,
Julie x

Shop at Cheery Lynn For :

Saturday, 21 May 2016

Just for You


Hi everyone, thanks so much for all your wonderful comments during our blog hop at Cheery Lynn and here on my blog, I so enjoyed reading them. Unfortunately I am struggling to catch up with all your blogs as I am down with a flu virus just now, but hope to catch up soon.

Today for my DT card at Cheery Lynn Designs I am showcasing the new - Just For You die.


I started by using White Cardstock along with my IOE plates and Embossing folder to make my background. I inked my card with Milled Lavender to highlight the embossed areas, tattered the edges of my card and added a sprinkle of Frantage for a shabby feel.


My Just For You was heat set with Milled Lavender Distress Powder and layered onto my Oval and mounted onto my Quadrafoil Doily with a little cheesecloth for extra detail.


My flowers and leaves are all cut out in White Cardstock. I shaded my Dandelions with Bundled Sage Distress ink at the stems and added Milled Lavender Distress Glitter onto the flowers. The centre of my Chrysanthemums is Micro Beads and a little Distress Glitter into the centre of my Sweet Christine flowers.

Thanks so much for stopping by today and good luck to everyone entering the Weekly Challenge at Cheery Lynn Designs.

Have a lovely weekend.

Happy Crafting,


Julie x
Shop at Cheery Lynn For:

I wish to enter this in to the following Challenges:


Saturday, 3 January 2015

Butterflies and Flowers Card

Click to enlarge

Happy New Year to Everyone, I hope you have all had a wonderful time during the festivities. For my DT card at Cheery Lynn Designs this week I decided to use the fabulous Chrysanthemum Strip to make an abundance of flowers for my card.


I started off by die cutting my background in a Dusky Pink Shade.


My doily was edged with Spun Sugar ink at the edges and in the centre, this softened the starkness of the White Cardstock against my vintage image and I also added some Pearlised Glitter glue.


My flowers were made by adding a little Spun Sugar ink into the centres of each layer. I used my embossing tool to shape the petals, layering up and adding Flower Soft to the centres.


My leaves were cut out in different shades of Green and my Butterflies were double layered with 2 shades of Pink Cardstock.


Finally arranging my floral bouquet onto my card.

See you all next week.

 Julie x

Shop at Cheery Lynn For :


Saturday, 22 November 2014

Especially for You - Tag

Click to Enlarge

Hi Everyone, I decided to join in the fun of the challenge at Cheery Lynn Designs this week and make a tag for my DT post. I had full intentions of it being Festive in style, but it was such a horrible day outside I decided to think of summer days.


I cut a piece of Cardstock into a tag shape measuring 3.5 by 8 inches. I mounted my pink striped paper onto it which was distressed at the edges with my distress tool, to give a shabby feel.  I cut out my Deco Border in pink and white paper and offset one in front of the other to give added dimension.


I cut sections of my Snowflake Doily and placed on my tag for interest and texture. Next layering my fanciful flourishes on top.


My flowers were cut out in white card. I dabbed a little distress into the middle area of the flowers for shading and added flower soft for texture into the centres to finish them.


My speech bubble is from the Latest Release. The die is called Say What and has many shaped bubbles which are so much fun to use. I stamped a sentiment onto it and added distress ink around the edges.


My doll stamp was coloured with Copics and her dress was stamped on patterned paper and layered up. Finally adding a ribbon and some bling for finishing touches.

Hope you have a lovely creative weekend,


Julie x

Shop at Cheery Lynn For :


Monday, 10 November 2014

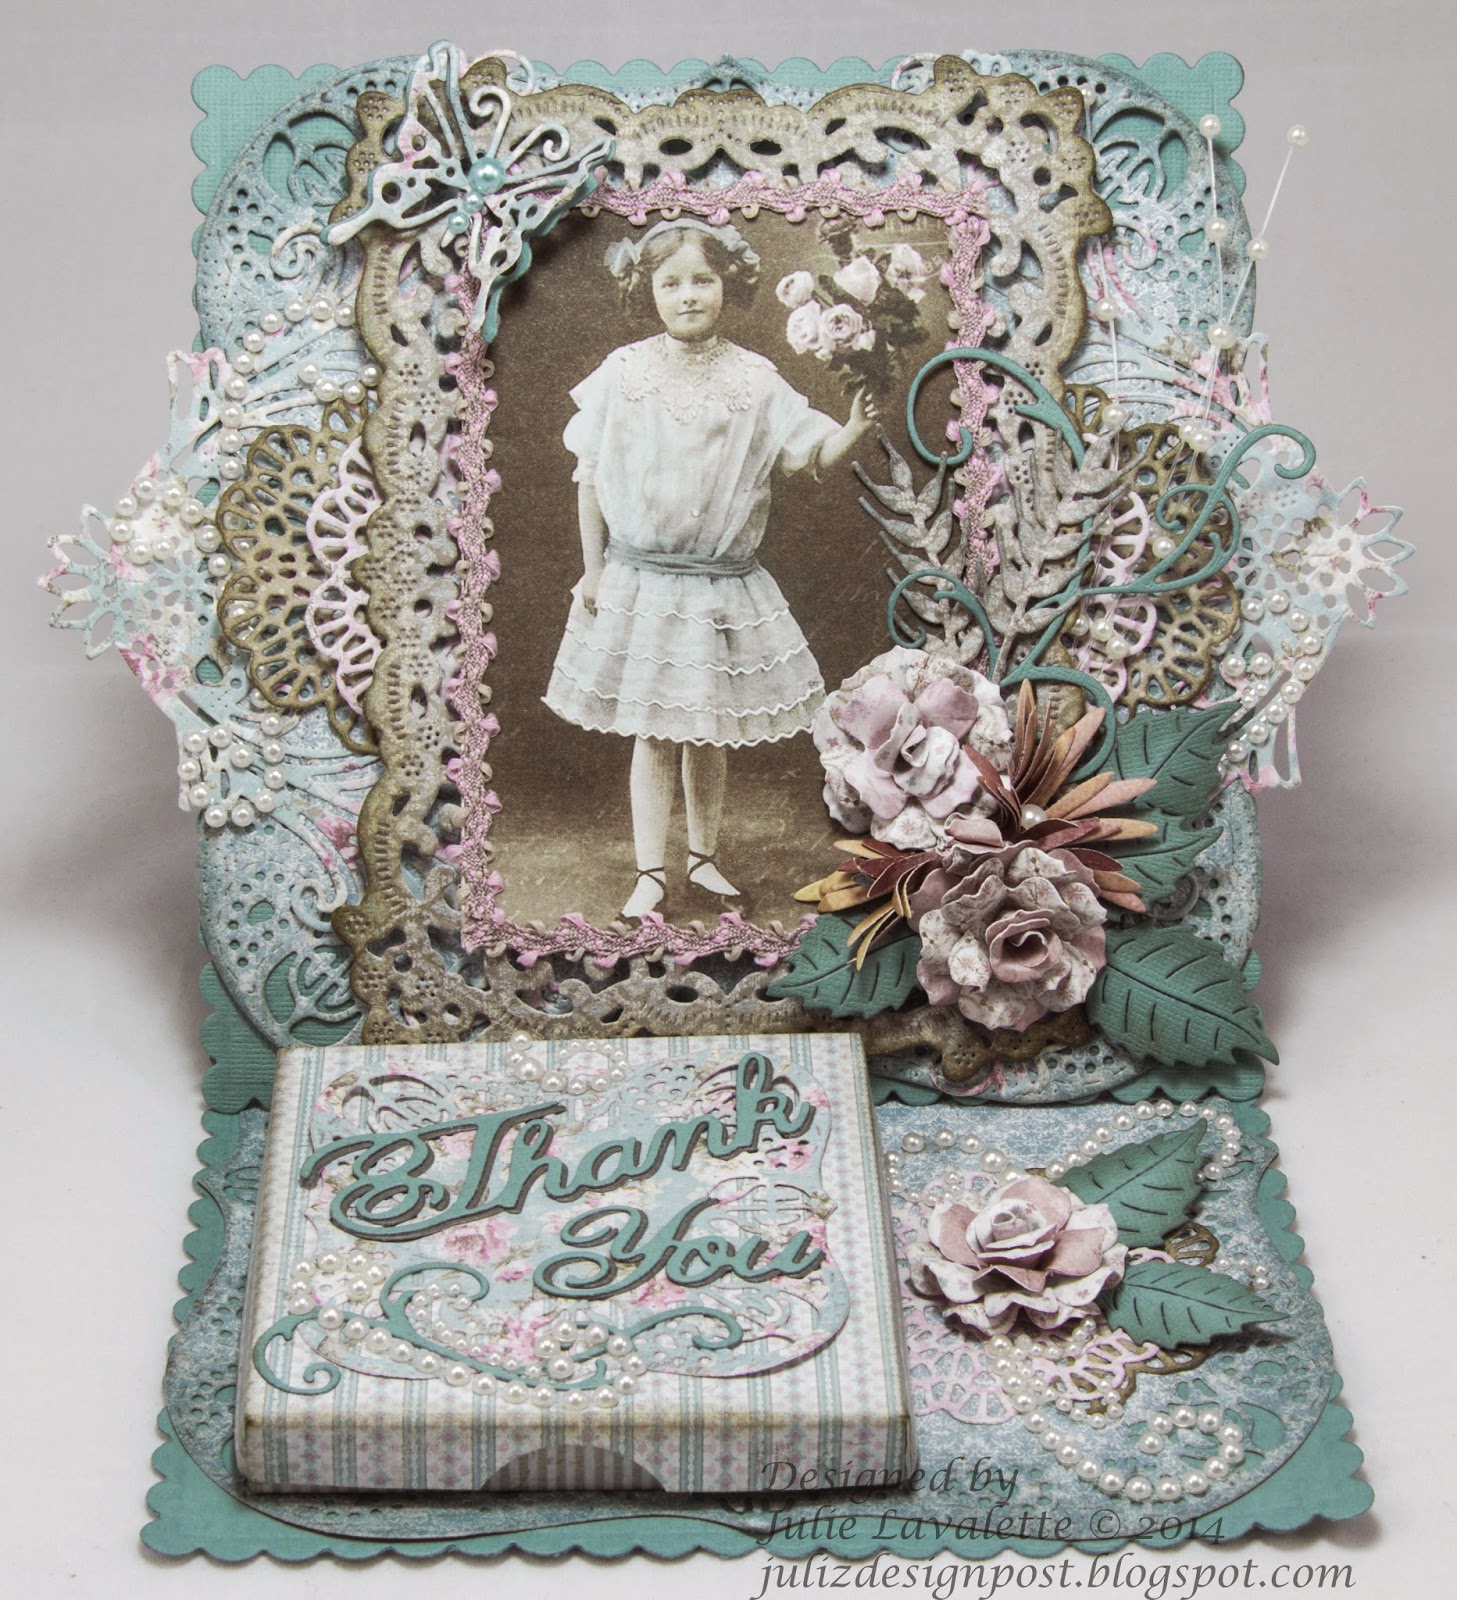
Thank You Gift Card


Hi Everyone, thanks for your continued support with comments especially with me running behind with all your lovely blogs. Today, I am delighted to be sharing my post as a Guest Designer at Craft Hoarders Anonymous after my win with my Cherub Keepsake Box here.
The challenge is 'For all that you do,Thank you'. It describes to make a Thank you gift for this challenge, a hostess gift or a simple thank you card.


My mum asked me around the same time to make a Thank you card for her friend she had stayed with recently in Finland. She explained to me she adored the vintage style, lace, pearls and a very ornate look. I decided to make an easel card and inside the little gift box I placed some Post - it notes. This way she could have it on display and always know where to get a bit paper if needed.


My image is from Pion and my papers are all Maja.


My box I made using my Scorpal board. Sorry I can't show you inside, I realised I didn't have this photo and it is now in Finland.


My die cuts are all Cheery Lynn and the lace is from my craft stash.

Please pop over to Craft Hoarders Anonymous to see the talented Design Team's post of inspiration for this challenge which started last week and you will also see a variety of Guest Designers posting at the same time as myself. Good luck to everyone entering their challenge.


Julie x

Cheery Lynn dies used:


Saturday, 30 August 2014

End of Summer Time


Hi Everyone, sorry I seem to be behind with catching up with all your blogs, but things have been rather hectic since coming back from our holidays, I promise to catch up soon. Can you believe we are at the end of August already. In Scotland the nights are starting to get darker earlier in the evening and my beloved little Robin has re-appeared back in my garden. All signs summer time is about to end and the clocks will go back soon and winter will be upon us. So this is where my inspiration for my Cheery Lynn  DT card this week came from.

My card is 8x8 in size and fits the Mega Doily Die perfectly. With this die cut I used patterned paper, dry brushed on some Gesso and inked the edges to give a shabby feel. My Clock, Victorian flourishes and corner dies were cut out in a lilac shade of paper. I stamped a crackle stamp onto the clock and corners and then inked the edges on all these die parts and once again dry brushed some Gesso on.


I added some glitter glue onto my clock face and little diamantés.


My flowers all started off as white cardstock. They were cut out and I added different shades of ink, a little stamping onto the Shasta Daisy for texture and a little flower soft into the centres. My leaves were cut from green card stock and the edges inked.


My butterflies were cut out in pink patterned paper and I used the angel wing to cut out the back of the butterflies in white cardstock, again inking the edges.


Thanks for stopping by today I always appreciate your visits and comments.  

Julie x

Tuesday, 22 July 2014

Flowers in a Cart


Hello everyone from sunny Scotland, and a warm welcome to my new followers. I hope you are all managing to get some creative time.
My mojo has been running on full power over the past week so I now have a few things being prepared to post. Do you remember my post - Flowers on a Log, if not you will see it here. Anyway, in my head I have a couple of variations of this project planned, but have been awaiting the perfect challenge or GD spot to make them. Finally, this month Our Creative Corner and A Vintage Journey and various other challenges listed below, fitted my idea perfectly for one of them. My post is photo heavy so will try to keep my writing to a minimum so if there is anything you would like to know please just ask.

I started off by making a rectangular box with my Scorpal, and then yes my favourite item the coffee stirrer sticks were given a coat of Gesso and PaperArtsy paints and crackle glaze were applied to them. Next, I glued them onto the sides of my box, once dry I then glued my box together and applied a little distress to the edges and added my little hinges which had been die cut in kraft, distress and little rust marks stamped on, finally adding black liquid pearls for the nails.


My wheels were die cut out with a cereal packet and 5 layers glued together. I applied distress paint and distress ink around the edges. Once all dry I used my crop a dile to punch a hole in the middle, added my die cut cog rubbed with a little treasure gold. I then cut down a barbecue skewer and placed my wheels on either end, hot gluing to my cart and adding another couple of sticks to the front to form my tow bar. I put a little hessian in my box to give it more of a Tim Holtz feel, but you only see little bits of it now the flowers are in it.


My flowers and leaves are all die cut out from various dies using kraft white and patterned paper. My kraft and white flowers had distress stain added to the paper the way Tim demonstrates in his videos, spraying a little water on to them and stamping with some distress ink. I then scrunched my flowers and let them dry in the sunshine.... Yes I did say sunshine and not heat gun lol, finally spraying a little glimmer mist on too.


My leaves we're made in the same way adding inks and stains, but I also double embossed with embossing powder some leaves to give a nice shiny look. Cheery Lynn's leave dies have veins in them and I find when you add the stains it starts to pool in the veins which I love.


I die cut out my bunting and stamped the word flowers and distressed the edges. I put the wording on both sides so my project can be appreciated a full 360 degrees. Barbecue skewers were painted with distress and rolled over a word stamp with archival ink to give more texture. My ribbons were made from an old sheet which I had saved a length of. I ripped 3 sections and placed into a diluted solution of distress stains and scrunched up to dry with my heat gun.


Well I really appreciated you seeing through my post. Thanks for stopping by and I'd love if you had time to leave me a comment.


Julie x

I wish to enter this in to :


LinkWithin

Related Posts Plugin for WordPress, Blogger...
01 09 10