Translator

Showing posts with label Cheery Lynn Dies. Show all posts

Monday, 1 April 2019

To Mum on Mother’s Day


Hi everyone, today I am sharing a box I made for my mum on Mother’s Day using Tonic Studios and Cheery Lynn Dies and of course the beautiful Maja Design Papers.


The photo is of my mum, which she thinks was taken in her early twenties with her first Toy Poodle called Nikki. Doesn’t she look glamorous.


My flowers have all been handmade using my Dies and inks adding stamens into the centres.


Some photos for you to enjoy.


Products used from

Thankyou so much for stopping by.

Crafty Hugs, 
Julie x

Monday, 10 July 2017

I Do - Craft Consortium


Hi everyone, today I am sharing some inspiration using the stunning paper pad call Tell the Bees for my DT post with Craft Consortium. This pad is filled with beautiful papers with Floral and Bee designs and is apt for many celebration cards or scrapbook layouts.

My card today showcases the soft gold designed paper which I thought was perfect for a Wedding or Anniversary card.


I used 3 layers on my card which have been tattered at the edges with my scissors and some distressed stitching added around the edges for added detail. I layered up with foam strips for extra dimension.


My diecut frame was heat embossed with a Cream Embossing Powder and whilst still hot I added a sprinkle of Gold Powder on to it. Adding my vintage image and lots of bling.


Craft Consortium have a range of beautiful vintage embellishments and laces in their Always and Forever collection, perfect for finishing off my card as if a piece of lace from the Bride's dress has been used.


Thanks so much for all your lovely comments and please do check out Craft Consortium and follow them on Facebook and Instagram for regular inspiration and giveaways.

Crafty Hugs, 
Julie x 

Craft Consortium Products Used -

Cheery Lynn Die - DL286 Mirror Mirror Doily Frame

Friday, 7 July 2017

Vintage Memories - Cherish The Memory


Hi everyone, today I am sharing a masculine styled card with you all for my DT post with Cherish The Memory.


I started by cutting a sheet of my 6x6 paper pad into one inch strips. I tattered at the edges with my scissors and then rubbed my clear Versamark Ink down the edges, heat setting Copper Embossing Powder. Next I sprinkled onto the paper a Verdigris Embossing Powder and heat set.


I then added my Cheery Lynn die - Border #15 which had also been Heat set with Embossing powders to give a rusty look.


I made a collage using my papers from my Vintage pack, diecut sheets and inserting a couple of metal cogs for extra texture.
Please check out Cherish The Memory Etsy Shop to see their beautiful range of papers and craft packs with new items being added weekly. You can also follow them on the following links :

Crafty Hugs, 
Julie x

Thursday, 8 June 2017

Happy Birthday


Hi everyone, today for my DT post with Cherish The Memory I'm sharing a feminine design using the Studio Vintage Line.


My base layer was tattered with scissors at the edges and some Distress Ink added to highlight it. My next layer was also tattered at the edges and rubbed along my Versamark Ink pad. I then sprinkled Copper Embossing Powder onto it and heat set adding some lace and part of a Doily for added detail.
My sweet diecut picture frames I added Stickles to for extra sparkle and mounted with foam tape.


My tag also has Copper Embossing Powder added, pretty die cut flowers and a butterfly finishing off with a shabby ribbon.

Cherish The Memory Products Used:

Please check out Cherish The Memory Etsy Shop to see their beautiful range of papers and craft packs with new items being added weekly. You can also follow them on the following links :
Thanks for stopping by,

Crafty Hugs, 
Julie xx

Wednesday, 24 May 2017

Making me Smile


Hi everyone, today I am sharing some more inspiration for my DT post with Cherish The Memory, using their exquisite Vintage Line, how  I adore these pretty papers and 3D Decoupage in this line, my card measures approx 6 inches square.


I started by matting and layering my first 2 layers which had been tattered at the edges and some distressed machine stitching added.


My middle layers were matted and layered with touches of cheesecloth using diecuts from my book adding my sentiment and hearts with Silicone Glue finishing with a shabby ribbon and a flower brad to the centre.


My green diecut framed image was also out of my book of die cuts. I layered it onto my Cheery Lynn die adding my butterflies which I curled their wings to give added dimension adding some black gems into their centres and a little black thread for their antennas. My flowers were die cut using a Spellbinders die and my same pink background paper adding Pearls to the centres.

Products Used: 

Please check out Cherish The Memory Etsy Shop to see their beautiful range of papers and craft packs with new items being added weekly. You can also follow them on the following links :

Happy Crafting, 

Julie x

Monday, 19 September 2016

An Apple A Day


Hi everyone, thanks for stopping by my blog. Today for my DT post with Craft Consortium I am using another image from their 3D Decoupage pack.

The decoupage is simple to build up and has clear instructions for the beginner. I like to use Pinflair Glue between my layers rather than foam pads. 


You will notice my apples look shiny and have a small dome shape on them. I got this effect adding a little Glossy Accents onto them.


I cut my doily in half and accented behind my layers.


My flowers have been die cut using the Santoro Flower dies with the coordinating cardstock.

Please checkout Craft Consortium to see their vast range of stunning embellishments, paper pads and Decoupage papers on Facebook for inspiration and regular giveaways, you will also find them on Pinterest, Twitter and Instagram.

Crafty Hugs, 
Julie x

Craft Consortium Products Used:

Wednesday, 31 August 2016

Summer Fun


Hi fellow crafters today for my DT post with Craft Consortium I am sharing another card using the delightful characters from Santoro's Kori Kumi range.


On this card I have used the 3D Decoupage Characters adding a little Flowersoft onto the flowers for added texture. I then mounted onto the background paper and put into my die cut frame. 


Adding my cheeky sunflower on the corner.


My floral arrangement I cut my flowers out in white cardstock and shaded with Distress inks adding Flowersoft to the centre. I added stitching for extra detail to my coordinating paper and layered up my card and finished with some bling.

Thanks so much for stopping by today and please check out Craft Consortium to see their vast range of stunning embellishments, paper pads and Decoupage papers on Facebook for inspiration and regular giveaways, you will also find them on Pinterest, Twitter and Instagram.

Crafty Hugs, 
Julie x
Craft Consortium Products Used:


Cheery Lynn Dies Used:

Thursday, 25 August 2016

Apple Harvest


Hi Everyone, for my DT post for Craft Consortium this week I am super excited to be showcasing their new Santoro Range called Kori Kumi......you may have seen these products on the Craft Channel Hochanda at the weekend.


The collection is filled with fabulous papers, stamps, decoupage and embellishments. Please check out the full range HERE.


When I received my DT pack and looked through my assortment of amazing goodies the Apple Cart stamp jumped out to me and I knew I just had to make a 3D version of this using many of the Kori Kumi range of products. The finished cart measures approx 5" x 8" in size.


I started off with a 'cup a soup' box and added coffee stirrer sticks onto it similar to the design on the stamp. I then added a layer of red paint and white paint with a texture stamp.

My Wagon Wheels were die cut from a Corn Flakes box and several glued together and painted. My wooden characters were coloured with Copic Pens.


My gorgeous stamped image reminds me of the Holly Hobbie dolls I had as a child. I coloured her in with Copic Pens and fussy cut her out.


My roof is covered with co ordinating paper in the range. I glued the ribbon in place with Pergamano glue, this is a specialist glue for Vellum paper and doesn't bleed through the ribbon showing glue marks. I added small red buttons to look like tiny apples.


My fruit boxes were made from Coffee Stirrer sticks. I added a layer of paper clay into the bottom and whilst still soft I popped a little glue on my buttons and pressed in place. I added some Sand coloured Flowersoft and a little wood shavings to give a look of sawdust. I also coloured the Apple stocks on my buttons with a Brown Copic Pen.


I do hope you like my Apple Cart as much as I enjoyed creating it and if there is anything else you would like to know please just email me or pop a comment on my blog post and I will get back to you.


Please checkout Craft Consortium to see their vast range of stunning embellishments, paper pads and Decoupage papers on Facebook for inspiration and regular giveaways, you will also find them on Pinterest, Twitter and Instagram.
Crafty Hugs,

Wednesday, 10 August 2016

Romance in Paris and exciting news.


Hi everyone, for my DT post with Craft Consortium I am sharing another card using the Wild Rose Paper Pad and fussy cut butterflies from the Gypsy Gypsy Paper Pad.


My card measures 5" X 8" and I started by adding layers which had been tattered at the edges inserting touches of lace and die cuts for a shabby vintage feel. My paper ribbon strips were mounted with foam tape and tattered at the edges, this complimented my other layers and added dimension.


My Eiffel Tower I heat embossed with Frantage Powders and also added a scattering of Frantage on my image finishing with a border of lace.


My card was finished with some Rhinestones and a floral arrangement.


Another View of my card to finish off with.


The exciting news I have to share......Craft Consortium are about to Launch a new Santoro Range called Kori Kumi which promises to encapsulate the spirit of curiosity and adventure we all share. This range will have papers, stamps, embellishments and lots more. please hop over and like their Facebook page to keep up to date with info on this and regular giveaways, you will also find them on Pinterest, Twitter and Instagram. 

Crafty Hugs, 
Julie x

Craft Consortium Products Used :

Monday, 1 August 2016

Destination Inspiration Terminal 5 - A Vintage Journey


Hi Everyone, today I am over at A Vintage Journey with a tutorial on the techniques I have used on my card. Love for you to pop over HERE.


Crafty Hugs, 
Julie x

Tuesday, 21 June 2016

The Heart has it's Reasons


Hi everyone, this is a scheduled post for my DT with Craft Consortium as we are celebrating my youngest Daughter's 21st Birthday, so apologies if I fall behind with catching up with your lovely blogs but we have no wi-fi over the next few days.


My card today showcases my favourite paper pad Bloom Beautiful and I have complimented this Floral paper with polka dot paper from the Wild Rose paper pad. Craft Consortium have the most amazing Vintage embellishments, today I have used a variety on my card which you can check out on the links below.

Please checkout Craft Consortium to see their vast range of stunning embellishments, paper pads and Decoupage papers on Facebook for inspiration and regular giveaways, you will also find them on Pinterest, Twitter and Instagram.

Happy Crafting, 

Julie xx
Craft Consortium Products Used:


Cheery Lynn Dies Used:

Friday, 3 June 2016

Memories - Textures and Embossing Pastes at A Vintage Journey


Hi fellow bloggers, today at A Vintage Journey we start a new challenge hosted by my talented teamie Astrid called Textures and Embossing Pastes.

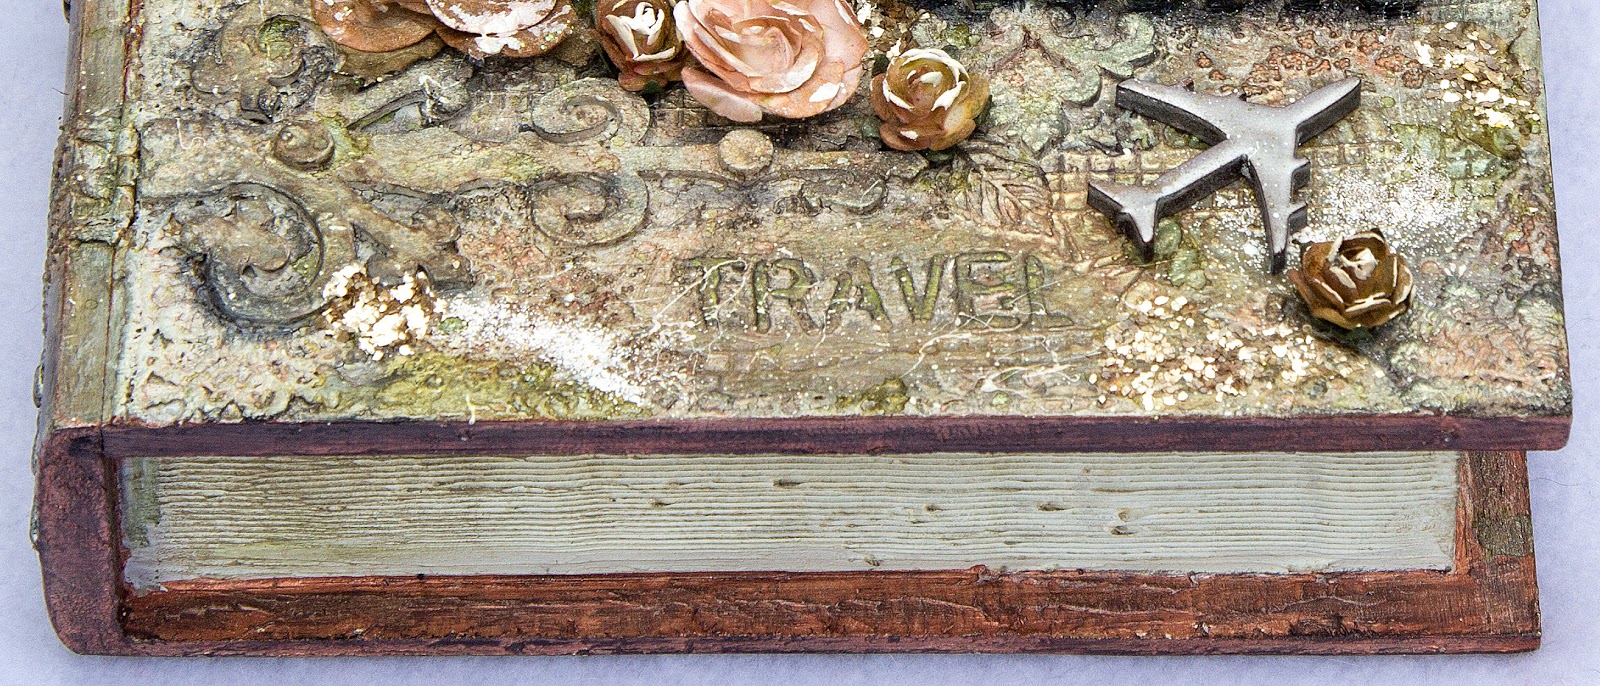
For my inspirational DT project I decided to alter a wooden book box to give to my daughter for her Birthday. She travels worldwide as Cabin Crew and likes to hold onto keepsakes from the many places she visits, so my box has been inspired by this.

Lots of photos to show you now, with tips to some of my techniques. 


I started by applying dry wall tape, tissue paper, lace and words with embossing paste through a TH stencil.


The spine of my book.


The edge of my book I wanted to look like book pages. I applied embossing paste and used a comb over it.


Once dry some Archival ink was rubbed over to dirty it up.


I added Greyboard hinges and more lace to the front, also some texture paste to the corners. I then forgot to take ongoing photos.....sorry !

Once I was happy with all my texture I gave it a coat of White Gesso and started to spray with Lindys Stampgang sprays in a variety of shades until I was happy with my colours.


A close up of the textures also adding Micro Beads and Distress Glitter. Frantage and Gilding Wax applied.


Sizzix postage Die was cut out a few times in Mountboard layering up with a photo of my daughter and her precious cat Gucci.


My word Memories and the Plane were covered in a variety of embossing powders.


The inside of my box was layered with TH Ephemera and postage stamps Kirsty had brought home from her travels, with a layer of felt .


On the inside of the lid I have layered a Decoupage Paper from Craft Consortium. Adding a photograph of her with her partner and using Cheery Lynn dies and a MDF word she brought me home from her travels.


Finishing off with some metal embellishments and highlights of Gilding Wax. My daughter adores her Keepsake box and I know will treasure it.


A full view of the open box, and now some close ups to finish off.


Please hop over to A Vintage Journey to see the wonderful inspiration from my Teamies and details on how to enter our challenge, which runs for a month.

Thanks for stopping by my blog.


Crafty Hugs, 
Julie x

I would like to enter this in to the following Challenges:

LinkWithin

Related Posts Plugin for WordPress, Blogger...
01 09 10