Translator

Showing posts with label Horizon Square Boutique Stacker. Show all posts

Monday, 14 November 2016

Happy Winter Card


Hi everyone, hope you had a lovely weekend.Today for my DT card at Cheery Lynn Designs I am sharing some inspiration with my Festive Winter card, so let me share my tips on this card with you.


I started by mounting a couple of Stacker Layers together to form the frame of my card adding Stickles around it. My Icicles I also added a little Stickles onto the white cardstock and let it dry. Once dry I used Iced Spruce Distress Ink at the tips of my Icicles and finished with a layer of Glossy Accents for an icy look.


My sentiment and snowflake were heat embossed with two shades of Silver embossing powder. 


The Fir trees are die cut from the versatile Camping Set, I also shaded with Iced Spruce and I ran a glue pen along the embossed areas and added an extra fine glitter for added sparkle.
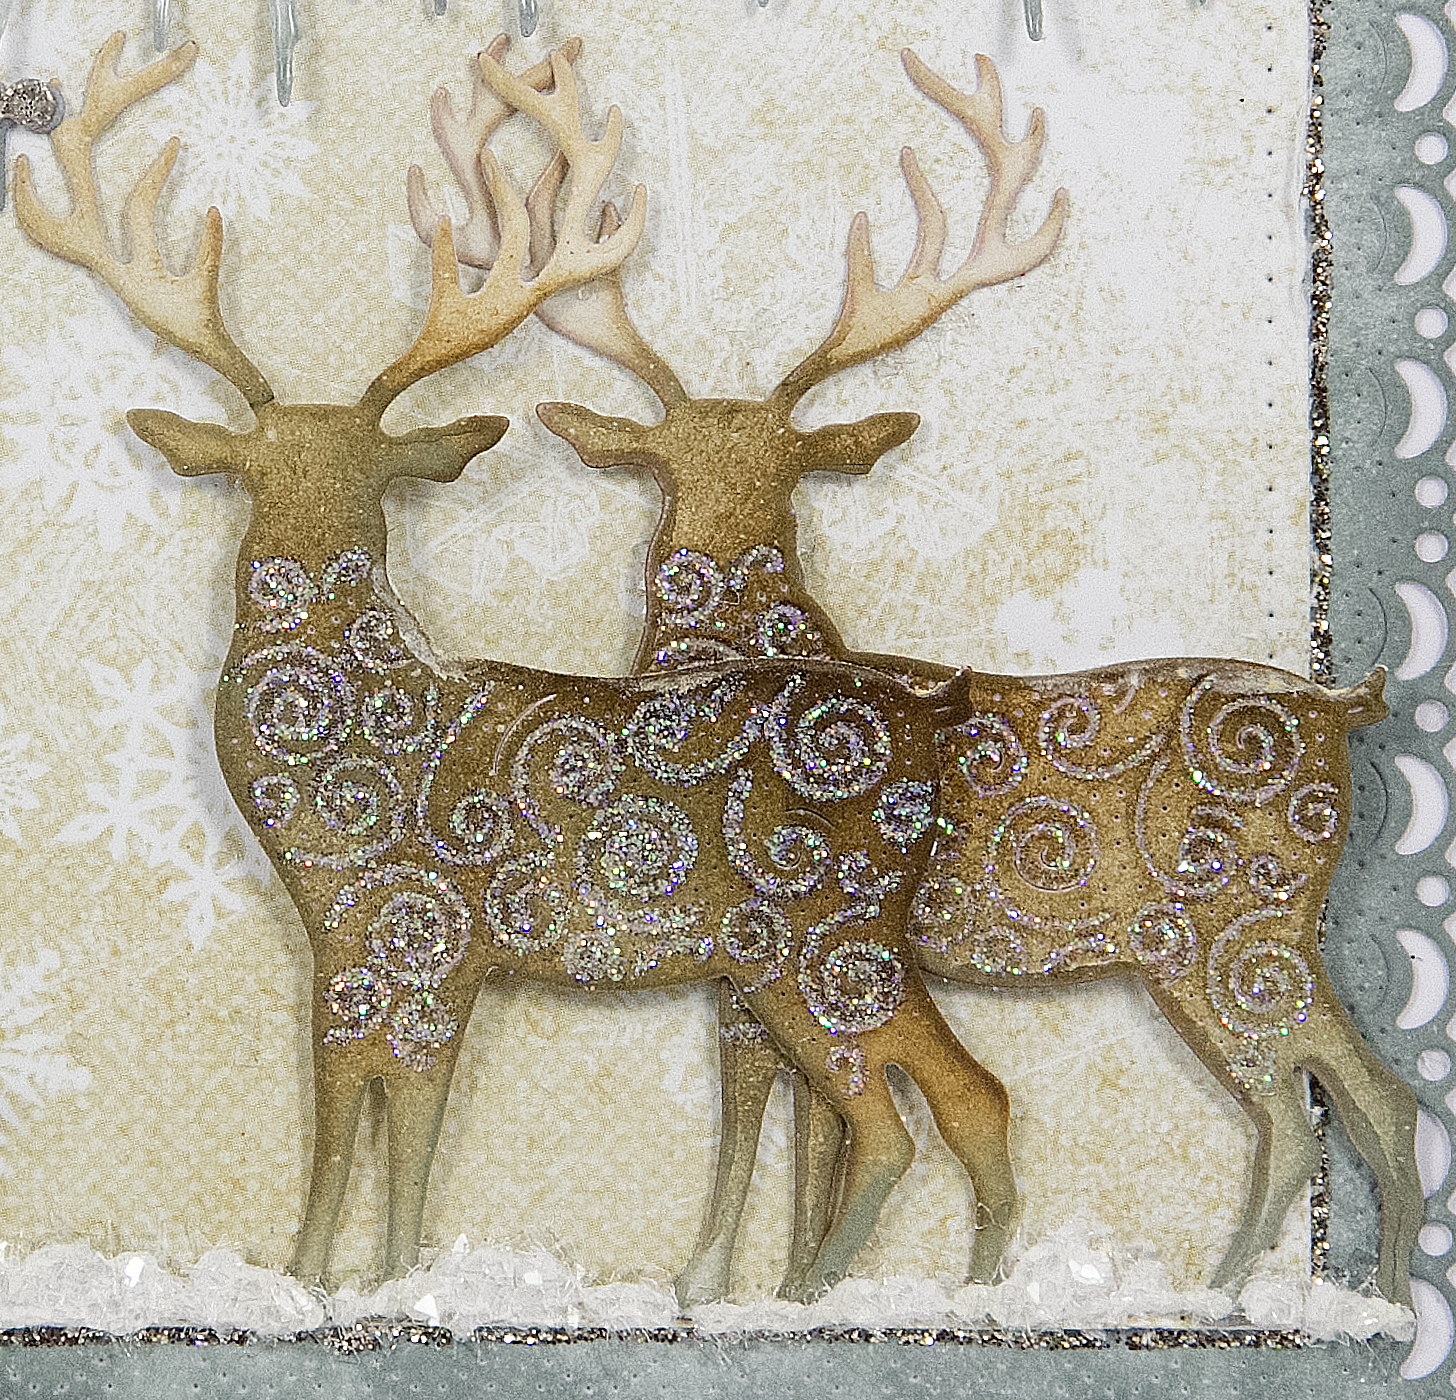

My reindeer were also shaded with Distress Inks adding some sparkle onto them in the same way I did my trees. I do love how you can add the extra sparkle onto the embossed areas.


To finish my card I used a Snow Writer Pen adding onto my trees and as a layer of snow on the ground. Whilst still wet I added some clear Glass Glitter for extra sparkle.

Thanks for stopping by today and good luck to everyone entering Cheery Lynn's Bi-Weekly challenge.

Crafty Hugs, 

Julie x
Shop at Cheery Lynn For -

Wednesday, 26 October 2016

With Love


Hi everyone, today for my DT card at Cheery Lynn Designs I am sharing some inspiration for an Autumnal card.


I started by die cutting out my stacker dies, tattering some at the edges with the blade of my scissors and layering up with foam strips.


My Sunflower Doily I layered two colours, offsetting and gluing only in the middle so my layers were not lying too flat.


I added a Winter bouquet of foliage and a Sunflower, apt for this time of year. My berries have Glossy accents added onto them. 


My Sunflower was shaded with Distress inks adding Flower Soft and Micro Beads to the centre.


I finished off my card with bling around my sentiment.

Thanks so much for stopping by today and good luck to everyone entering the Bi-Weekly challenge at Cheery Lynn Designs.

Crafty Hugs, 
Julie x

Shop at Cheery Lynn for:

Saturday, 9 April 2016

Lady Steampunk


Hi everyone, did you know that Cheery Lynn have the most amazing selection of Steampunk dies and Embossing plates ? You can check them all out HERE. For my DT post at Cheery Lynn Designs today I have used a small selection of these dies on my card and hope it inspires you to try some Steampunk if you haven't before.


My border was cut out in a dark brown textured cardstock and shaded with Inka Golds for a rusty aged look. I layered onto a cream cardstock to add shadow and offset 2 layers on the side of my card with foam strips for depth.


I used the same technique on my frame, by mounting onto corrugated card and fussy cutting around the edges. I love the detail in the wings die of the feathers, these were layered behind my stamped La Blanche image.


My key was heat embossed with Silver powder and as this melted I sprinkled some Vintage Photo Distress powders onto it for a rusty effect. My flower I added some microbeads into the centre.


My die cut layers were mounted onto my Frantaged background, I added some foam between the layers for added dimension and glued other layers flat together.

Thanks so much for stopping by today and I hope you get the chance to join in the latest Cheery Lynn challenge which is Back to Nature.

Crafty Hugs, 

Julie x

Shop at Cheery Lynn for:

Saturday, 30 January 2016

Cool Dude


Hi everyone, today for my DT card at Cheery Lynn Designs I am sharing a card using the New Release words Cool Dude, let me take you through my techniques.


My centre die cuts were all layered twice for a shadow effect. My Palm tree was shaded with Copics and a little Distress Stickles added to leaves. My wording and arrow were all heat embossed with Red Tinsel Embossing Powder to make them stand out within my design. 


I re-inserted my letters to the surf board after heat embossing them in the same way as above.

The current challenge at Cheery Lynn Designs - Anything Goes is open until 3rd Feb. It would be lovely to have you join in the fun, with a chance to win a shopping spree of $20 at Cheery Lynn Designs.

Crafty Hugs, 

Julie x

Shop at Cheery Lynn for:


Saturday, 23 January 2016

Just Married


Hi Everyone, firstly I would like to thank you all for your lovely visits and comments on my blog during the Cheery Lynn blog hop last week, you really made my day. Today for my DT card at Cheery Lynn Designs I am sharing a Wedding card using the New Release words 'Just Married'. Let me take you through my techniques used on this card.


I used pearlised cardstock for my stacker layers and used a Silver Pen to shade all my Silver accents and scalloped layers. My top stacker layer I embossed with my Hearts Embossing Plate.


My Bride I glued on an overlay of lace and once dry replaced back into my Die to trim off the excess lace. I shaded the Happy Couple with Distress Inks and added some Bling and a Floral Bouquet.


My Chandelier was coloured with a Silver Pen and a little touch of Gold Gilding wax on the Tassles. For my candles I painted on a little Beeswax I had melted in my Meltpot, the flames were shaded with Copics and a touch of Glossy Accents added. Finishing it off with lots of bling.

Thanks so much for stopping by today.

Crafty Hugs, 

Julie x

Shop at Cheery Lynn for:

LinkWithin

Related Posts Plugin for WordPress, Blogger...
01 09 10