Translator

Showing posts with label That Craft Place. Show all posts

Wednesday, 7 March 2018

Repost - Tutorial Post for That Craft Place


Hi everyone, I am just re-posting my tutorial post onto my blog as it was previously posted at That Craft Place a couple of years ago when I was on their Design Team with only a link from my blog to take you to this tutorial. I wish to now keep as a reference on my blog rather than it being lost in cyberspace with their blog being closed down rather than it sitting continuously in my drafts box. So please don't feel obliged to comment, but enjoy the post.
                                                      
                                                            Blog Post Copy

Hi Everyone, it's Julie here today from Juliz Design Post and I am sadly sharing my last DT tutorial with you at present here at That Craft Place, as our challenge blog and Natter and chatter group are taking a long extended holiday.

Lisa sells the most beautiful MDF Shrines in different shapes along with great embellishments to add to them in Greyboard and MDF, so please check out her shop links at the end of my post as these will still be remaining open.

So let me take you through the process of my shrine.


These are all the sections that come in the kit to start the project, ( my finished shrine measures approx 2.5" x 4.5" ).


You will see I painted all my inside sections apart from the front of my house.


In this photo you will see I added on some heat embossed detail.


Next I made templates in greyboard so I could add a roof onto my house by simply drawing around my shapes. I also roughly worked out placement of embellishments although I changed a bit later on.


I covered my greyboard in Metal foil and ran through my embossing folder. 
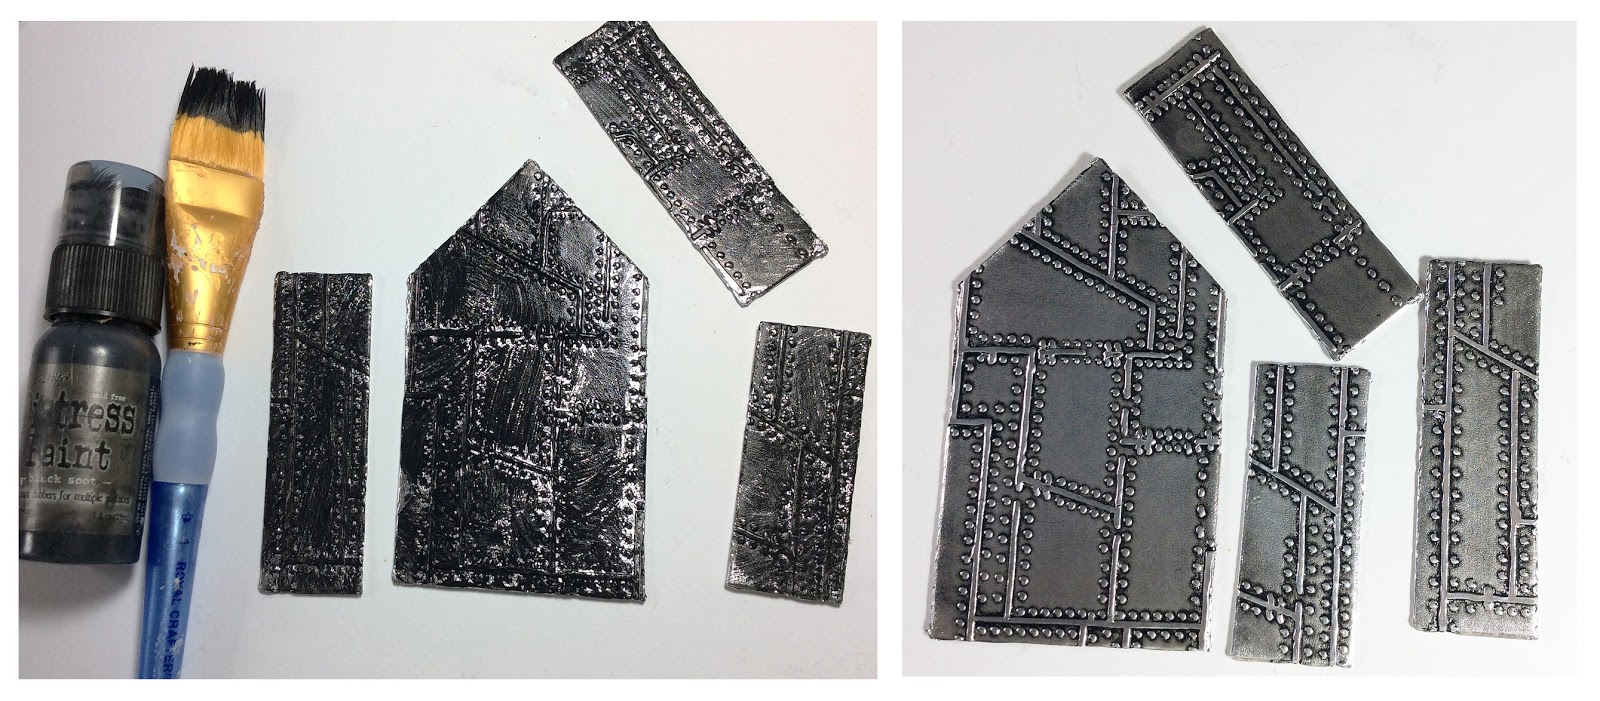

I  added my paint and let it slightly dry before buffing back with a dry baby wipe.


I glued my greyboard onto the MDF and added on some rust effects to the edges.


I glued lace onto the front and painted it with Black Gesso.


I then blended in some Mica Powders for highlights with a little water over my lace.


I felt at this point the background was a little dark in my house so I gave it a wash with Titan Buff.


I mixed Bronze Micro Beads with some Matt Gel Medium and applied through my stencil onto my roof. Once this was dry I dripped Alcohol Inks over it.  


I love the look it gives almost like an Abalone Shell.


Side on and rear views were highlighted with Inka Golds at the embossed detail. My feet are sewing machine bobbins with some alcohol inks on them. 


I added alcohol ink onto my pearls for a more Industrial look and then glued them around the window opening.


I Rusted my cogs using Andy Skinner's Techniques.


A close up view of the inside showing the cogs in place. My hearts had a layer of Crackle paint and were sprayed with Tarnished Brass Spray Stain, I wiped them back and added a little Black Paint to the edges.


My key was heat embossed with various Embossing and Distress Powders, wrapping around with a little wire. 


I brought out more highlights in my lace using Viva Decor Inka Golds in coordinating shades.


A couple of finished photos. All products used in this post are available at the links below to the shop.

If you have enjoyed my posts at That Craft Place I'd love for you to pop over HERE to my blog to continue to follow me. My followers buttons are down my sidebar and I look forward to following your blog too.


Crafty Hugs,

Julie x
Links you need to know.

Sunday, 27 March 2016

Steampunk Shrine


Hi Everyone, Today we have the start of another challenge at That Craft Place called Anything Goes. Please head over HERE to see all my Teamies fab projects and to hear the news we have to share.


I just have some photos to share today as I will have a full tutorial up later on in the week over at That Craft Place.


Thanks for stopping by today and for your continued comments, which I love reading.


Julie x

Links you need to know.

Monday, 21 March 2016

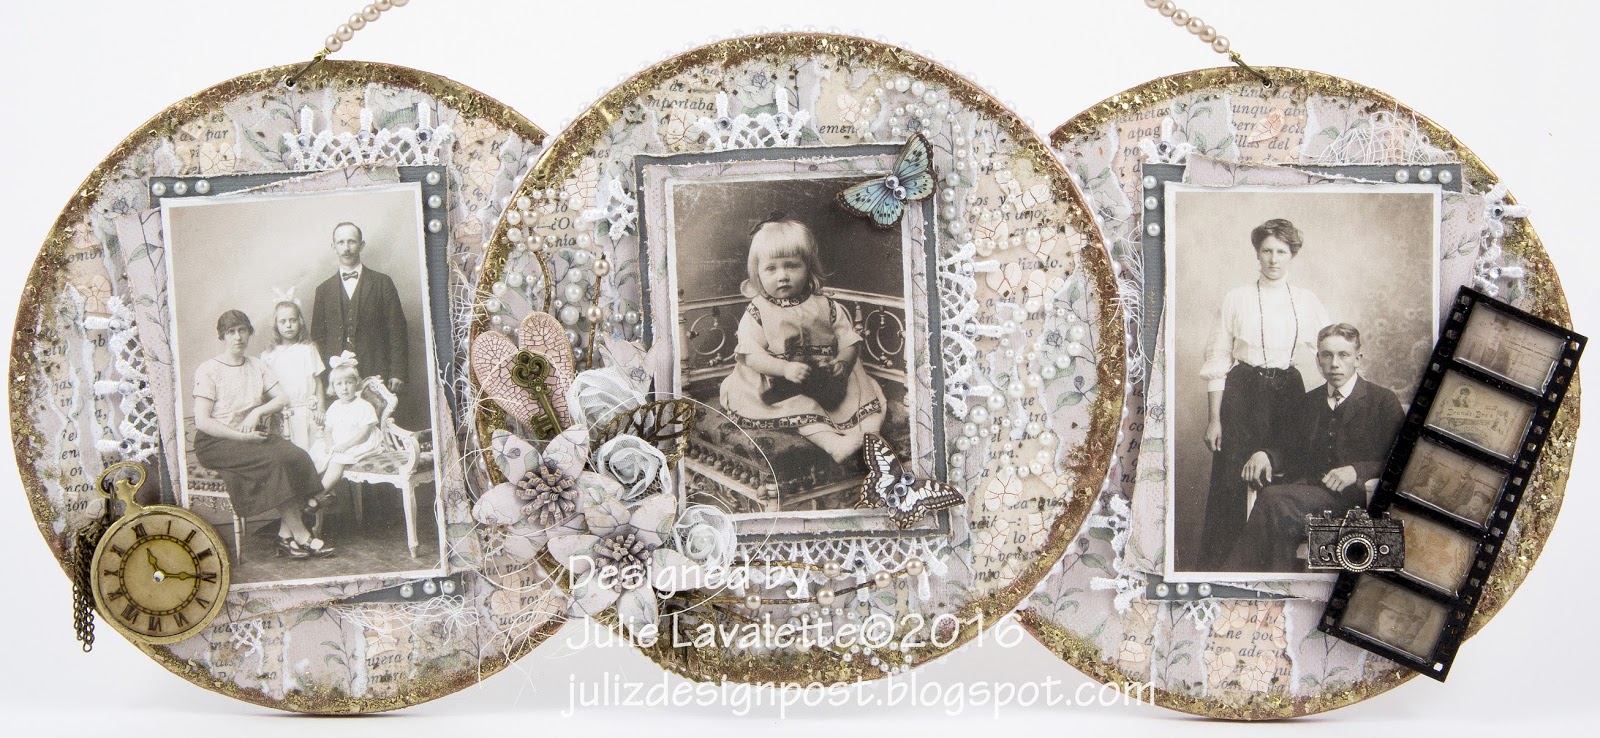
Vintage Family Memories


Hi there, I hope you all had a lovely weekend. Today I am over at That Craft Place with a Tutorial on the techniques used on my Vintage Family Memories Frame.

Would be lovely to have you hop over HERE.


Crafty Hugs
Julie x

Sunday, 13 March 2016

Vintage Family Memories


Hi Everyone, Today at That Craft Place we start a new fortnightly challenge of Anything Goes.
I have made an MDF wall hanging ( 13" x 5.5" Approx ) which I shall be sharing a tutorial on shortly over at That Craft Place, using lots of goodies from Lisa's amazing shop.
So for today I will just share some close up photographs.


Thanks for your continued comments and I do hope to be well enough to catch up with your blogs soon.

Please hop over Here to see all the fab projects from my Teamies and I have also listed all the links that may be of interest to you.

Crafty Hugs,
Julie x


Links you need to know.

Sunday, 14 February 2016

Valentines Memory Box


Hi Everyone, Happy Valentines Day, great to have you stop by my blog. Today at That Craft Place Blog we start a new challenge called Anything Goes. For this challenge I decided to make for my DT post a keepsake Valentine Box.


I shall be posting a link on my blog later next week, so you can see a full tutorial on how I made this box over at That Craft Place. So at the moment I hope you enjoy seeing all my photos.


Please check out the amazing That Craft Place shop for bespoke MDF and Greyboard Goodies. They also stock a vast range of products and their own Digi Images.

                                                         Links you need to know

                                   That Craft Place Facebook Shop
                               That Craft Place Natter chatter page
                                           That Craft Place Etsy
                                              That Craft Place

Happy Crafting 

Sunday, 20 December 2015

Jingle All The Way


Hi Everyone, Apologies for still being behind with some of your blogs, I am still under the weather and we are also having terrible problems with our internet downloading pages and losing connection, hopefully all will be sorted soon. 

This is our last Challenge of the year at That Craft Place and I am super excited to showcase some of Lisa's amazing Bespoke MDF for my DT project. All links on my sidebar.

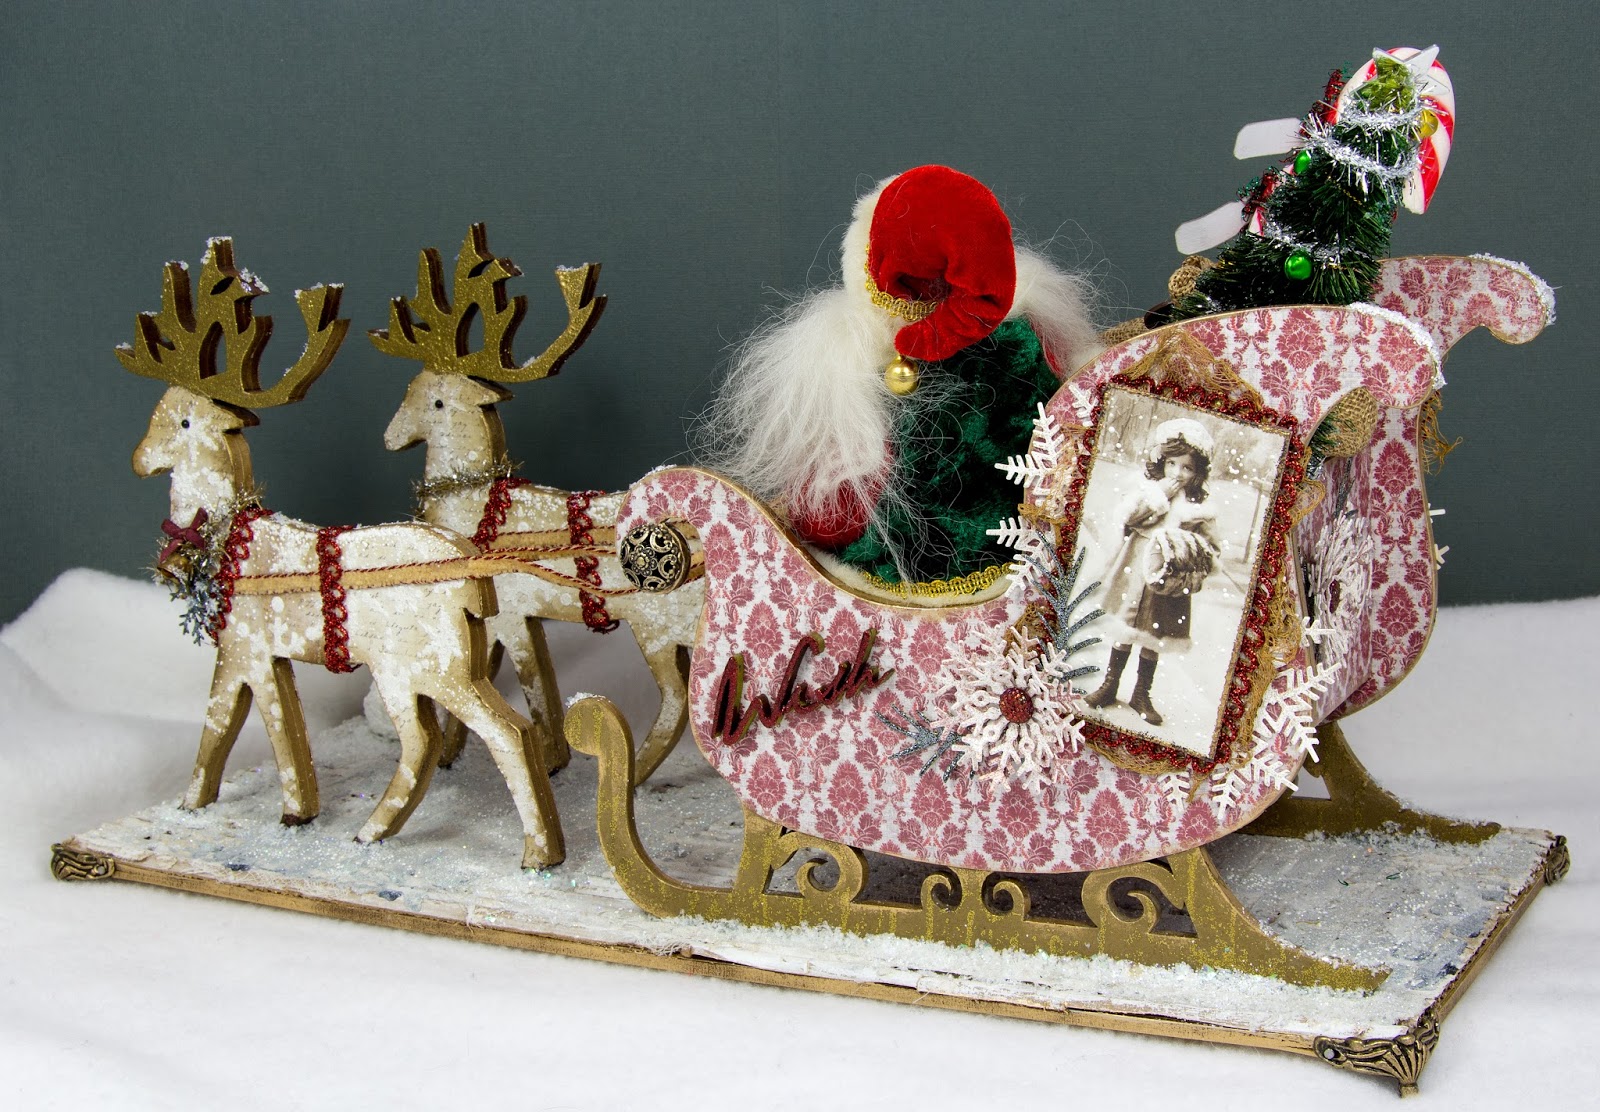
It has been a few years since I have made an extra special project for my much loved parents so this is a Christmas Present that has had hours of love poured into every detail for them.

With everyone so busy at this time of year I thought I would just show you around my Christmas Scene, which my Husband has taken all these amazing pictures for me.


As you can see I painted the runners of my sleigh, then stamped and heat embossed Gold onto them for added texture and went around the perimeter rubbing in Gilding Wax.


Next my papers were glued in place sanding around the edges to make neat. I then gave it all a coat with DecoArt Gloss Varnish.


A view inside my sleigh. 


For my images I added Chunky white embossing powder, I then mounted the images onto cereal box packaging and dipped into my embossing powder to form a frame.


Some cheesecloth coloured and dried with my heat gun, this makes it lovely and stiff and I added it behind my images.


A view of one of the finished sides.


I glued two Reindeer together for added stability.


My MDF words and die cuts were all heat embossed with different colours of glitter embossing powders.


My Tree was from Tim Holtz and I sprayed it with Distress Sprays, once dry I added Glossy Accents and Distress Glitter. Finishing off with a star, tinsel and bells threaded together.


My Santa Sack was stitched to form a sack adding Polystyrene packing peanuts to the inside. A ribbon and embellishments to the outside and a couple of labelled Candy Canes for my Mum and Dad.


I tore corrugated cardboard back in areas to reveal the corrugation and gave a coat of gesso and added on some Cheesecloth and glued onto my plinth of wood. I wanted this to look like a very old Cobbled Street.


Next was to add my cobbles using a brick stencil along with DecoArt Sand Texture Paste that I added a little black paint too. I scattered over glitter and chunky white embossing powder. Once dry heat set in place.


Finally lots of Flower Soft Snow was added. Gilding wax was added to the feet and around the edges of the plinth.


My Snowman was originally a cheap wooden Snowman tree decoration. I covered his body in Snowtex and added a Paper Clay Carrot for his nose, along with a stamped sign.


Santa was made by using .... Ha Ha fooled you ..... bought from a Christmas shop !


The reverse side of the sleigh.


The rear of my sleigh.


Some angled shots.


The reindeer's collars.

If there is anything else you would like to know about my post please email me or leave a comment and I'll get back to you when I can.

Wishing everyone a Wonderful Christmas.

Crafty Hugs,

Julie x


Products used:
MDF Sleigh
MDF Words
Bespoke Cutting Service used for Reindeer and Plinth.
DecoArt Products:
Embossing Powders
Distress Products
Hessian
Cheery Lynn Dies:
B635 Snowflake Set 2
B486 Dancing Snow Flurries
B475 Merry Christmas Hanger
DL175 Lace Pine Snowflake
B156 Pine Branches
B216 Wreath Strip

All Products available from That Craft Place.

LinkWithin

Related Posts Plugin for WordPress, Blogger...
01 09 10