Translator

Showing posts with label Camping Set. Show all posts

Monday, 22 May 2017

Summer Fun Blog Hop - Cheery Lynn Designs

Hi everyone, today we are having a blog hop at Cheery Lynn Designs using a variety of their fun Summer Dies which look great on cards, scrapbooks, home decor and journaling to name a few.


My collaged card today uses a variety of summer Dies listed below to make this fun card that could easily be adapted onto several craft projects. 


I love layering the Pine Trees and have also used them on Christmas cards with snow and glitter on them so this is a super Die to have in your collection.


My fish was cut out in White Cardstock and I dripped a few shades of Alcohol Inks onto it including silver to look like scales. Once dry I rubbed over with some black Archival Ink and placed it around my Summer Camp sign.


I added Glossy Accents onto the lens of my Binoculars layering on with some Silicone Glue. 


My boat was cut out in Kraft Card and I dry brushed some Gesso on so this would act as a resist as I added some ink.

Cheery Lynn Dies Used -

I'd love if you left a comment before hopping HERE to Lisa's lovely blog for some more Summer inspiration  and good luck at winning a shopping spree at Cheery Lynn Designs.

Crafty Hugs, 
Julie x

Monday, 14 November 2016

Happy Winter Card


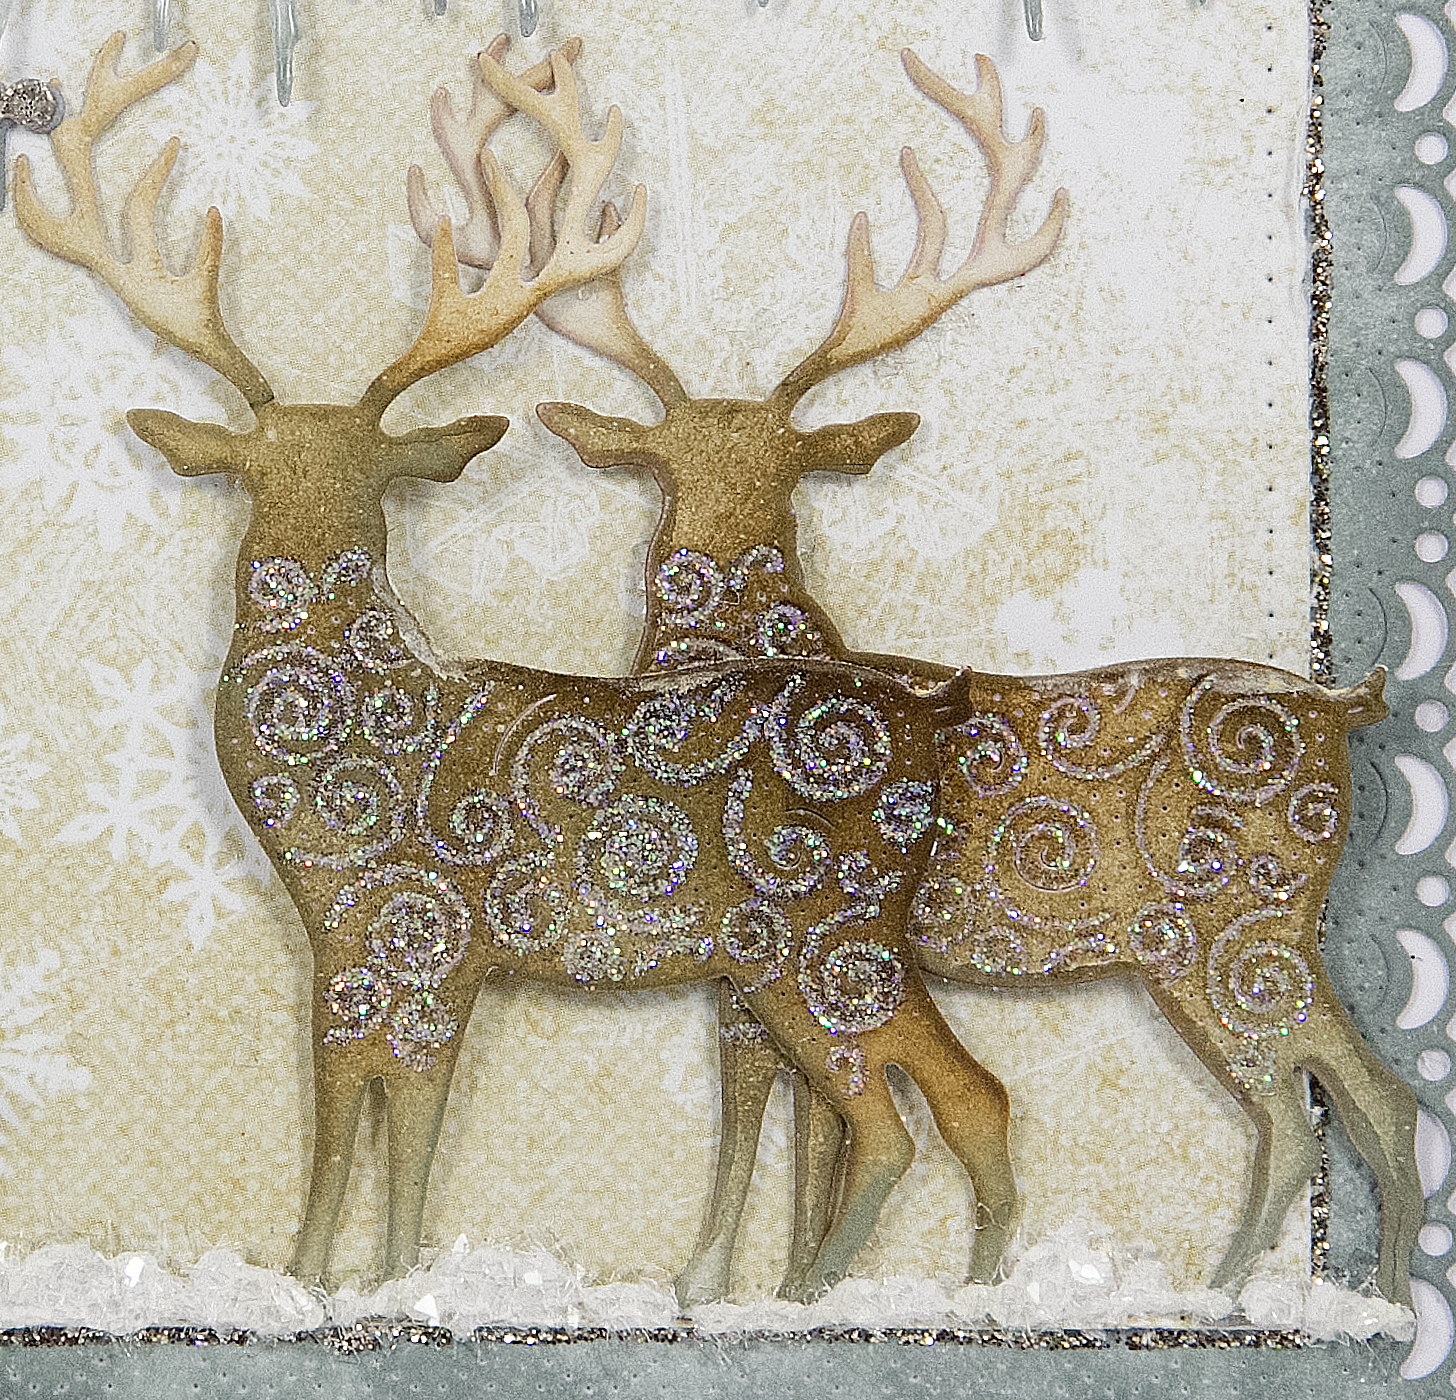
Hi everyone, hope you had a lovely weekend.Today for my DT card at Cheery Lynn Designs I am sharing some inspiration with my Festive Winter card, so let me share my tips on this card with you.


I started by mounting a couple of Stacker Layers together to form the frame of my card adding Stickles around it. My Icicles I also added a little Stickles onto the white cardstock and let it dry. Once dry I used Iced Spruce Distress Ink at the tips of my Icicles and finished with a layer of Glossy Accents for an icy look.


My sentiment and snowflake were heat embossed with two shades of Silver embossing powder. 


The Fir trees are die cut from the versatile Camping Set, I also shaded with Iced Spruce and I ran a glue pen along the embossed areas and added an extra fine glitter for added sparkle.


My reindeer were also shaded with Distress Inks adding some sparkle onto them in the same way I did my trees. I do love how you can add the extra sparkle onto the embossed areas.


To finish my card I used a Snow Writer Pen adding onto my trees and as a layer of snow on the ground. Whilst still wet I added some clear Glass Glitter for extra sparkle.

Thanks for stopping by today and good luck to everyone entering Cheery Lynn's Bi-Weekly challenge.

Crafty Hugs, 

Julie x
Shop at Cheery Lynn For -

Monday, 10 October 2016

Halloween Trick or Treat Fun


Hi everyone I hope you had a lovely weekend and managed some creative time. Today for my DT card at Cheery Lynn Designs I am sharing some more Halloween inspiration using many of the amazing Halloween dies that Cheery Lynn have.


My Witches Cauldron was cut out in black cardstock adding some Vintage photo Distress powder at the edges to give a rust effect. My flames and logs were cut out in White cardstock and coloured with Copic pens adding some Glossy Accents onto the flames.


My cute little Witch was cut from the Trick or Treat Border layering her with a foam pad.


My hills were die cut from my Stitched stacker die, I then fussy cut the shape of hills and highlighted the stitching effect with a black pen, distressing the edges and adding some black soot Distress ink.


My house I layered Orange cardstock behind to give a warm glow, layering on with foam pads and a spooky ghost behind. My stormy sky was created with inks and a cloud stencil.

Thanks so much for stopping by today and I hope I have inspired you to create a Halloween scene on a card or Scrapbooking page. 

Good luck to everyone entering the Bi-Weekly Challenge at Cheery Lynn Designs for a chance to win a $20 spending spree.


Crafty Hugs, 
Julie x

Shop at Cheery Lynn for :


LinkWithin

Related Posts Plugin for WordPress, Blogger...
01 09 10