Translator

Thursday, 24 November 2016

Mirror Mirror


Hi everyone, for my DT post with Craft Consortium I have used the exquisite paper pad Bloom Beautiful. Some of you will be aware I adore this paper pad but for anyone that is new to this paper pad please check it out HERE.


I decided on an easel card for this design and fussy cut out my bird, feather and rose decoupaging back onto the cardstock with Silicone Glue.


My perfume bottles were stamped and fussy cut adding a layer of Glossy Accents for a glass look.


I layered satin ribbon behind my lace ribbon to make it pop and another strip of satin ribbon on top of my doilies with a stunning embellishment from the Always and Forever collection.


Thanks so much for stopping by today to see my card and do check out Craft Consortium to see their vast range of stunning embellishments, paper pads and Decoupage papers on Facebook for inspiration and regular giveaways, you will also find them on Pinterest, Twitter and Instagram.

Crafty Hugs, 
Julie x  

Craft Consortium Products Used :

Wednesday, 23 November 2016

'Twas the Night Before'


Hi everyone, today for my DT Card at Cheery Lynn Designs I am sharing with you my Festive Scene. I love how Cheery Lynn's dies can make so many wonderful scenes on your cards/ scrapbook pages. On my card you will see how I have adapted my Holly Wreath die and used elements from other dies to create this. So let me take you through all the techniques on it.


My card measures 5" x 7", I tattered a couple of layers of paper and glued in place. My Garland has been made from the Christmas Wreath by cutting it into sections. I coloured my die cut with Copic Pens adding Glossy Accents onto my Mistletoe. 


My berries on the Garland were made from Red Stickles glue, once dry I added a drop of Glossy Accents to form the shape of berries. The bells were coloured with a gold pen and shaded at the sides with Archival ink.


Santa was also coloured with Copics, dabbing some Stickles onto his hat to make it Sparkle. His beard, eyebrows and hat I added Snowtex and some Glamour Dust too. I mounted him onto my Stacker die to frame him on the wall.


My tree has also been coloured with Copics adding Stickles onto the baubles and once dry a layer of Glossy accents for a domed effect.


I just adore this fireplace and had a lot of fun building it up. I die cut out the fireplace 3 times layering on with foam strips for dimension, adding an extra layer onto the mantle. I outlined the brick embossed areas with a Fineliner Pen and added a different shade of paper to the back of the fire. I shaded my logs with Distress inks and drop shadowed with grey cardstock, adding in place with Silicone Glue. My flames are coloured with Copics and a layer of Glossy Accents, off setting a few layers for a natural look.


The Fireplace die also comes with the picture frames, candles and stockings. On this card I used the Christmas Stockings and Parcels from the Whimsical Set adding Candy Canes onto my Stockings for extra detail. You will find these in the Build A Christmas Tree die set listed below.

Shop at Cheery Lynn for: 

Thanks so much for stopping by today and for your lovely comments left on my cards. It would be great to see you joining in the Bi-Weekly challenge over at Cheery Lynn Designs giving you the chance of winning a $20 Shopping Spree.

Crafty Hugs, 
Julie xx

Friday, 18 November 2016

Pussy Cat, Pussy Cat !


Hi everyone, I had a trip to our local Parkinson's Charity shop which is like an Aladdins Cave filled with lots of treasures and furniture to upcycle. I love cats and when I saw this little white one, I knew right away some of Craft Consortiums Decoupage paper would give it a new lease of life.


Normally I would have given the item I am about to decoupage a coat of Gesso, but with it being White already I just gave it a wash to get rid of any dust and grease on it.


I glued my torn pieces of paper in place using Mod Podge matte.


Once dry I added a couple of coats of DecoArt Gloss Varnish  and finished off with a new collar for my cat using embellishments from the Always and Forever Collection.

Thanks for stopping by today to see my DT project for Craft Consortium and do please check out Craft Consortium to see their vast range of stunning Embellishments, Paper pads and Decoupage papers on Facebook for inspiration and regular giveaways, you will also find them on Pinterest, Twitter and Instagram.

Crafty Hugs, 
Julie x 
Craft Consortium products used:


Monday, 14 November 2016

Happy Winter Card


Hi everyone, hope you had a lovely weekend.Today for my DT card at Cheery Lynn Designs I am sharing some inspiration with my Festive Winter card, so let me share my tips on this card with you.


I started by mounting a couple of Stacker Layers together to form the frame of my card adding Stickles around it. My Icicles I also added a little Stickles onto the white cardstock and let it dry. Once dry I used Iced Spruce Distress Ink at the tips of my Icicles and finished with a layer of Glossy Accents for an icy look.


My sentiment and snowflake were heat embossed with two shades of Silver embossing powder. 


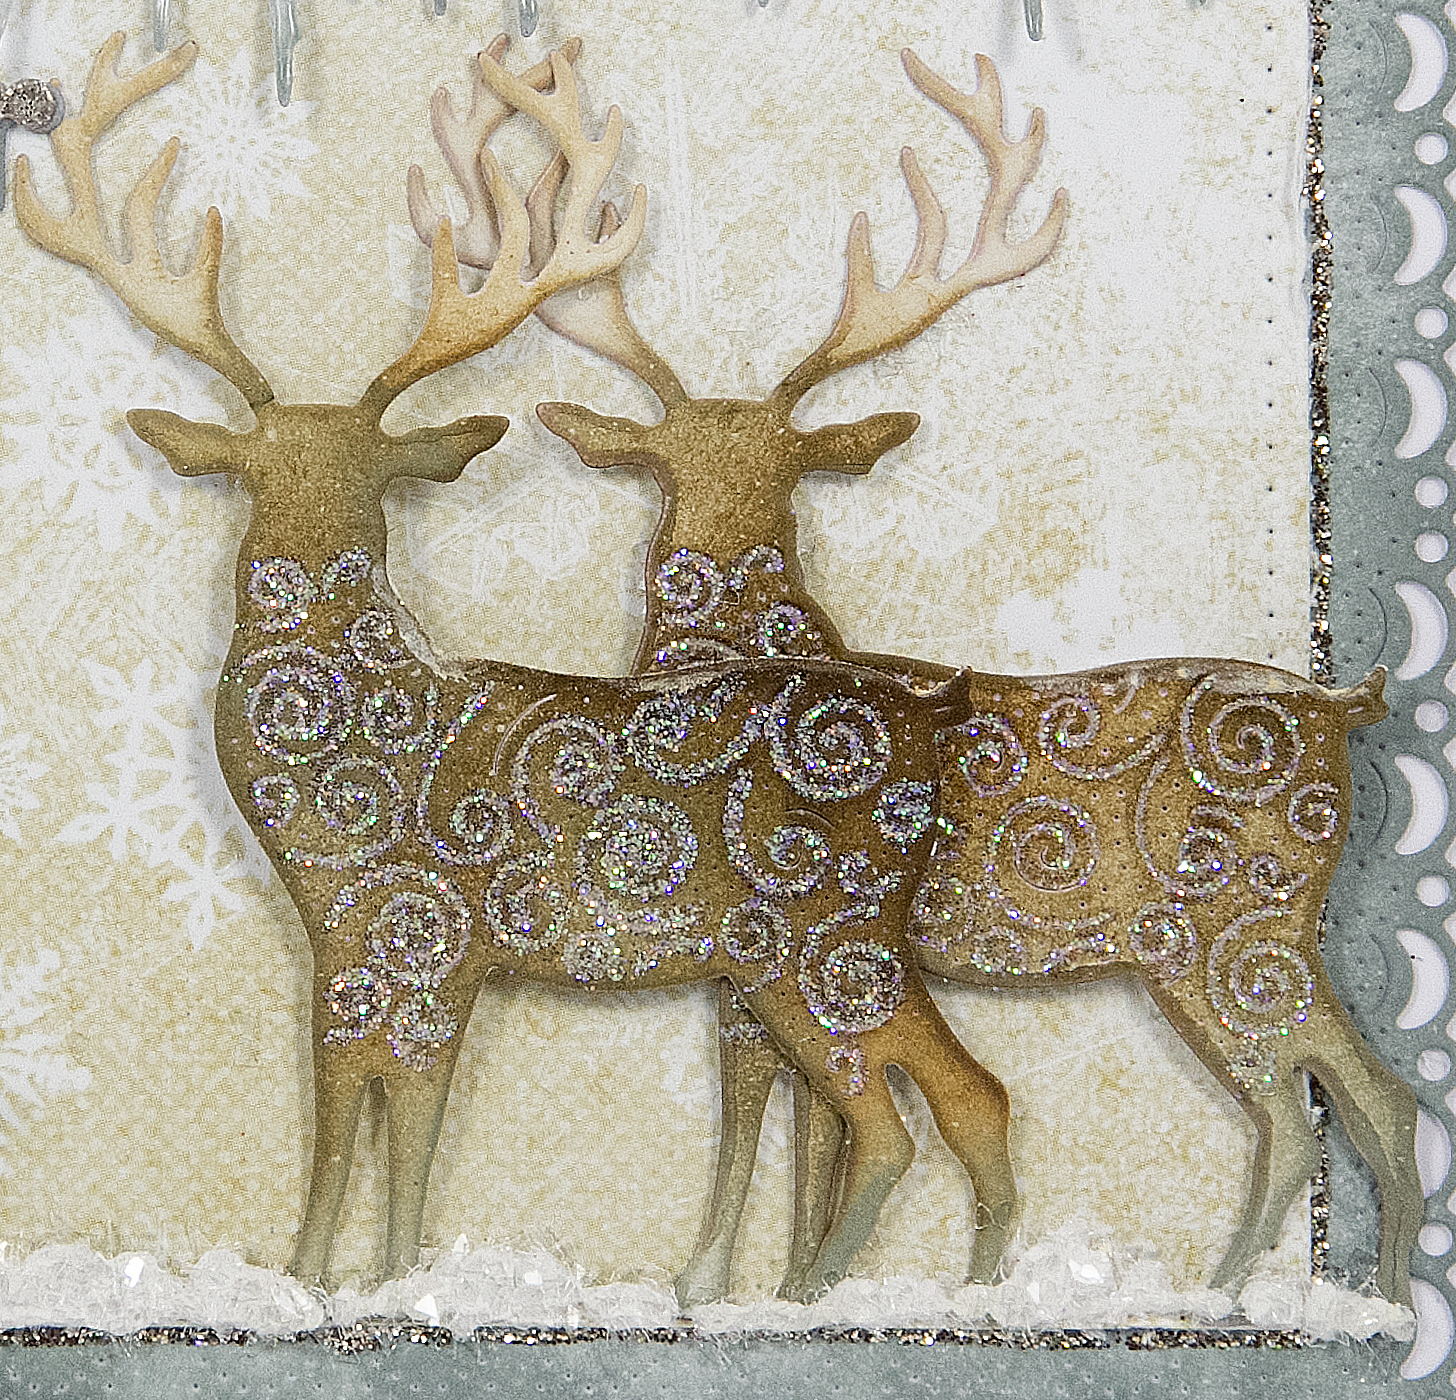
The Fir trees are die cut from the versatile Camping Set, I also shaded with Iced Spruce and I ran a glue pen along the embossed areas and added an extra fine glitter for added sparkle.


My reindeer were also shaded with Distress Inks adding some sparkle onto them in the same way I did my trees. I do love how you can add the extra sparkle onto the embossed areas.


To finish my card I used a Snow Writer Pen adding onto my trees and as a layer of snow on the ground. Whilst still wet I added some clear Glass Glitter for extra sparkle.

Thanks for stopping by today and good luck to everyone entering Cheery Lynn's Bi-Weekly challenge.

Crafty Hugs, 

Julie x
Shop at Cheery Lynn For -

LinkWithin

Related Posts Plugin for WordPress, Blogger...
01 09 10