Translator

Showing posts with label Branches. Show all posts

Friday, 22 June 2018

The Songbird


Hi everyone, today for my DT card at Cheery Lynn Designs I am sharing a vintage styled card using some papers I picked up recently at a car boot sale, along with a few other bargains.


I started by tattering edges of my base layer and heat embossed some gold powder onto the edges. Adding layers with coordinating papers, a little cheesecloth for a shabby look and my bird with embossing powder also at the edges.


My flowers were all cut out from coordinating papers and shaped on my Embossing mat and stamens added into the centres. I then arranged my floral arrangement onto my card along with leaves and flourishes.

Cheery Lynn Dies Used -
B259 Daisy Strip

Thanks for stopping by today.
Happy Crafting, 

Julie x

Saturday, 7 May 2016

Songbirds


Hi Everyone, In Scotland the Songbirds are all starting to sing. It's so lovely to hear them happy now Spring has arrived.....unless it's 5 o'clock in the morning ! So my Cheery Lynn Designs DT card today was taken from inspiration of the blossom filled trees and these beautiful birds.

I started by layering up a couple of my stacker dies to form the frame of my card. I love how the inverted scallops give the appearance of a postage stamp edge.


My branches were all cut out in textured Green Cardstock and I went over the branch area with a Brown Copic Pen. I then shaded a small piece of White Cardstock with a few shades of ink and then die cut out my flowers and added a little Stickles into the centres.


My sentiment was stamped onto patterned paper.


My sweet little birds were shaded with Distress inks to look like a Robin and a Blue Tit. I added a drop of Liquid Pearls for their eyes and highlighted the details of the die with a Fine Liner pen. If you google an image of the kind of bird you want to colour on your die, I find this makes it easy to shade them.

The Current Challenge at Cheery Lynn Designs is Mothers Day and I do hope you get a chance to join in for a chance to win a $20 shopping spree.
Thanks so much for stopping by and for the wonderful comments you leave. I love reading them and appreciate them so much.

Crafty Hugs,

Tuesday, 5 May 2015

Little Birdhouse


Hi Everyone, today I am sharing with you a small balsawood birdhouse which measures approximately 3" x 5" high, that I got from Michaels in San Diego recently. Yes I hear you asking, when did you go there ? Well both of my daughters work in the Airline Industry and I came up with the idea I could go virtual shopping when they came across a craft shop, isn't technology amazing ! So they simply Face Time me and walk around the craft shop showing me things I would like. Isn't that a COOL idea !

The shape of this sweet little birdhouse caught my eye and I knew straight away what I wanted to do with it.


I wrapped garden string all around the roof gluing as I went, giving it a coat of Multi Medium to seal it.


I wanted a brick effect on my house and with a stencil just not being practical to place on the shapes I decided to make my own bricks out of packaging from my Tim Holtz Stencils.


I started laying my bricks pushing into Texture Paste similar to laying tiles and this is the finished effect.


My fence is a Magnolia die. My grass and tiny flowers are from Cheery Lynn.


I decorated my die cut fence colouring my flowers with Copics and shading my fence with Distress before adding to my house.


I then added a little Flower Soft to the base to look like grass.


My little Doves were a wooden die cut. I heat embossed some Lindys Embossing Powders into and added a little Distress Paint to shabby it up.


My birds are from Cheery Lynn's Bird Bath (Set of 2)


My branches were all shaded with Copics and my Blossom flowers added.


Thanks so much for stopping by my blog today. I have some more Birdhouses of different sizes which I will be decorating shortly.


Julie xx

Shop at Cheery Lynn for:

I wish to enter this in to the following Challenges:


Saturday, 2 May 2015

Birdhouse Card


Hi Everyone, I immediately fell in love with the new Fancy Birdhouse die from Cheery Lynn Designs as soon as I saw it and gathered inspiration for my 7 x 7 card from feeding all the birds that visit my garden, so I am sharing with you my DT card this week for Cheery Lynn Designs.


My background was made with shading Distress inks over cardstock, stamping on feathers to give a cloud effect and spritzing with water. I tattered the edges with a Distress Tool.


I layered my grass in two shades of green and shaded a little Distress Ink onto my fence to shabby it up a bit.


My Birdbath was layered twice with a little Silicone Glue added into the bath part to give some extra dimension and Distress ink added to it and my birds for shading.


My sign was cut out in white and the pole area coloured with a Black Copic Pen. I layered the oval area twice with Silicone Glue and stamped on my sentiment and added a little bird.


My branches and leaves were all shaded with Copic Pens and my Blossom had a little Distress Ink added into the centre with a little yellow Stickles.


My sun is made using the Sunflower die, colouring also with Copics and adding a little orange Stickles. My Birdhouse was cut out 3 times and shaded with Distress ink. I paper pieced the fence area twice and my roof three times to give the effect of being 3D.

Well I do hope you like my card which was a lot of fun to make. I have another few plans for the Fancy Birdhouse die which I will share with you over the coming months.

Thanks for stopping by today, your visits are always appreciated.
 Julie x

Shop at Cheery Lynn for New Release Dies:

Other Cheery Lynn Dies Used:
I wish to enter this in to :
Fussy and Fancy - Lots of Flowers Challenge
Audsentiments - Things with Wings plus a Sentiment Challenge 

Saturday, 25 April 2015

Springtime Card


Hi Everyone, apologies for falling behind with your blogs this week, I look forward to catching up as soon as I am able. Today I am showcasing four of Cheery Lynn's new dies on my DT card for Cheery Lynn DesignsLet me show you how I built my layers on my 5.75 x 5.75 card.


On a length of patterned paper I placed my Curved Border set with the little pierced holes about half an inch in from the edge. I then added my cutting strip to the edge of my paper matching up with my pierced design, holding down with some low tack tape to keep in place. Inking the edges and adding on my lace edge.


I sprayed a little water onto my paper and gathered it into folds. I dried with my heat gun, highlighting the folds with Distress Ink. I then stitched around the edges for more detail.


You will notice my pierced stacker had the middle section cut out to fit neatly into the space available on my card and to compliment my oval doilies shape. 


On my image I coloured her dress with Distress Pens and mounted onto my doily frame. I die cut my frame in white cardstock and then pressed into my Versamark Ink pad and heat embossed some Aged Aqua Frantage powder.


My branches I shaded with Copic Pens. My Cherry Blossom was shaded with Distress Ink and a Pearl added to the centre which I coloured with Alcohol Inks.


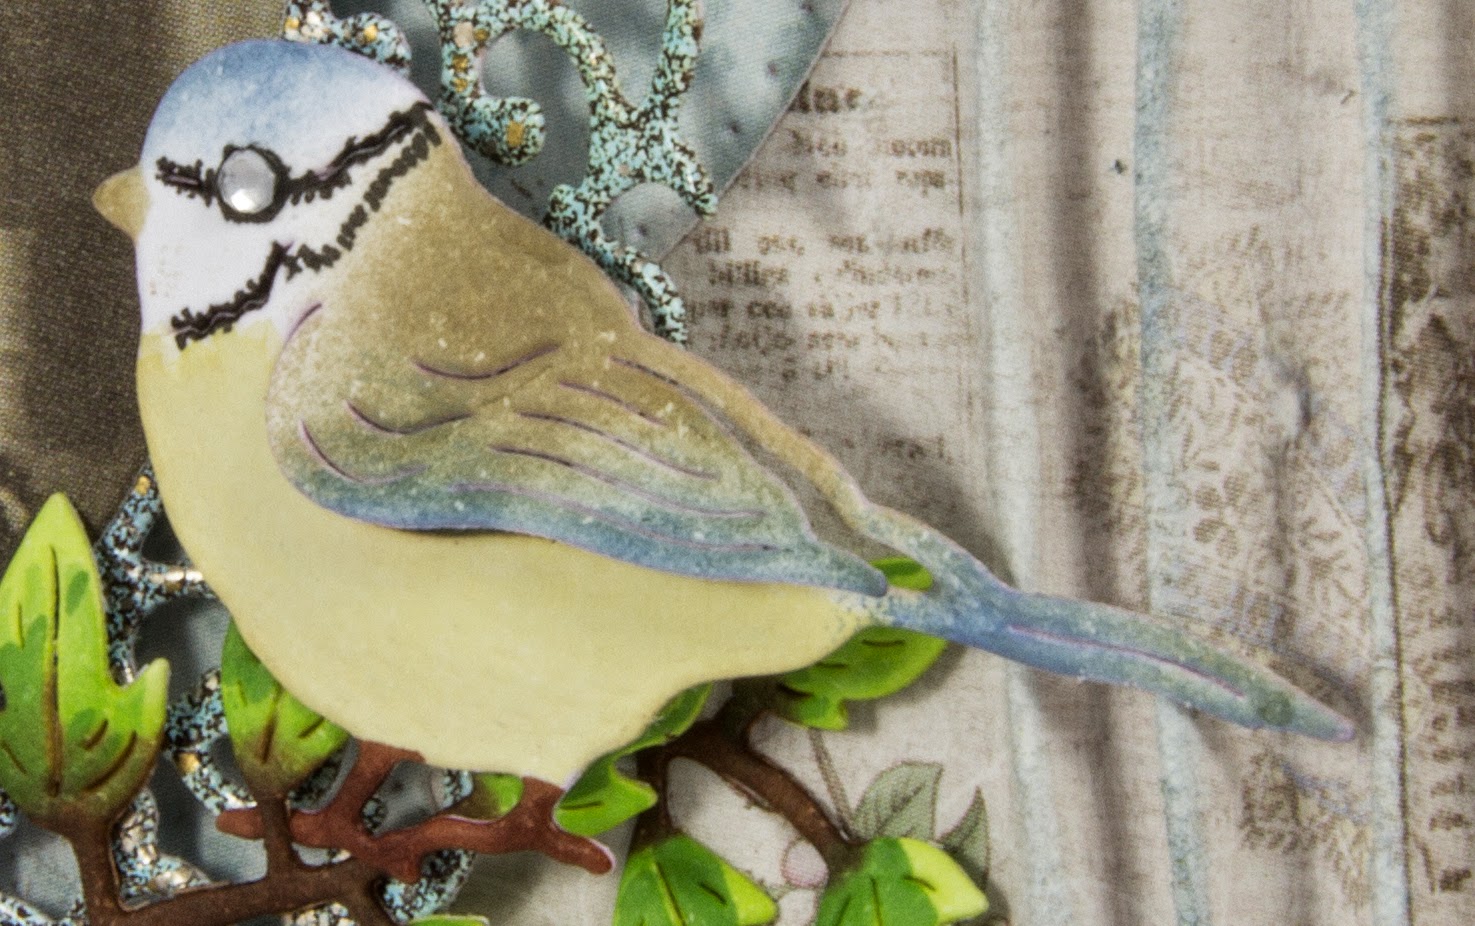
My sweet little Blue Tit was shaded with Distress Inks and edged with a Black Fine Liner Pen around his face and a diamante added for his eye. I absolutely adore these new birds from Cheery Lynn which come in a set of four ....... a must have !

Thanks for stopping by to see my post today and for the lovely comments you leave, I really appreciate them. 

Julie x 


Shop at Cheery Lynn For :

Cheery Lynn New Release Dies Used:

Other Cheery Lynn Dies Used :


LinkWithin

Related Posts Plugin for WordPress, Blogger...
01 09 10