Translator

Showing posts with label Oval classics. Show all posts

Saturday, 25 April 2015

Springtime Card


Hi Everyone, apologies for falling behind with your blogs this week, I look forward to catching up as soon as I am able. Today I am showcasing four of Cheery Lynn's new dies on my DT card for Cheery Lynn DesignsLet me show you how I built my layers on my 5.75 x 5.75 card.


On a length of patterned paper I placed my Curved Border set with the little pierced holes about half an inch in from the edge. I then added my cutting strip to the edge of my paper matching up with my pierced design, holding down with some low tack tape to keep in place. Inking the edges and adding on my lace edge.


I sprayed a little water onto my paper and gathered it into folds. I dried with my heat gun, highlighting the folds with Distress Ink. I then stitched around the edges for more detail.


You will notice my pierced stacker had the middle section cut out to fit neatly into the space available on my card and to compliment my oval doilies shape. 


On my image I coloured her dress with Distress Pens and mounted onto my doily frame. I die cut my frame in white cardstock and then pressed into my Versamark Ink pad and heat embossed some Aged Aqua Frantage powder.


My branches I shaded with Copic Pens. My Cherry Blossom was shaded with Distress Ink and a Pearl added to the centre which I coloured with Alcohol Inks.
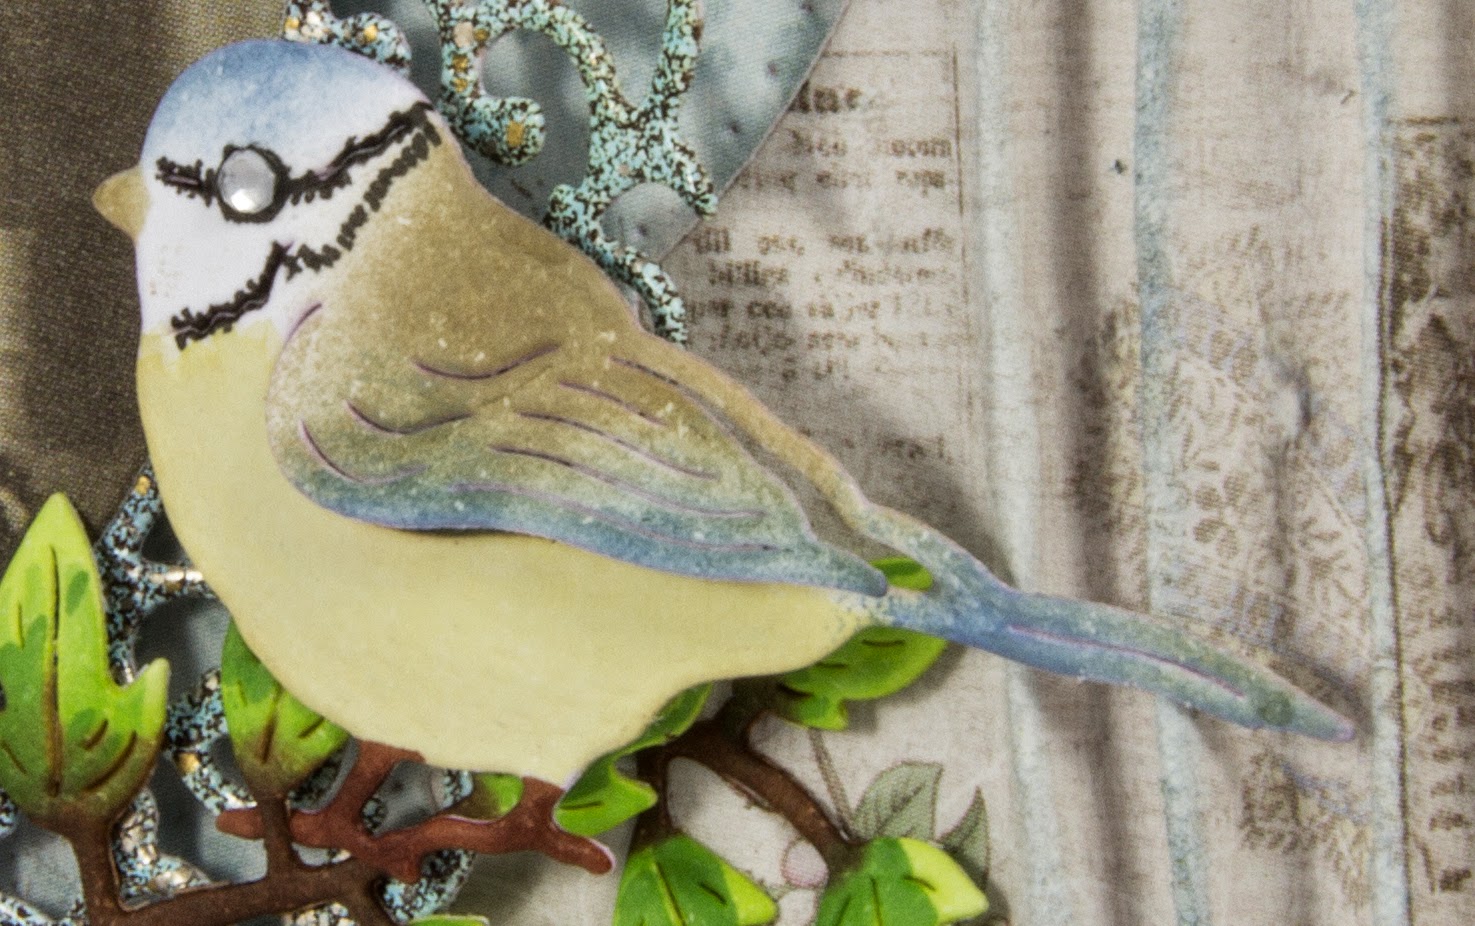

My sweet little Blue Tit was shaded with Distress Inks and edged with a Black Fine Liner Pen around his face and a diamante added for his eye. I absolutely adore these new birds from Cheery Lynn which come in a set of four ....... a must have !

Thanks for stopping by to see my post today and for the lovely comments you leave, I really appreciate them. 

Julie x 


Shop at Cheery Lynn For :

Cheery Lynn New Release Dies Used:

Other Cheery Lynn Dies Used :


Saturday, 21 February 2015

Easter Chicks


Hi Everyone, today for my DT card at Cheery Lynn Designs I thought it would be nice to share an Easter card with Spring colours and these three gorgeous little Chicks from our recent CHA release.

Here are the steps on how to make it, this first photo shows the reverse side.


Using the French Flair Scalloped die cut the largest die in Orange and Green cardstock. Cut the Orange layer in half, down the middle and attach with adhesive onto the back of your Green layer for a shadow effect around the edges.
Repeat this process using the second largest French Flair Scalloped die and Yellow and Striped Pattern Paper.


Die cut Happy Easter in Orange, Yellow and Green cardstock offsetting and adhering each layer together.


Die cut your Easter Chicks in Orange and Yellow cardstock again slightly offsetting. Lift the Yellow layer of wing slightly up. On the reverse of your Chick lightly press the point of a Black Pen into the centre of the eye. This now defines the eye area.


Die cut your Heart Oval in White Cardstock and mount Yellow card in the coordinating die cut from the Classic Ovals.


Cut out your Shasta Daisy Strip in White Cardstock and using your Craft Dauber or a small ball of cotton wool begin tapping some Scattered Straw ink into all the centres.


Once dry shape petals on a foam mat with a stylus tool. Assemble layers up to desired effect with adhesive. Finally adding a layer of Flower Soft into the Centres with adhesive.
Die cut the Leaf Strip in Green and shape leaves on a foam mat with stylus tool.


Using a square card 5"7/8 by 5"7/8 start to adhere you layers onto your card as in photograph. Adhere Happy Easter with glue onto the Oval Centre and then layer onto the card with foam pads.
Finally arranging and adhering on the Chicks, Leaves and Flowers to the card to finish.

I hope you have all enjoyed my tutorial and feel inspired.
See you all next week.

Julie xx   

Saturday, 16 August 2014

Lace Wardrobe Style Card


Hi everyone, 
For my DT card this week I thought I would showcase how versatile Cheery Lynn doilies can be in making beautiful accents and patterns on our craft projects.
The Anastasia border matches the Kiwi doily die perfectly so are great to use together, especially when making a real feature with them, like I am doing with this card.


On the opening of my card you will see the border strips, I love the lace effect. You will also see my doily cut into corners and halved. I matted and layered onto papers.


My flowers were made by cutting them out in same pale green card stock as the swirls and background but I stamped a little gesso onto them and rubbed the edges too with gesso before making them up, to give a shabby feel.


The inside of my card compliments the outside and I embellished with a few pearls to finish.

Thanks for stopping by today to see my card. 


Julie x 

Cheery Lynn dies used:


Saturday, 9 August 2014

Celebration Card


Hello Everyone, for my Design Team card this week at Cheery Lynn Designs I have made a card showcasing the New Release die - Pour the Wine.


I cut out my wine bottle and backed onto silver paper which I fussy cut around. I then applied lots of little gems into the centre of the flowers and a little sticker on to it. My wine glasses were cut out and I then placed a little colour core paper behind and fussy cut too, adding some bling to finish.


My rose was made with bazzill card stock and the Large Rose die.

Thanks for stopping by my Blog today. I am off on Holiday today for two weeks but still have my posts scheduled for going up. I hope to still catch up with your blogs while away.

Julie x

New Release dies used:
Other Cheery Lynn Dies used :

Main stamped image is from Penny Black


Saturday, 19 July 2014

Merry Christmas my Deer


Lovely to have you popping over to see my DT post for Cheery Lynn Designs today.  I thought I would share over the next few weeks some cards I have made using some of the new dies from the Cheery Lynn July 2014 release, to give you some ideas for planning, dare I say it.....your Christmas cards.


My icicles were cut out in glitter card and I offset them slightly and layered them twice to give depth to my card.

My frosty trees are the base die from the build a Christmas tree die. This die I love as can be used as a decorated tree or bare tree layered up or on its own, also as foliage with your flowers and the decorations as accents on other things. I cut my die out in various shades of card stock and sprayed with an adhesive and dipped into a fine glitter. I glued down the spine of the tree so it would lie flat to the paper and my branches were lifted up to add more dimension.


My window was cut out using the oval die and stamping snowflakes onto the frame. My winter scene was made using inks and embossing powders. To the side of the window you will see my Mistletoe, this was die cut out and glitter applied in the same way as the trees and I also place some liquid pearls onto it to represent the little white berries.


My deer I cut out in brown and white card which I'd applied glitter to and I then layered them together slightly offsetting to give a shadow effect. Finally, adorning my card with snowflakes and more glitter to finish.

Julie x

Cheery Lynn new release dies:


Other Dies

I wish to enter this in to :

That Craft Place Anything Goes Challenge
Winter Wonderland Challenge Blog - Blue Christmas Challenge


Tuesday, 15 July 2014

Cheery Lynn July 2014 New Release


Today is a very exciting day for all of us at Cheery Lynn Designs as we launch July 2014 new release. A word of caution as you check out the Cheery Lynn Designs blog and my Teamie's blogs in the side bar ...... there are some 'must haves' you will just have to add to your basket or wish list, so don't say I didn't warn you lol.
For those of you who know my style of craft you will see why the Build a Tree die was a 'must have' for me.


It comes in sections and you start with the small base tree building on as much foliage to the size of tree that suits you. It also doubles as accents of foliage mixed with your leaves and flowers and as bare trees. The top of the tree has a little star or angel to be added should you decide to decorate it, along with the other tree ornaments. I cut out my ornaments in several colours of card and mixed them up in a tub and just added some to my tree. My candy canes are cut out in red card and a white pen tipped onto them to give the striped effect. I also added a little stickles.

My sentiment was die cut in gold and red paper. I offset the red to the back of my die to give a shadow effect on the wording and added the red to the front on the tree and added glitter glue.


My poinsettia style flowers were made with the snowflake die that comes along with the sentiment. I used my ball tool to add some dimension and layered it up 3 times. The greenery to the back is part of the foliage on the Build a Tree die. I cut it out in green card sprayed with glue and dipped into glamour dust. 


The background of my card was stamped and embossed with tinsel embossing powders and stickles on my card to decorate further. I also paper pieced 2 square background dies together to fit my base card.

Look forward to hearing your comments,

Julie x

Shop at Cheery Lynn for:

Other Dies used:

LinkWithin

Related Posts Plugin for WordPress, Blogger...
01 09 10